Microsoft 365 (SharePoint & OneDrive) backup for free with Raspberry Pi and Rclone
When I started working for my employer, they were using an on-site server and file storage with overnight backups to external drives. Everything was limited by the broadband (internet connection) speed, which in England is quite crazy — business parks rarely have access to inexpensive fibre connections, whereas at home you can get cheap Full Fibre. When things changed (or rather, the company needed to invest in change), we moved everything into the cloud.
We chose Microsoft 365 as our provider.
Once the migration was completed and people had got used to accessing their files in the new way (which hadn’t changed much thanks to the integration of the OneDrive app with Windows, apart from the use of file links), I needed to find a method to back up all files in case of an emergency (or the accidental removal of important files by an employee).
Although Microsoft provides an option to restore files for a short period (typically 30 days), sometimes that may be too short — by the time you notice files are missing, it could be too late. It’s better to have a backup (even an old version of the file) than to have no copy at all.
Without going into costly online backup solutions, or even investing in Microsoft 365 Backup (with its pay-as-you-go billing model), I decided to build an inexpensive and relatively cheap long-term backup system — and I did.
For this purpose, I used a Raspberry Pi with Raspberry Pi OS (formerly Raspbian OS). Initially, I used a Pi 3, but later moved to a Pi Zero W (currently Pi Zero 2 W), as the Pi 3 was overkill for this task. For storage, I used an externally connected hard drive (a 2.5" 1TB hard drive in a USB 3.0 enclosure) connected via a micro USB to USB converter. For power, I used a 2A @ 5V iPad charger with a USB to micro USB cable.
After a quick initial setup and running a few commands, the backup system was ready to go. I have been using it successfully since mid-2019, and now I would like to share it with you.
Because WebDAV access for SharePoint in Microsoft 365 Business Standard has been deprecated, I have updated the guide below for SharePoint sites and their Document Libraries accordingly. I have also revised the setup method to account for configuring everything remotely over the network.
You will need:
- A Raspberry Pi with a minimum 8GB microSD card (for the operating system);
- A USB-connected external hard drive or memory stick (for external storage — capacity depends on your needs);
- A charger that provides sufficient power (especially when using an external hard drive);
- Raspberry Pi OS (previously known as Raspbian OS);
- Raspberry Pi Imager (official software).
Raspberry OS
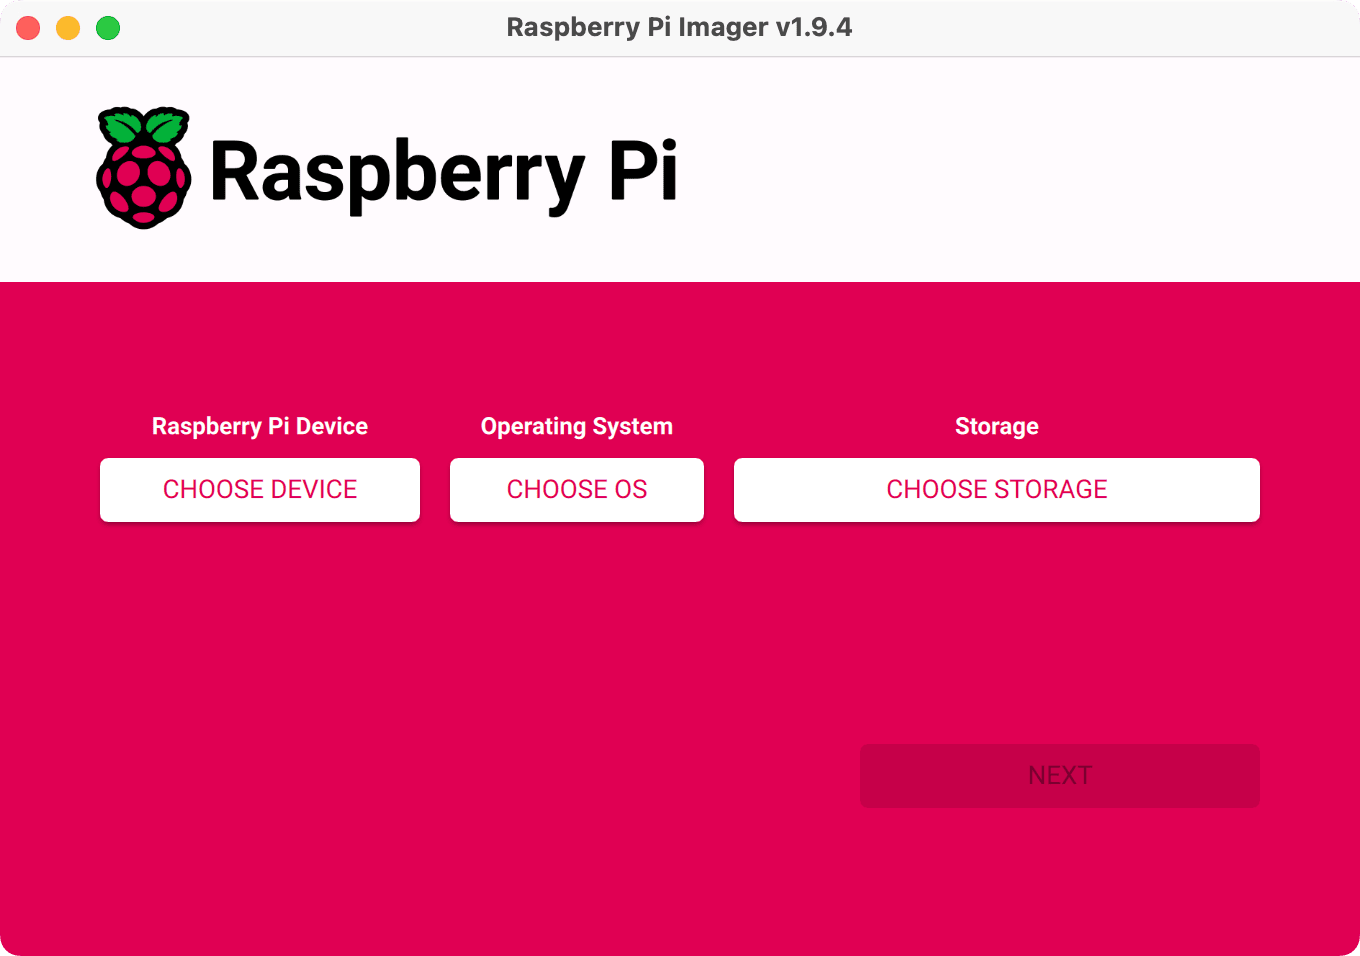
To install Raspberry Pi OS on the SD card, we will use dedicated software called Raspberry Pi Imager.
Previously, I recommended downloading the Raspberry Pi OS image and using balenaEtcher to flash it onto the SD card. However, Raspberry Pi Imager now has an advantage over balenaEtcher, as it allows you to pre-set certain settings, such as password, hostname, and Wi-Fi connection. This means you can do everything remotely without needing to connect a screen, keyboard, and mouse for the initial setup.
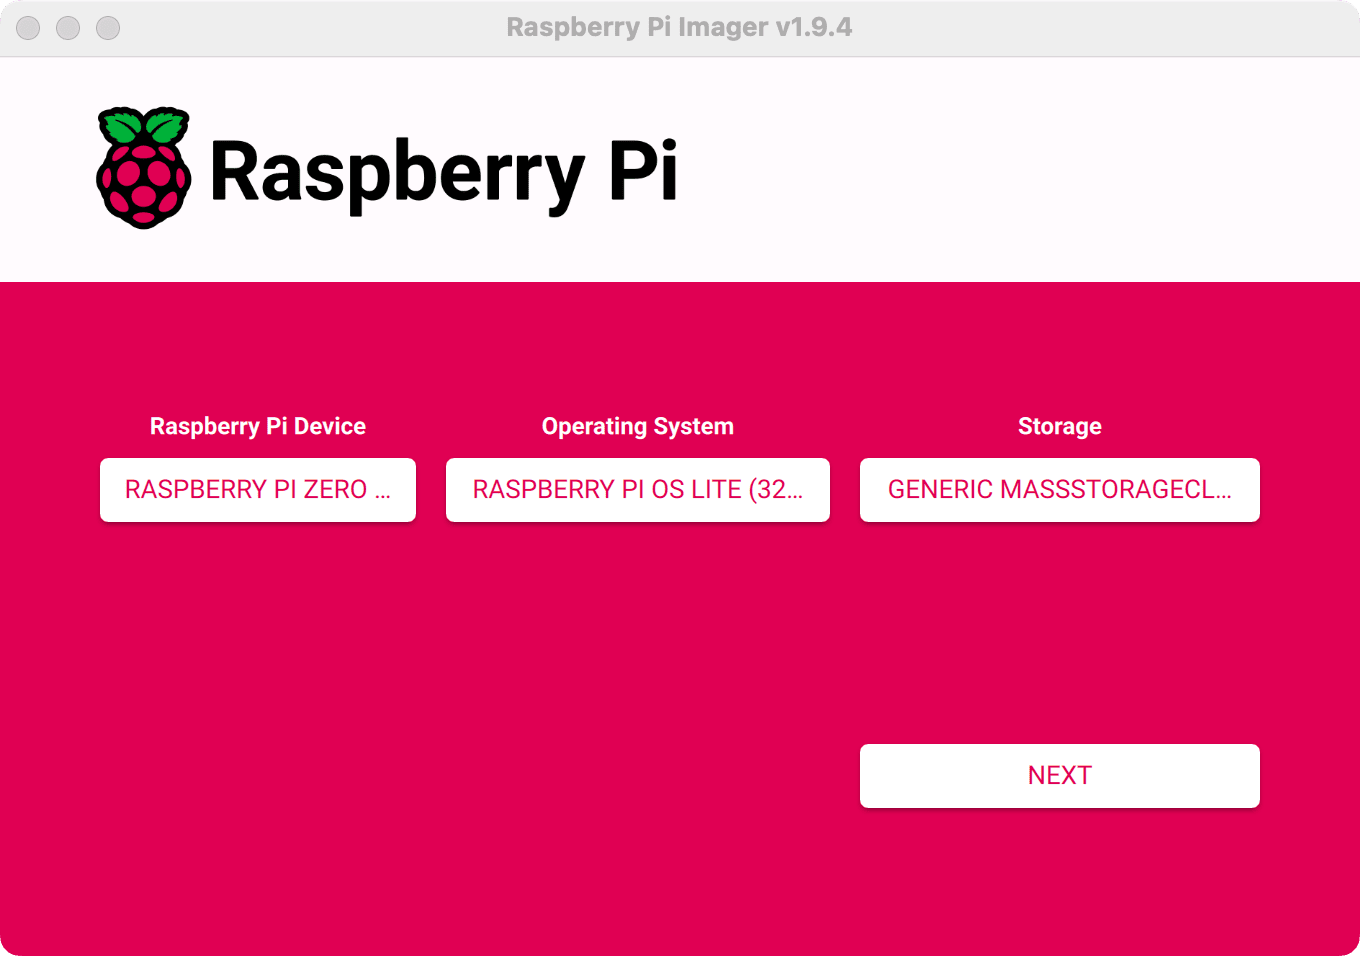
On the initial run, you need to select your Raspberry Pi device (mine was Pi Zero 2 W) and choose the operating system.
Here is a tip — do not choose the 64-bit OS. Not all software is yet available for 64-bit, especially on lightweight devices like the Pi Zero 2 W. For Microsoft authentication, we’ll be using a desktop environment and the lightweight Midori web browser, which is only available in 32-bit. Chrome would be overkill and a performance nightmare on such a device.
Under Operating System, select Raspberry Pi OS (32-bit). Alternatively, if you want the lightest installation possible (recommended), scroll down and select Raspberry Pi OS (other), then choose Raspberry Pi OS Lite (32-bit).
The following steps will be based on Raspberry Pi OS Lite (32-bit).
Next, select the storage. Connect your SD card to your computer and select it.
Once you’ve made your selections, click the Next button. At this stage, you’ll be asked if you want to apply custom settings. I strongly recommend doing this and setting everything accordingly.
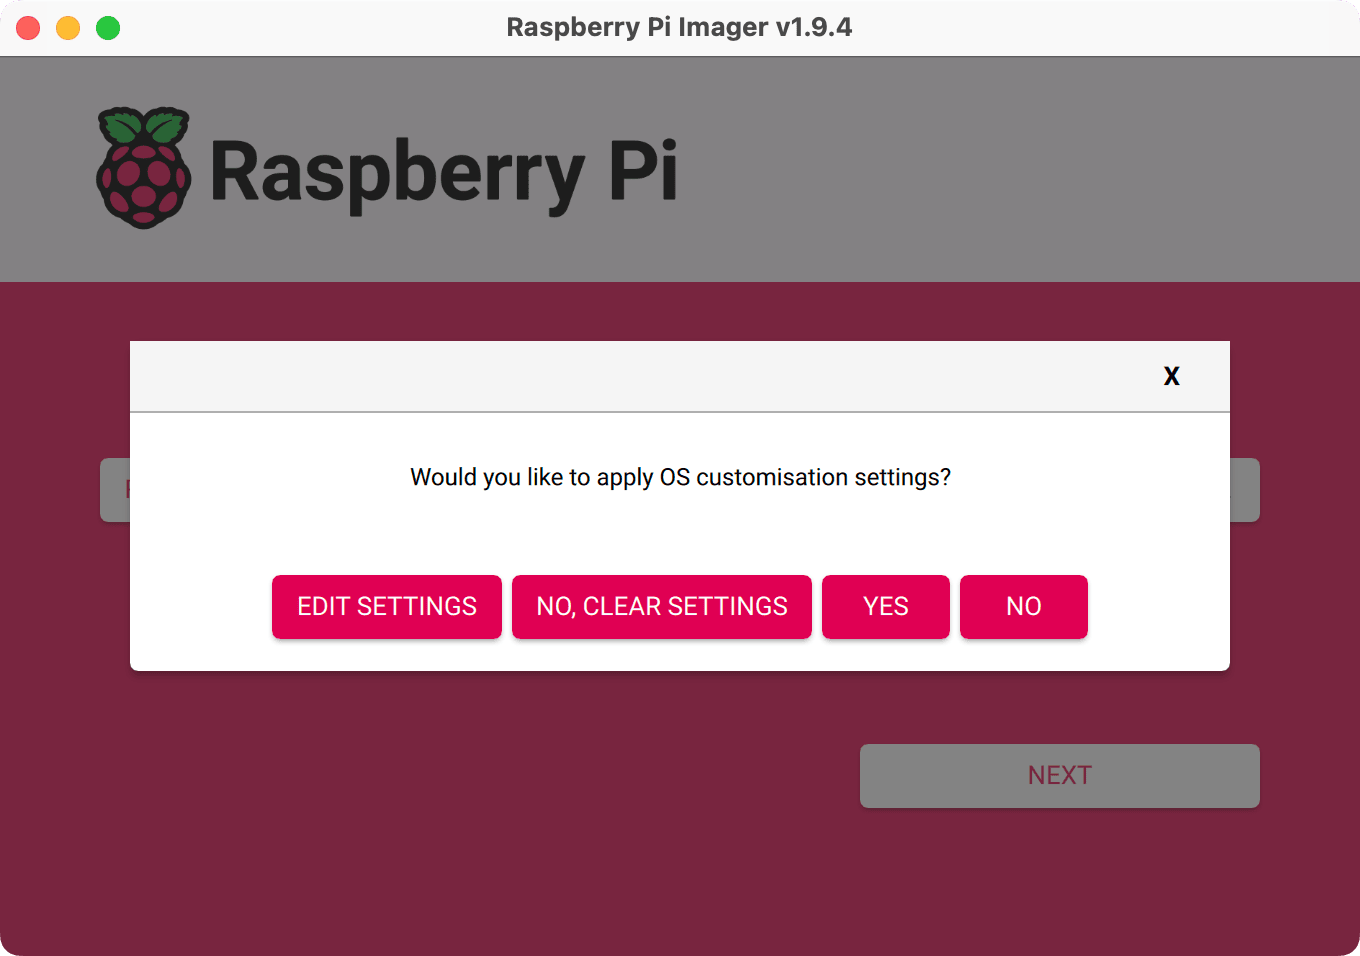
In the General tab, I suggest setting the hostname, username and password, and configuring the wireless LAN. Scroll further to set the locale settings.
In the Services tab, make sure to enable SSH, then click the SAVE button.
As mentioned earlier, we will need a desktop environment on our Raspberry Pi and the Midori browser for the setup, but we don’t need it to run by default. We’ll go through all the necessary steps later.
Initial setup
Following the predefined Wi-Fi connection settings from the earlier step, once our device is up and running, we need to connect to it over SSH.
ssh pi@192.168.1.188 -p 22
Your IP address will be assigned by your router unless you have set a static IP based on the device’s MAC address.
Once we are connected, let’s update our list of software packages.
sudo apt update
FTP (optional)
We may need access to our device over the FTP protocol to easily upload or download some files. The command below will install an FTP server on your Raspberry Pi.
sudo apt install vsftpd
Once this is installed, we just need to change one setting in the vsftpd service to enable write access over that protocol.
Let’s edit the vsftpd.conf file.
sudo nano /etc/vsftpd.conf
Uncomment (remove the # from) the line stating write_enable=YES.
Then, exit and save the file, followed by restarting the FTP service.
/etc/init.d/vsftpd restart
Desktop Environment
Let’s install a desktop environment, as we will need to run an internet browser to authenticate with Microsoft services at a later stage.
sudo apt install raspberrypi-ui-mods
Lightweight Browser
Let’s follow this up with the installation of Midori, a lightweight web browser.
sudo apt install midori
Remote Desktop
To be able to connect to our remote desktop using RealVNC, we need to install the server first.
sudo apt install realvnc-vnc-server
Once that is done, we will also need to install RealVNC Viewer on our computer.
To run the virtual desktop and connect to it using the viewer, we need to execute the following command:
vncserver-virtual
By default, our desktop will run as
:1.
Once it is running, we will be able to connect to it over RealVNC Viewer by connecting to 192.168.1.188:1.
To shut down the remote desktop, we can use the command below.
vncserver-virtual -kill :1
If you prefer remote connection over the RDP protocol, you can do this by installing xrdp.
sudo apt install xrdp
Then, you can simply use the built-in Remote Desktop app in Windows or download the Windows app if you are using macOS.
Rclone
For the backup purpose, we will be using a package called rclone.
To install it, use the following command:
sudo apt install rclone
Screen
To be able to leave the backup running once we disconnect from the terminal, it is worth running it inside screen. We need to add this functionality by installing the package.
sudo apt install screen
Now, we are ready to set up our storage.
Storage
Let’s start by formatting our drive with exfat before connecting it to the Raspberry Pi.
If you want to do this on the Raspberry Pi, I recommend using GParted — an easy, graphical tool for partitioning.
Let’s install it as shown below, then run the virtual remote desktop and format the drive through the graphical interface.
sudo apt install gparted
GParted is not able to create an exfat partition natively, so we will also need to install additional utilities.
sudo apt install exfat-utils exfat-fuse
On the virtual desktop, go to Pi Menu > System Tools > GParted.
From GParted, select your hard drive from the top-right drop-down menu. It will typically be /dev/sda.
If there is no partition on the hard drive, we will create one.
If there are any existing partitions, remove them and start from scratch.
Create a partition formatted with exfat, as this will allow you to connect it quickly to your Windows computer or macOS and work efficiently on the saved files.
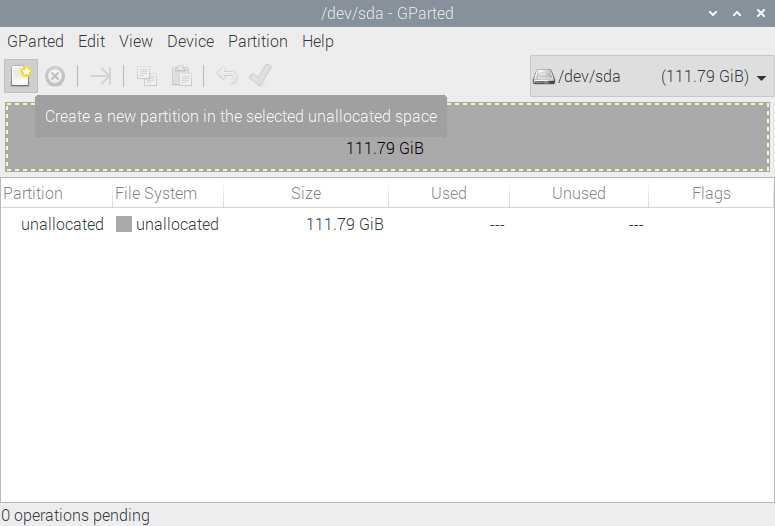
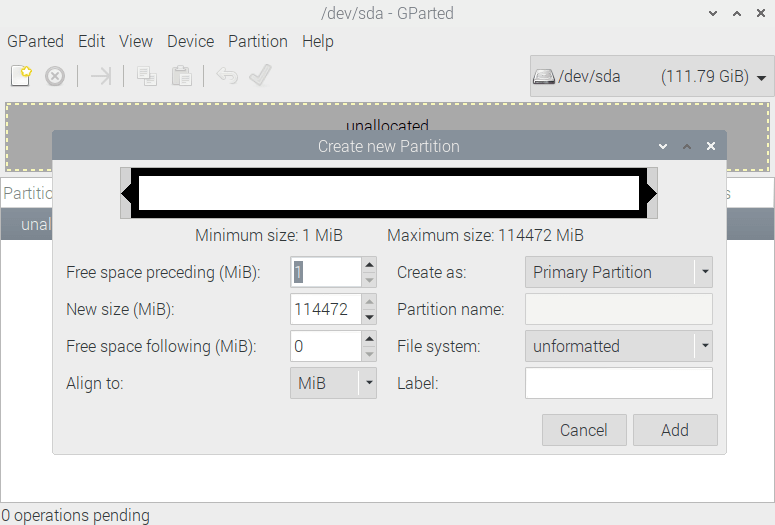
In GParted, create an unformatted partition (this will create /dev/sda1), then format it to exfat from the terminal.
sudo mkfs.exfat /dev/sda1
Mounting hard drive
Because I am using the Lite version of Raspberry Pi OS, the desktop environment is not triggered to run at boot, so the drives are not automatically mounted and available upon connection. To mount the drive, we will use the command below, which will set the default write permission to the user pi. This is important, as it means we will not need to run further commands with sudo all the time.
Before mounting, let’s create a mount point. I created mine at /media/pi/O365, so I need to create the relevant empty folders for this purpose.
sudo mkdir /media/pi
sudo mkdir /media/pi/O365
Then, simply mount the drive using the command below.
sudo mount -t exfat -o uid=1000,gid=1000 /dev/sda1 /media/pi/O365/
Confirm that it is visible by using the df command.
Hard Disk Idle Spin-Down Utility (optional)
Depending on the type of hard drive we are using for the backup, it is worth considering preventing it from spinning down in the middle of the backup.
Let’s install the hd-idle package.
sudo apt install hd-idle
Once our storage is connected and mounted, we can execute the command below to set the spin-down time to zero.
hd-idle -i 0 -a sda
Now your drive is ready to use.
Rclone Configuration
It’s time to set up our backup configuration with Rclone.
At this stage, we will be using the terminal (either remote or via the virtual desktop) and the internet browser (Midori) on the remote desktop.
If you haven’t done so already, initiate the virtual desktop with
vncserver-virtualand connect to it using RealVNC Viewer.
rclone config
From the menu, create a new remote connection by pressing n.
Let’s name it o365onedrive (for Personal OneDrive), and later, create another one named o365sharepoint (for the SharePoint Document Library).
In the next step, we need to decide which service to use.
For Microsoft, select Microsoft OneDrive. This is the option for backing up both the user’s OneDrive folder and the SharePoint Document Library. This configuration will require an authentication token (not a password), which is why we will need to do this through Midori.
OneDrive Personal
Let’s select the Type of storage to configure from the list by number or by typing onedrive.
We don’t need to enter anything for client_id and client_secret (just press Enter to accept the default).
For Choose national cloud region for OneDrive, I’m keeping the default (global) selection.
When asked Edit advanced config?, answer n for No or just press Enter.
When asked Use auto config?, answer Yes or just press Enter.
At this stage, we will be presented with a local URL like http://127.0.0.1:53682/auth?state=6W7rX_yb67gWJfySzz_WkA, along with the message Log in and authorise rclone for access and Waiting for code….
Copy that link and open it with Midori.
There, you will need to log in to your Microsoft 365 account following the on-screen prompts.
When everything goes well, you will see a simple page with the message Success! All done. Please go back to rclone. in Midori, and in the terminal you will get confirmation (Got code) that the code has been received.
At this stage, you can close the web browser and return to the terminal.
From the final options, you need to select the type of account.
Choose 1 for OneDrive Personal or Business.
You may see SharePoint listed here as well, but more on that later.
In the last step (Select drive you want to use), confirm which drive to use by choosing OneDrive (business).
One last step:
Drive OK?

Found drive "root" of type "business"
URL: https://contoso.sharepoint.com/personal/dariusz_contoso_com/Documents
We simply confirm with y for Yes (or just press Enter) and once again y for Yes to confirm that all is fine and the configuration will be saved.
Let’s quit the rclone configuration now (press q) and check if we can see the folders in our configuration.
In the terminal, type:
rclone lsd o365personal:
This should bring up a list of directories on your personal OneDrive account. If all goes well, the configuration is ready.
SharePoint Document Library
In the past, SharePoint Document Library was accessed using the
webdavprotocol, but this method is no longer in use. Microsoft has shifted away from WebDAV-based access in favour of OneDrive sync and modern SharePoint integration.
rclone config
Create a new configuration – n.
Let’s name it o365sharepoint (for SharePoint Document Library).
For Type of storage to configure, select the option from the list or type onedrive.
Leave client_id and client_secret blank.
Select your region option (global default).
Answer No to advanced config and Yes to auto config.
Follow the new http://127.0.0.1... link in the Midori browser and log in with your account until you get the message Success! All done. Please go back to rclone..
From the Type of connection options, select the one related to SharePoint site name or URL e.g. mysite or https://contoso.sharepoint.com/sites/mysite (URL).
On the next step, paste the link to your SharePoint Site (not to a Shared Directory folder or any other, but directly to the created SharePoint site where the folders are located), for example https://contoso.sharepoint.com/sites/mysite.
At the next step, you will have to Select drive you want to use.
Typically, this will be one of the first options related to Documents (documentLibrary). If you have more than one document library, you will need to create a separate configuration for each document library folder.
One last step:
Drive OK?

Found drive "root" of type "documentLibrary"
URL: https://contoso.sharepoint.com/sites/mysite/Shared%20Documents
We just confirm with y for Yes (or just press Enter) and once again y for Yes to confirm that all is fine and the configuration will be saved.
Let’s quit the rclone configuration now (press q) and see if we can view folders in our SharePoint configuration.
In the terminal, type:
rclone lsd o365sharepoint:
This shall bring you a list of directories in your SharePoint Document Library. If all goes well, the configuration is ready.
We will no longer need the virtual desktop, so we can kill it by executing the command vncserver-virtual -kill :1.
Pre-backup steps
Now it’s time to execute the commands that will start the backup process.
We don’t need to do this on the Raspberry Pi OS desktop; we can run them via SSH.
Let’s go to our mounted hard drive at /media/pi/O365 and create two folders there, one for each configuration in rclone.
mkdir OneDrive
mkdir SharePoint
Now we are ready.
Backup
Run the screen command and execute the commands below inside it, so you can close the terminal and disconnect without cancelling the backup process. To return to the screen, log in via SSH and recall the screen using screen -R. If you have more than one screen running (more on this at the end), you will be presented with a list of screens and need to recall the specific one using its number, for example, screen -R 693.
Backup – OneDrive
Here is my command to back up my o365personal OneDrive to my backup drive.
rclone copy --progress --update o365personal: /media/pi/O365/OneDrive --log-file=/media/pi/O365/OneDrive.log --log-level ERROR
This command will start copying our files from OneDrive into our hard drive.
As you see, the command will show not only --progress but also record in --log-file any errors encountered during file access. The --update option is used to update files that have changed rather than download and overwrite them, even if they are exactly the same. Very useful if doing a progressive backup into the same folder as before.
After a successful command, it’s always worth checking the logs.
Backup – SharePoint
The following command will copy our “Shared Documents” folder on our SharePoint site.
rclone copy --progress --update o365sharepoint: /media/pi/O365/SharePoint --log-file=/media/pi/O365/Documents.log --log-level ERROR
In such a way, we have a great backup system for our files in Microsoft 365 Cloud (OneDrive and SharePoint).
Excluding the cost of setting this up — Raspberry Pi and external hard drives (and electricity) — there are no subscriptions to pay, and we maintain full control over our files.
The backup is not fast and may take several hours on SharePoint sites over 100GB.
I have been using this system for years now and have used it at least twice during that time to restore some crucial files.
Resolving Raspberry Pi network issues
On my Raspberry Pi, I experienced an issue with WiFi that, from time to time, suddenly dropped the connection with my router, especially when tasks on the device finished and there was no network activity. It also crashed under heavy utilisation of the WiFi network. I fixed this in two ways.
WLAN Power Management
Just before running the backup, I run the commands below to turn off any power-saving features related to Wireless LAN on my device.
sudo iwconfig wlan0 power off
sudo iw wlan0 set power_save off
Dummy Network Activity
Along with the screen running my backup command, I run an additional screen where I just run the command:
ping 1.1.1.1
This silly thing helped maintain network activity and prevent the Raspberry Pi from crashing during the backup procedure, which can sometimes take hours to complete.
And that’s all.
Regards


Comments & Reactions