Adding Cloudflare Tunnel to OpenWrt Router (VPN Alternative)

If you follow my website and posts related to OpenWrt you have probably come across my post about installing a VPN server on an OpenWrt router using WireGuard.
WireGuard is one of the fastest protocols available for creating a VPN connection. Thanks to it, from the Internet, we can easily connect to our network and use it, either for local purposes (access to a printer or network drive) or to limit regional restrictions. Being outside the country, I can connect to my router at any time and my device will appear on the Internet as if it were where the router is, i.e. in the UK.
This super fast solution, however, requires configuration, which can sometimes be complex and cause various errors (although it is usually much easier than other VPNs).
WireGuard also has a limitation. To connect to our router, we need an external (static or dynamic, it doesn’t matter) IP address.
Optimised for OpenWrt 25.12 using
apkinsteadopkg
In case of a variable (dynamic) IP address, we can set the domain according to the entry Domain setting for variable IP address (OpenWrt and DDNS)
If our internet connection does not have an external IP address, as in the case described in my post Adding a second internet connection to an OpenWrt router, then we have a problem.
Most mobile connections (4G/5G) do not have an external IP address, and each user is also placed behind a so-called CG-NAT.
Personally, I would describe CG-NAT as a network of users inside another network belonging to a shared external IP address. Our router (our network) is placed on another network, which contains a router that has an external IP address that we have no control over.
At work I have a router with OpenWrt configured in such a way that when the main connection goes down, the mobile connection is activated. Users on the local network can still work, but those connecting via WireGuard have a problem.
I decided to try using a method to create a tunnel that, regardless of whether we have an external IP address, whether we are behind CG-NAT, or whether we do not want to bother with configuring WireGuard or port forwarding on the router, will allow us to access local network resources from the Internet.
Here I came across Hector Molina’s solution using Cloudflare Tunnel and Zero Trust Network Access.
The author of the original post highlighted the lack of the cloudflared package in the OpenWrt repositories, which would allow for easy installation and configuration of the tunnel.
Here the situation has changed recently, as the package is available from the repository, as far as OpenWrt 22.03 is concerned. However, as I have found out, this package is not updated regularly and does not work at all. It is not without reason that this package is missing from the repositories of the latest OpenWrt 23.05 version.
Therefore, I will describe here how to create a Cloudflare tunnel using the package for our router provided directly by the Cloudflare team. Additionally, we do not have to worry about its updates, because it will update automatically as soon as a new version is published.
In addition to the entire tunnel, CouldFlare has its own app 1.1.1.1 (Cloudflare WARP) that allows you to configure it to connect to your tunnel. This saves you from having to mess around with configuring profiles for each user.
For macOS, the Cloudflare WARP app and Cloudflare ONE are available. Cloudflare One allows you to configure your tunnel independently of the WARP app, so you can use both WARP and the configured tunnel without having to log in every time.
While WireGuard is my default approach when it comes to connecting remotely to my home network, it’s good to have an alternative available that, under changing conditions, can solve problems like CG-NAT.
Additionally, the tunnel does not require us to open any ports on our router to connect, as is the case with Wireguard. It also allows us to bypass any network restrictions.
It can be described by comparing the tunnel to the way you connect using the TeamViewer application. It doesn’t matter if you have an external IP address, are behind CG-NAT or not, as long as the internet connection works, it is possible to create a tunnel to access your network.
Install the official cloudflared package
From OpenWrt version 22.03, it is possible to install the cloudflared package from the repository; however — previously — I did not recommend it because the package was defective and the tunnel did not work.
After updating to the latest version of OpenWrt 23.05 we will not see the cloudflared package in the repository, which will make things easier as we will get rid of the problems associated with it.
Previously this post was based on a package from the repository, but I modified it to use the same solution regardless of whether we are using OpenWrt 22.03 or 23.05.
In OpenWrt 24.10, as well as in 25.12, the cloudflared package is back in the repository. However, I have focused on the package provided directly by Cloudflare to ensure that further steps for establishing the tunnel work flawlessly. The package installed using the method below will update itself in the background to the latest version, whenever this is released by Cloudflare.
However, this way of installing the package has its downsides, especially when you are using Attended Sysupgrade. A manually installed package will not be restored upon a change of OpenWrt version. There is, however, a solution for that — using the official package from the apk repository — which I will mention further on.
Before we start, a small note. The cloudflared package requires almost 32 MB of free space on our device. Make sure that your router, or more precisely the
/overlaypartition, has at least twice the space needed for this package.
Cloudflare provides a package for several platforms. For OpenWrt routers, we need the ARM platform package for Linux.
To do this, execute the following command:
wget --no-check-certificate -O /usr/bin/cloudflared https://github.com/cloudflare/cloudflared/releases/latest/download/cloudflared-linux-armIf your system is arm64, the command shall be:
wget --no-check-certificate -O /usr/bin/cloudflared https://github.com/cloudflare/cloudflared/releases/latest/download/cloudflared-linux-arm64We grant rights to execute (run):
chmod +x /usr/bin/cloudflaredA little note here. If you use my method to update OpenWrt firmware without losing installed packages, be sure to run the above two commands after restoring the packages, but before restoring the backup. Otherwise, the system will have the incorrect
cloudflaredpackage.
And we run it, checking if our file works:
cloudflared versionWe should see something like this:
cloudflared version 2023.10.0 (built 2023-10-31-1235 UTC)At this stage, we go to the Cloudflare Zero Trust page where we select a user, and then set the name of our “team” assigned in the cloudflareaccess.com domain
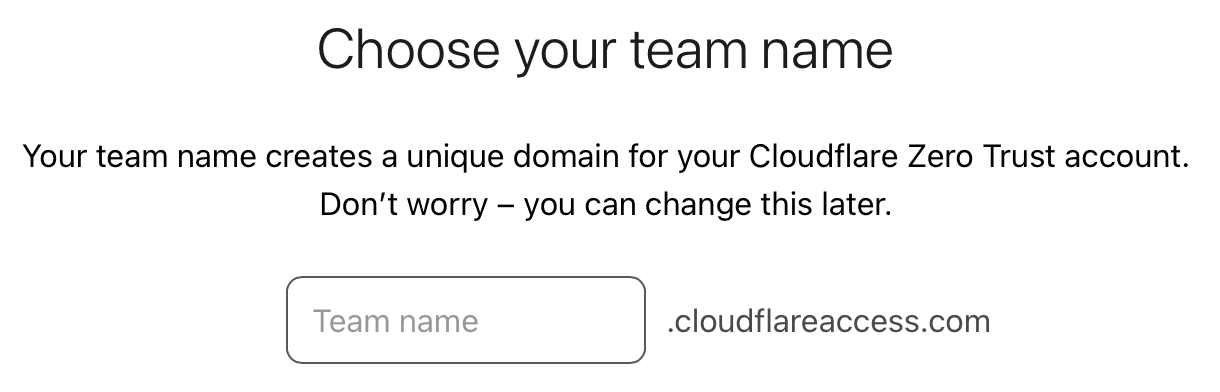
Remember the team name, as you will need it to configure users on their devices. If you forget, you can find (and change) it in Settings > Custom pages.
Next, we need to choose a price plan. Of course, we start with the Free plan.
Under the free plan, we can have up to 50 users of the service, which is very generous.
This is how we started the fun.
At this stage we need to create our tunnel. We do this fun on our router side.
cloudflared tunnel loginBy executing this command, we will receive a link that we need to paste into our web browser to log in to Cloudflare.
In the next step we will select the domain for which we authorize our tunnel.
If everything went correctly, we will receive information that Cloudflare has created a certificate enabling the creation of the tunnel.

Our terminal will display:
root@OpenWrt:~# cloudflared tunnel login
Please open the following URL and log in with your Cloudflare account:

https://dash.cloudflare.com/argotunnel?...

Leave cloudflared running to download the cert automatically.
You have successfully logged in.
If you wish to copy your credentials to a server, they have been saved to:
/root/.cloudflared/cert.pem
The cert.pem file must be copied (moved) to the /etc/cloudflared/ folder
mkdir /etc/cloudflared
mv /root/.cloudflared/cert.pem /etc/cloudflared/
Next we will create our tunnel:
cloudflared tunnel create Tunnel-NameOur terminal will display information about where the credentials and our tunnel ID are saved.
Tunnel credentials written to /etc/cloudflared/b26bb351-46ca-4fc1-a157-0ecdc1560658.json. cloudflared chose this file based on where your origin certificate was found. Keep this file secret. To revoke these credentials, delete the tunnel.

Created tunnel Tunnel-Name with id b26bb351-46ca-4fc1-a157-0ecdc1560658
My ID in this example is
b26bb351-46ca-4fc1-a157-0ecdc1560658, yours will be different.
We need to fill this information in our configuration file vim /etc/cloudflared/config.yml
tunnel: b26bb351-46ca-4fc1-a157-0ecdc1560658
credentials-file: /etc/cloudflared/b26bb351-46ca-4fc1-a157-0ecdc1560658.json
warp-routing:
 enabled: true
If you have already created your tunnel, find its name and ID by running the cloudflared tunnel list command. Then, create the credential file using the following command:
cloudflared tunnel token --cred-file /etc/cloudflared/b26bb351-46ca-4fc1-a157-0ecdc1560658.json Tunnel-NameNext, use the details to populate /etc/cloudflared/config.yml as described above.
Remember! My ID in this example is
b26bb351-46ca-4fc1-a157-0ecdc1560658, yours will be different.
All that’s left is to launch our tunnel and check if everything works.
Several corrective treatments (required)
Before we do that, however, there is an additional step that we must perform on the side of our router in order to correct several errors that are displayed when starting the tunnel.
- We create the file
touch /etc/sysctl.d/99-fix-buffer-and-ping.conf - We add the following lines to the file via
vim /etc/sysctl.d/99-fix-buffer-and-ping.conf
net.core.rmem_max=2500000
net.ipv4.ping_group_range=0 2147483647- We run the following command
sysctl -p /etc/sysctl.d/99-fix-buffer-and-ping.conf.
This prevents a problem at startup:
WRN The user running cloudflared process has a GID (group ID) that is not within ping_group_range. You might need to add that user to a group within that range, or instead update the range to encompass a group the user is already in by modifying /proc/sys/net/ipv4/ping_group_range. Otherwise cloudflared will not be able to ping this network error="Group ID 0 is not between ping group 1 to 0"
WRN ICMP proxy feature is disabled error="cannot create ICMPv4 proxy: Group ID 0 is not between ping group 1 to 0 nor ICMPv6 proxy: socket: permission denied"
Now we can launch our tunnel.
cloudflared tunnel run Tunnel-NameAfter going to the Cloudflare Zero Trust > Network > Tunnels (was Access > Tunnels) panel we will see if our tunnel is working.
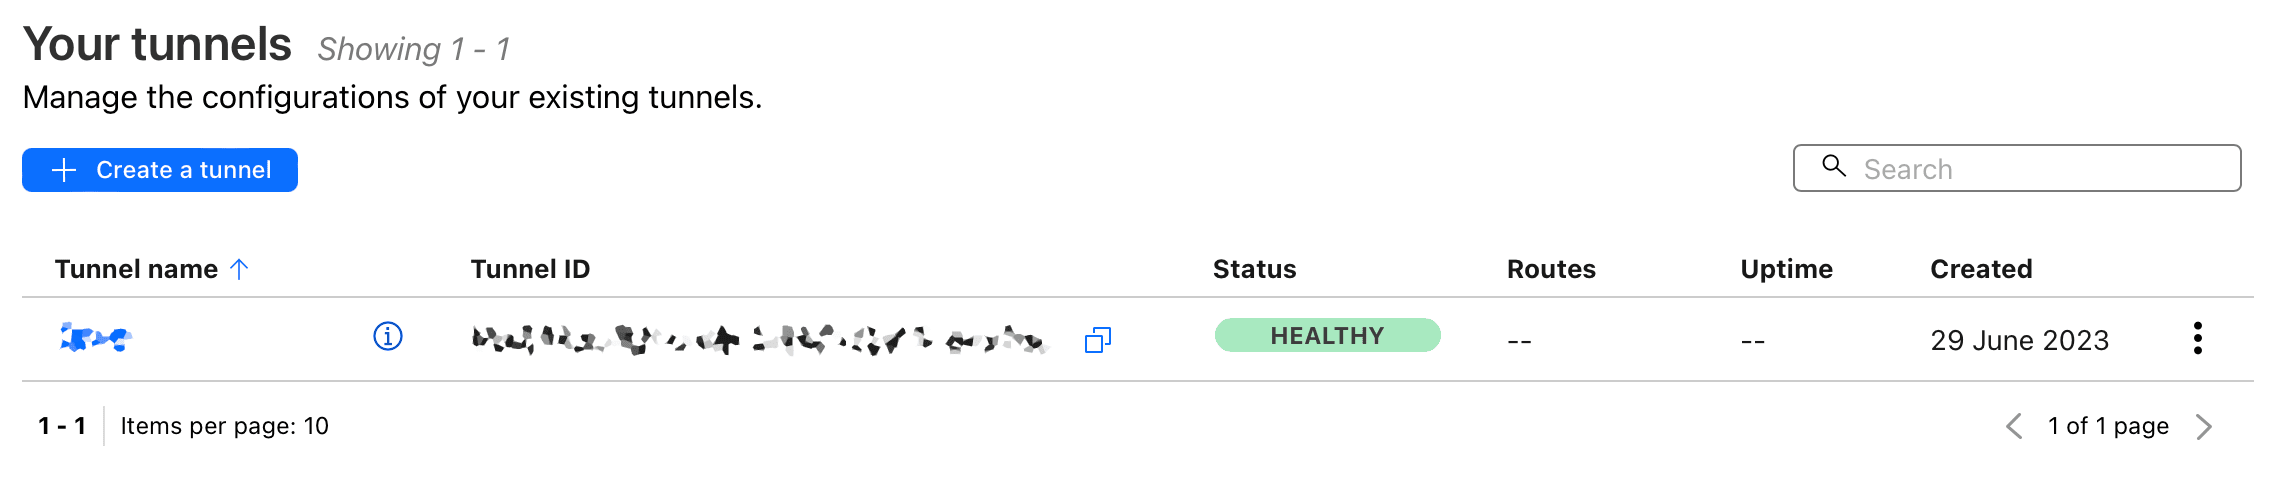
This way we know that the tunnel is working. We can end the above command (Ctrl+C for Windows, or Cmd+C for macOS).
Tunnel Migration
We run our tunnel again manually and go to our tunnel on the Cloudflare Zero Trust website and select the configure option (or simply click on the tunnel name) in the Network > Tunnels section (it was Access > Tunnels ).
Here we will get the option to migrate the tunnel which they had to perform.

We click the Start migration button, confirm each question (without entering any data) with the Confirm button, ending with Migrate tunnel.
Adding our local network addresses
We click our tunnel again and the Configure button.
In the Private Network tab we add our local addresses that we use in our network.
Since I use the 10.0.0.(1-254) pool for Wireguard and the 192.168.0.(1-254) network, I added them as follows.
10.0.0.0/24
192.168.1.0/24
Local network access - Split Tunnel
Additionally, we need to split the tunnel (Split Tunnel) to be able to access the local network.
To do this, go to Settings > WARP Client and in the Device settings section click on our default profile (Default).
Go to the Split Tunnels section, which by default is set to Exclude IPs and domains and click the Manage button.
There, on the exclusion list, we find the network addresses that correspond to our local network, in this case 10.0.0.0/8, 192.168.0.0/16, 192.0.0.0/24, and delete them.
At this point we can finish with our tunnel.
Added support for UTP and ICMP (ping) packets
In addition, go to Settings > Network, in the Firewall section we enable Proxy and select, in addition to the default TCP packets, also UTP and ICMP.
Thanks to this, we will expand the functionality of our tunnel and additionally gain the ability to execute the ping command to our devices in the local network, which is very useful for analyzing whether our tunnel is working or not.
We are also enabling the WARP to WARP service.

Tunnel Launch
When installing the cloudflared package from the OpenWrt 22.03 repository, a startup file is provided along with it and installed in /etc/init.d/cloudflared. However, this file is buggy and does not work, so we do not use it.
In the case of the official package, we do not have this type of file by default, which will partially simplify the entire procedure.
To create it, we execute the following command:
cloudflared service installThanks to this we will get a file saved in
/etc/init.d/cloudflared, which unfortunately does not work entirely, but there is a solution described below.
The startup file is not adapted to work with OpenWrt. The packages available on the router, such as ps are not the same (do not have the same options) as in other Linux systems.
Our tunnel will start with the /etc/init.d/cloudflared start command without a problem, but stopping with the stop command does not work and even though the status shows that the tunnel is not running, we still see it when we execute the ps | grep cloudflared command.
The startup file generated by cloudflared is intended for Redhat Linux (as you can see by executing the command head -2 /etc/init.d/cloudflared).
Fixing new startup file /etc/init.d/cloudflared
In the file for RedHat, almost at the very beginning, we have the following command:
is_running() {
    [ -f "$pid_file" ] && ps $(get_pid) > /dev/null 2>&1
}
The ps command in OpenWrt doesn’t have many options, so you can’t just display a process by its PID (ps 14535 won’t work).
For this purpose, the following part:
ps $(get_pid)we change to:
ps | grep $(get_pid) | grep -v grepThe
grep -v grepcommand is intended to exclude the grep package from the response we get.
This way, all commands of the cloudflared package work and we are ready for further configuration.
Usage: /etc/init.d/cloudflared {start|stop|restart|status}Adding cloudflared from the OpenWrt repository and performing an official update
The above section described how to install and establish a cloudflared tunnel using the official package. Once you have gone through all these steps, it is worth taking a step back for a minute.
When you run the command below:
cloudflared --versionYou will see something like the following (at the time of updating this article):
cloudflared version 2026.6.1 (built 2026-06-18-14:33 UTC)From OpenWrt 25.12, the package included in the official repository is finally operational. Having it installed using official means will work swiftly when updating the router using Attended Sysupgrade.
To do that, we just need to run the command below:
apk add cloudflaredThis will install the version from the repository, which will be a few versions behind:
cloudflared version 2026.3.0 (built unknown)But that is not a problem. Before we use our repository version of cloudflared, we need to run one command:
cloudflared updateThis will swiftly update us to the latest, official version of the cloudflared build:
2026-07-05T06:03:00Z INF cloudflared has been updated version=2026.6.1
cloudflared has been updated to version 2026.6.1
Thanks to this approach, the cloudflared package will be restored during an Attended Sysupgrade, even if it is not the latest version. If we do not do this manually, the update will typically happen on its own to the latest version within the next 24 — 48 hours.
Logging into the tunnel using the 1.1.1.1 app (Cloudflare WARP)
While our tunnel is running, we need to start configuring our users.
Before this can happen, we need to define who can log into our tunnel.
Login Method
In the Cloudflare Zero Trust panel go to Settings and then Authentication where we can add login methods in Login methods.
I will focus here on what is enabled by default, namely One-time PIN and that is what we will use first.
As you will notice, there are options available there thanks to which we can specify, for example, that the user will have to log in using a Google account to confirm their identity and, together with the login rule established (at a later stage), connect to the tunnel.
The person logging in to our tunnel will have to provide the “team” name, which we specified at the beginning in the cloudflareaccess.com domain.
Let me remind you that we can see it in Settings > Custom pages.
Before we do that, we need to define who can log in by setting a login rule.
Login Rule
To do this, in Settings go to WARP Client > Device enrollment permissions. By clicking the Manage button, we will create a new rule in the Policies section using the Add a rule button.
- I set the Rule name to Allowed emails.
- I left the Rule action to Allow
- In the Include section I selected Emails and in the Value field I entered my email address.
Here we can also specify that all users in the domain can log in to the tunnel (Emails ending in). If we have our own domain and email addresses configured in it, this will reduce the need to add each email address/user separately.
When logging in to the 1.1.1.1/Cloudflare WARP app, I will be asked to provide my email address, where I will receive a one-time password to enter in the app, which will allow me to be authenticated and logged in.
App
Let’s start with the application on our mobile device.
For iOS, it is available in App Store. All others (links to them) are displayed when we go to the page 1.1.1.1 in our web browser.
After the initial start-up and configuration of the VPN profile to the standard WARP service, go to settings (three horizontal lines) > Account > Login to Cloudflare Zero Trust
At this stage we will be asked for the name of our “team” and will be redirected to the login page. We enter the approved email address there, then open our email and read the received code, which we enter in the application.
After logging in, my Cloudflare WARP (1.1.1.1) app will look a bit different and the options will be limited to a single button to turn the Zero Trust tunnel on/off.

We can do this in the application on our computer in a similar way (Preferences > Account > Login to Cloudflare Zero Trust).
Maintain tunnel if IP address changes (optional)
The only problem I have left is making sure that the tunnel will continue to work if the IP address of the internet interface changes or the internet is redirected through a different interface.
In my case, when the main internet connection with a static IP address stops working and the emergency one (behind CG-NAT) is activated.
As I have checked, an active tunnel does not detect the fact that the IP address or access interface has changed. Even though the tunnel is enabled, it will be inactive.
With mwan3 package
Post reference Adding a second internet connection to an OpenWrt router
In my case, when the Internet switches to a failover connection, the mwan3 package will make sure that there is still an Internet connection in the local network.
The mwan3 package has the ability to execute a command when one of the connections goes down. I could theoretically use this to stop the Cloudflare tunnel and start it on a new connection.
In the LuCI panel go to Network > MultiWAN Manager and the Notify tab.
Here we can execute the following script.
if [ "${ACTION}" = "ifdown" ] || [ "${ACTION}" = "ifup" ] && [ "${INTERFACE}" = "wan" ] ; then
   (/bin/sleep 30; /etc/init.d/cloudflared restart >/dev/null) &
fi
In case our WAN interface goes down (or restarts), the script will wait 30 seconds and then restart our Cloudflare tunnel.
Another example:
if [ "${ACTION}" = "ifdown" ] || [ "${ACTION}" = "ifup" ] ; then
 if [ "${INTERFACE}" != "loopback" ] && [ "${INTERFACE}" != "self" ] ; then
 (/bin/sleep 30; /etc/init.d/cloudflared restart >/dev/null) &
 fi
fi
When any interface goes down or recovers (ignoring the loopback interface), wait 30 seconds and restart the Cloudflare tunnel.
However, I would like to explore other options as soon as our connecting IP address changes.
By analyzing the IP address
As I described in my post Setting domain for dynamic IP address (OpenWrt and DDNS) and section Supporting multiple internet connections with DDNS (when the above solution does not work), using curl we can read the external IP address from a given interface.
If our backup interface has an IP on the router 192.168.8.2, we execute the following command to read the IP.
curl -s --interface 192.168.8.2 'http://icanhazip.com'This will allow us to read the current IP address.
Personally, at home, with one interface, I will save my IP address to a file, execute the compare command, when the IP address changes, I will restart the tunnel.
The command to read the IP address and save it to a temporary file is as follows.
curl -s 'http://icanhazip.com' > /tmp/ip_readI will add reading the IP address to the cron schedule so that it executes once a day, one minute after midnight.
01 0 * * * curl -s 'http://icanhazip.com' > /tmp/ip_readI will also add my script to the schedule that will read the IP address and compare it to the one read earlier. When the IP address changes, the tunnel will be restarted. The script will run every 5 minutes.
*/5 * * * * /bin/sh /root/ip_check_scriptContents of the file ip_check_script
FILE1="/tmp/ip_read"
curl -s 'http://icanhazip.com' > /tmp/ip_check
FILE2="/tmp/ip_check"

if cmp -s -- "$FILE1" "$FILE2"; then
  # IP not changed, don't do anything
  :
else
 # ip address differ, run the following
 /etc/init.d/cloudflared restart > /dev/null
 # update ip_read
 cp /tmp/ip_check /tmp/ip_read
fi
We add rights to execute (run)
chmod +x ip_check_scriptWe will also add to the cron schedule an IP address check after the router reboots.
@reboot sleep 15 && curl -s 'http://icanhazip.com' > /tmp/ip_readTo prevent the tunnel reset command from being executed every 5 minutes (even though the IP address has not changed), when the IP address read currently changes, the ip_read file will be updated.
Automatic tunnel start on router startup
By default, the cloudflared package from OpenWrt 22.03 repository, /etc/init.d/cloudflared, which was broken and which we replaced and fixed, had the option to start the service during router startup (enabled).
The new, official, file has only four options (start, stop, restart and status).
To make our tunnel start after startup, we will use the cron scheduler.
We add the following line.
@reboot sleep 15 && /etc/init.d/cloudflared startI added a 15 second wait to the line above. In some cases, you may need to wait a bit longer, especially if the router takes a while to connect to the internet.
Failsafe - Periodic check if the tunnel is working
If we did everything correctly, our tunnel should work without any problems, however there are situations when our tunnel (process) stops working.
Therefore, it is worth introducing some kind of check. When it is detected that the tunnel is down, execute the command to resurrect it.
For this purpose we can use 2 types of commands. Choose one that you think is right. Personally, I prefer the first solution.
We will add the selected command to the cron schedule that executes every 5 minutes. When our command detects that our tunnel is down, it will try to start it again.
*/5 * * * * /bin/sh /root/cloudflared_checkChecking with /etc/init.d/cloudflared status
if [[ $(/bin/sh /etc/init.d/cloudflared status) == "Running" ]];
then
 :
else
 /bin/sh /etc/init.d/cloudflared restart
fi
We save the above command to the file /root/cloudflared_check and give it execution rights chmod +x /root/cloudflared_check.
Checking with pgrep package
if pgrep cloudflared >/dev/null
then
    :
else
    /bin/sh /etc/init.d/cloudflared restart
fi
We save the above command to the file /root/cloudflared_check and give it execution rights chmod +x /root/cloudflared_check.
User Management
While everything is up and running and users can use the new service to see what devices and users are available, we can do so from the My Team and Devices and Users sections respectively.
There we can also revoke login rights for a given user using the Revoke option.
Including configuration files in OpenWrt backup
If you are backing up OpenWrt from System > Backup / Flash Firmware, in the Configuration tab add the following folders to be included in the backup file.
/etc/cloudflared/Personally, since I also have other packages, including WireGuard, my folders look like this:
/etc/ssl/
/etc/wireguard/
/etc/cloudflared/
/etc/config/
/etc/init.d/
/root/
Bonus
I don’t know if you know that as a bonus to all this fun, being connected to your own tunnel gives you access to the network using IPv6 (from the users’ side, not the router’s).
Sources:


Comments & Reactions