Sharing a USB drive over the network from an OpenWrt router

Continuing my post Adding a USB drive to a router with OpenWrt using the USB port (using the Linksys WRT3200ACM as an example), we move on to sharing our drive on the local network.
Optimised for OpenWrt 25.12 using
apkinsteadopkg
We start by installing two packages. We can do this from the administration panel via a web browser or from the terminal. The first package installs the Samba server, while the second adds the ability to operate it from a graphical interface via a web browser.
apk update
apk add samba4-server luci-app-samba4
The installation will take a while because in addition to the two main packages, it is necessary to install companion packages.
Package samba4-server (4.11.6-1) installed
Package luci-app-samba4 (git-20.105.64099-eeba108-1) installed
Next, we log into our administration panel from a web browser. We go to Services > Network Shares.

In the General Settings tab we make several settings.
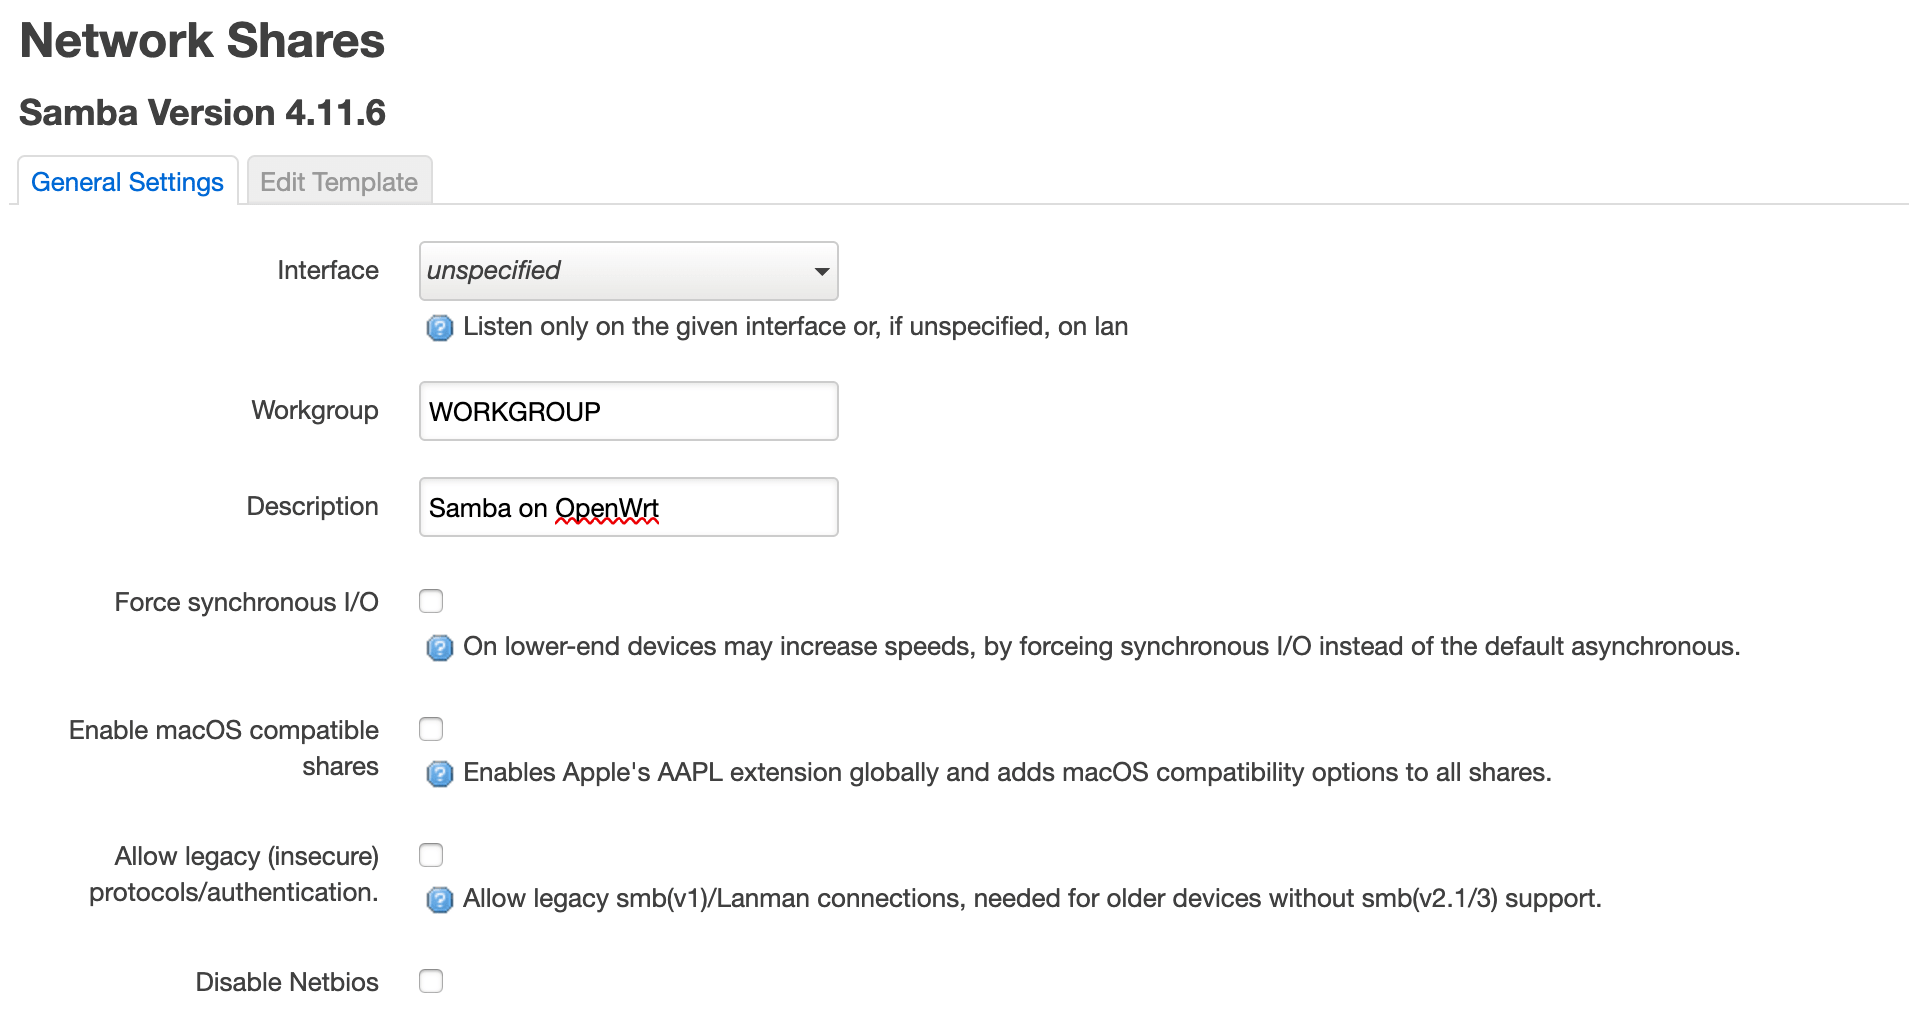
Even though we don’t have to, we set the interface (Interface) on which Samba will run to LAN (the default, if not specified, is LAN). If we want, we can set the name of our home network (Workgroup) and a description (Description).
As for the remaining settings, as a user of an Apple computer, I checked Enable macOS compatible shares.
However, if we experience problems with unmounting our disk in macOS, we should leave this option unchecked.
Before we go any further, I click Save & Apply.
In the Shared Directories item, click the add button, which will give you a short form to fill out.
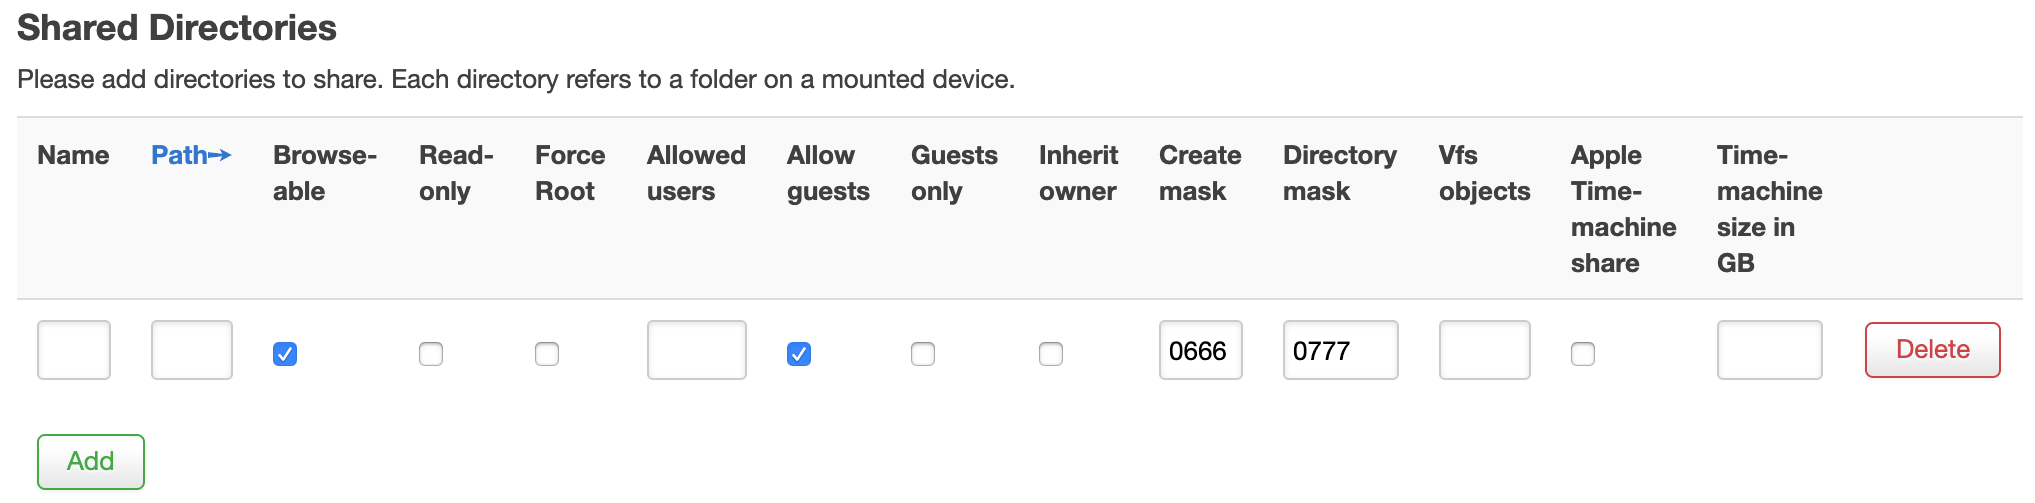
In the name field, enter the name of our share as we want it to be seen from the network level.
In the path field, we enter the location of our mounted disk, in my case /mnt/sda1.
We leave the Browseable and Allow guests options selected by default.
If we want to use our disk for backup purposes, from a computer with macOS we select Apple TimeMachine share and define (optionally) a disk limit for backups.
I confirm everything by clicking Save & Apply.
For a standard user, these settings are sufficient. However, if you want to change advanced sharing options, you can always go to the Edit Template tab.
At this stage we need to check if our sharing is working.
In the case of macOS, we open a new Finder window, go to the Network tab and search for our router. Then intuitively click one by one until we open our shared folder.
We can also select Go > Connect to server from the Finder menu, where we enter the address smb://192.168.1.1/ (where 192.168.1.1 is the address of our router) and click Connect.
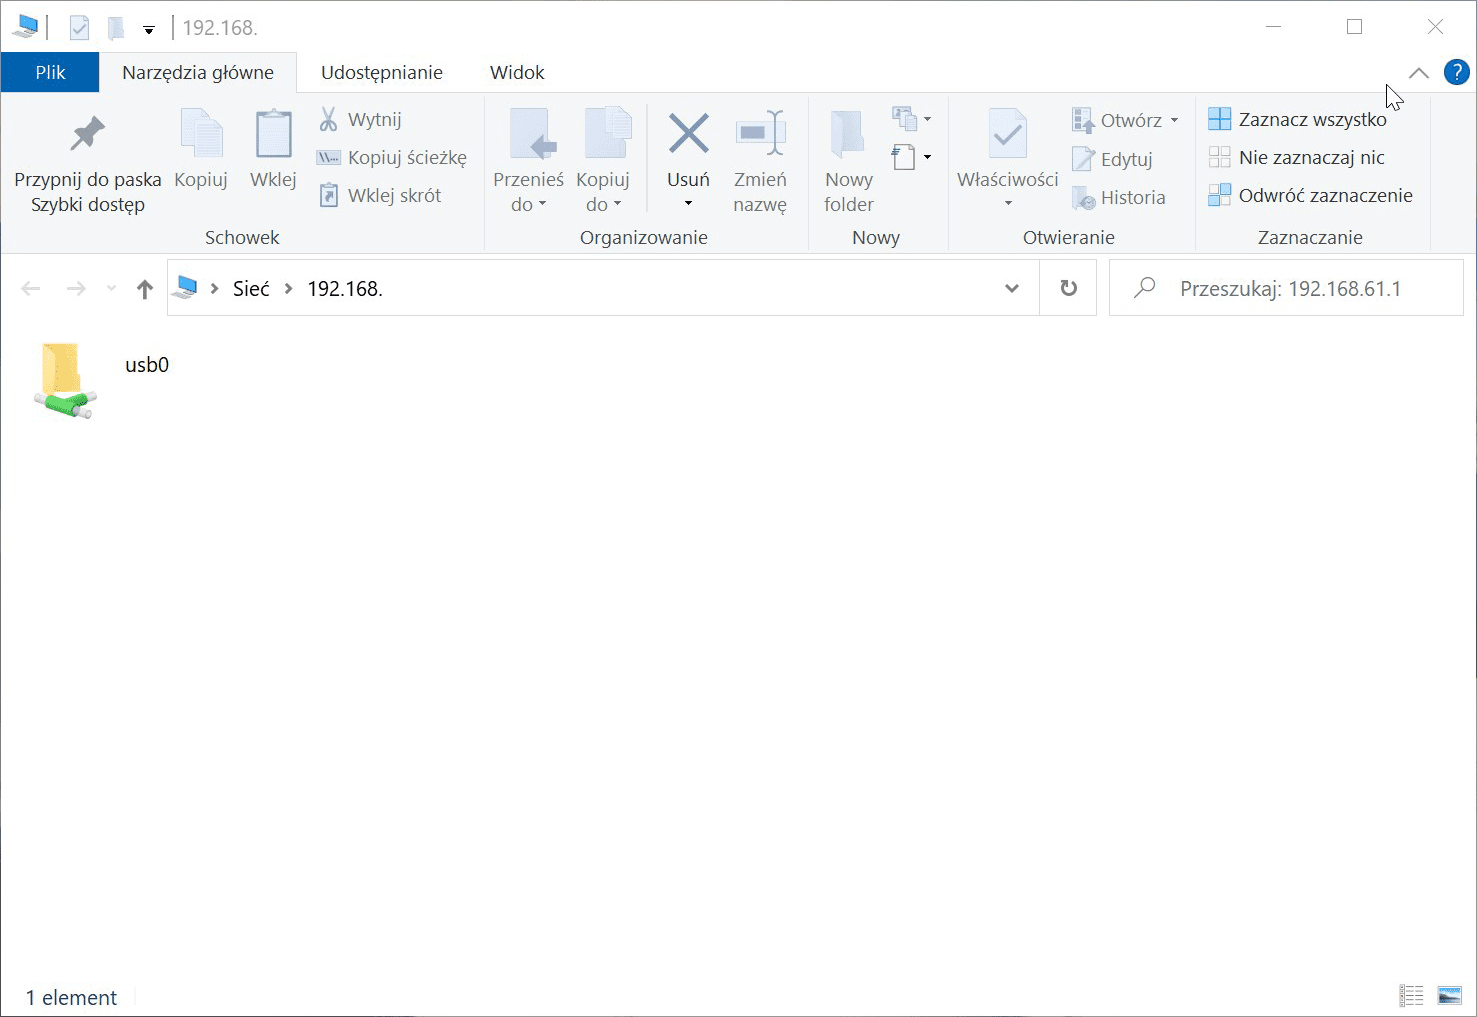
And that’s it. Our disk should be working and visible on the network.
If you added the disk according to my previous post, you can unmount the disk from the router (block umount) at any time and connect it to a macOS or Windows computer. Thanks to the use of exFat partition, there is no problem with visibility of the disk’s contents regardless of where the device is running.
Problem in Windows and its solution
While accessing a shared drive using a user account available on our router is not a problem, many of us would prefer to have access using a guest account.
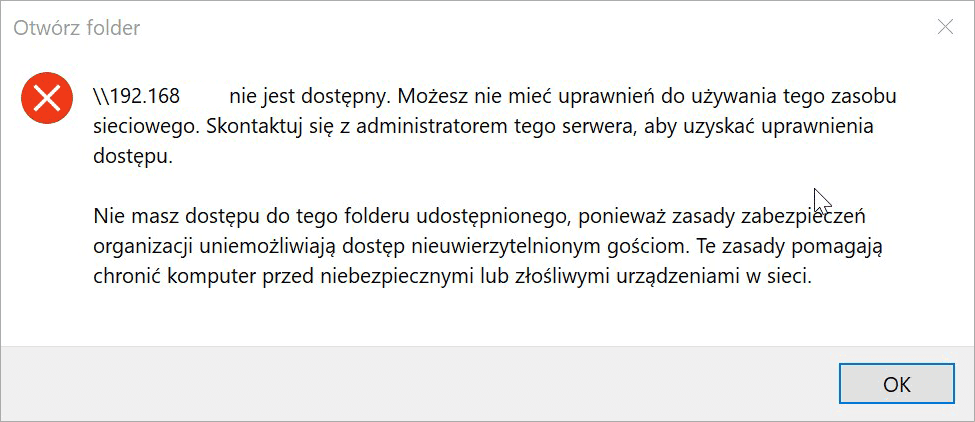
In the latest versions of Windows, for security reasons, changes have been made to access network resources.
Access using the Guest account is not possible and results in an error when accessing resources. Entering the username Guest and leaving the password field blank also does not help much.
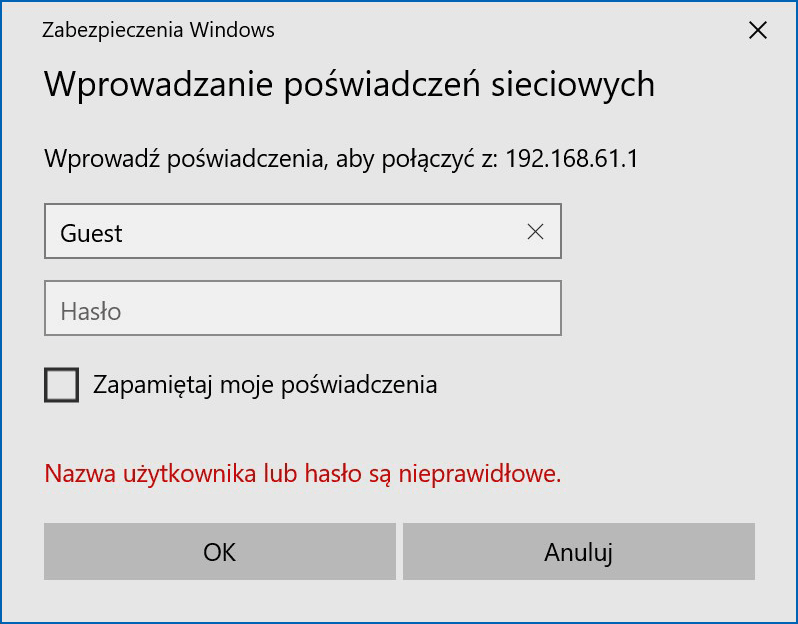
However, we can easily change this.
Just run Command Prompt in administrator mode (otherwise you will get an Access Denied message) and execute the command below, which will add the appropriate entry to the system registry.
reg add HKLM\SYSTEM\CurrentControlSet\Services\LanmanWorkstation\Parameters /v AllowInsecureGuestAuth /t reg_dword /d 00000001 /fAfter making the change, we restart our system.
Now, when we try to access the network resource again, we will also receive a message asking us to enter a username and password. This time, however, we can easily enter the Guest username and confirm the whole thing with the OK button without having to enter a password.
Regards.


Comments & Reactions