Updating Windows with PowerShell

Recently I came across a problem where a freshly installed Windows wouldn’t download updates.
The search for updates took forever or, if they did appear, they were stuck in the download queue (Pending Download) and there was no way to convince them to download. Clicking the Download button did nothing. Even the tried and tested methods of resetting the Windows Update service didn’t help.
Therefore, I started looking for another solution and that’s how I came across the update method using PowerShell.
PowerShell 7.x
Before we start, it is worth installing PowerShell version 7 (minimum), as Windows has version 5.1 (!) by default, and this module likes to play tricks with this version.
We can do this in various ways, but the easiest in my opinion is to install it directly from the Microsoft Store (Microsoft Store). This way we won’t have to worry about updating it manually.
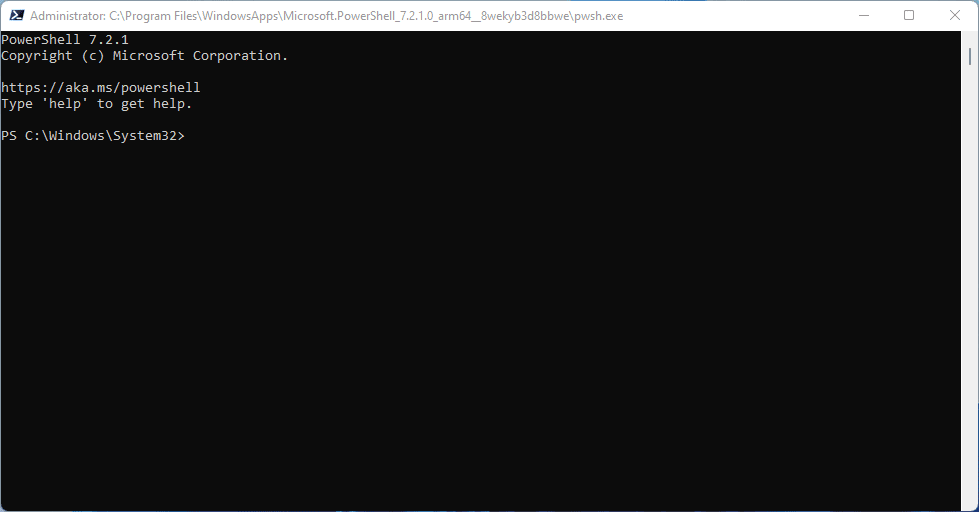
We run our PowerShell in administrator mode (Run as administrator).
PSWindowsUpdate
To update our system, we will use a module prepared by Michał Gajda called PSWindowsUpdate.
This is not some little-known package. It has been downloaded over 112 million times (112,054,801 downloads and counting)!
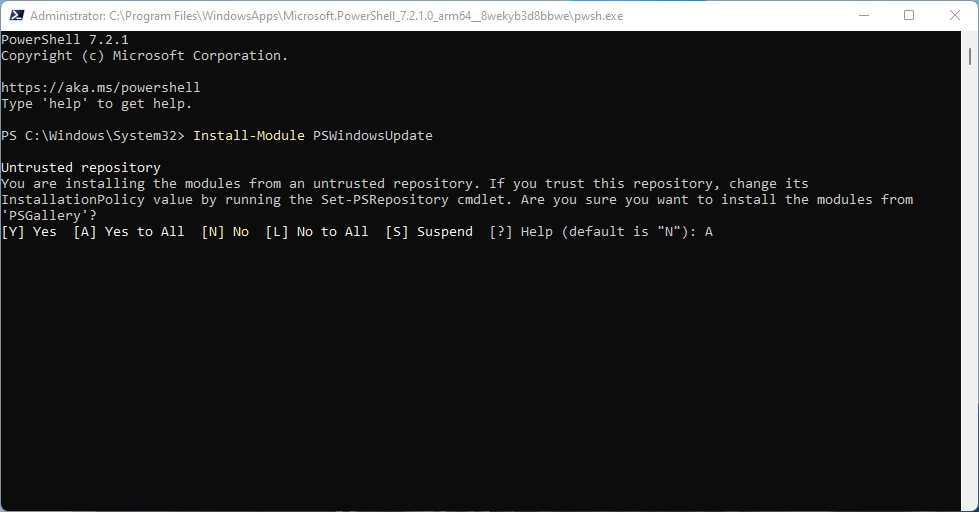
To install it, we execute the following command:
Install-Module PSWindowsUpdateWhen asked whether to install the module from an “untrusted source”, as well as others during installation, answer Yes for All with A.
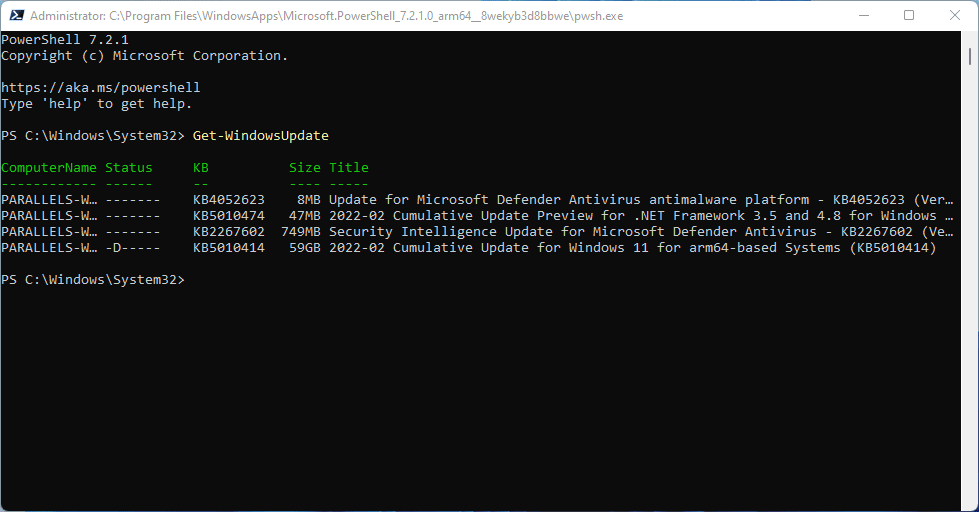
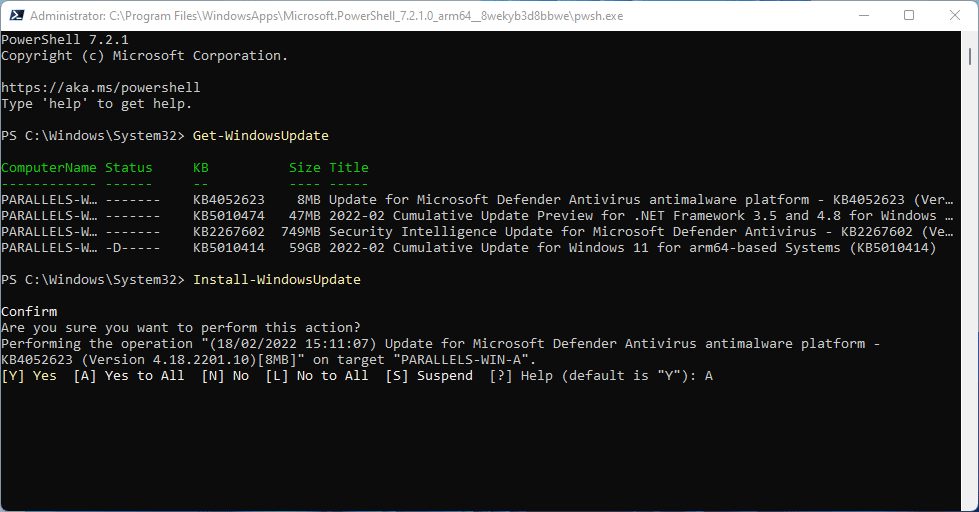
Then it’s time to search for updates:
Get-WindowsUpdateAfter issuing the command, it may seem for a while that nothing happens. You should wait a moment until you see some response.
ps. Don’t be fooled by the size of the update, because it is not always displayed correctly (like in my case 59GB, lol).
Once our updates are found, we execute the following command to install them:
Install-WindowsUpdateWe also confirm with A that we want to perform the installation for all available updates.
Now all we have to do is sit back and wait for everything to download and install.
Update Management
The PSWindowsUpdate package is not only the above commands. It has a number of different options that can be used to, for example, remove installed updates or stop an update that we do not want.
The full list of available options can be viewed using:
Get-Command -Module PSWindowsUpdate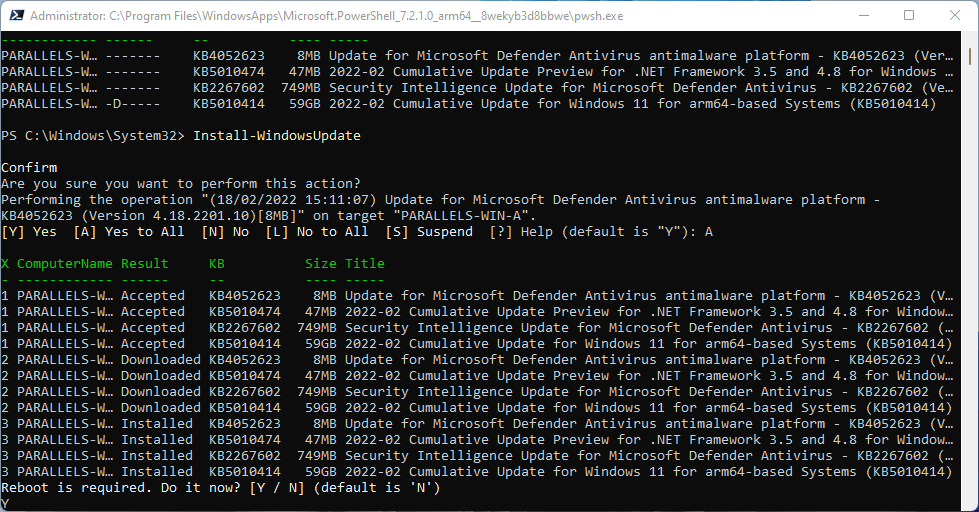
When installing updates using the Install-WindowsUpdate command, we need to delve a bit into the information that is displayed (if any) at the very end. Sometimes, a computer restart is required, which will not be done for us, but we have to do it ourselves (decide at the end).
To make the whole process of finding updates, approving, installing and automatically starting the computer when needed, easier, we can use the following command:
Get-WindowsUpdate -AcceptAll -Install -AutoRebootIf, using Get-WindowsUpdate we have several to choose from and we want to focus on one in particular, we can do it using the following entry:
Get-WindowsUpdate -Install -KBArticleID 'KB5010414'We change KB5010414 accordingly to the one obtained after executing the command Get-WindowsUpdate.
Although in most cases the “graphical” Windows Update works as it should, it is good to have some kind of alternative.
Best regards.
Source: How to install Windows 10 update using PowerShell by Pureinfotech


Comments & Reactions