Upgrade Windows 11 Home to Pro
Recently, I had to put into use a computer that was delivered with Windows 11 Home version by default. Since I need the professional version in the environment where I need to use it, I decided to upgrade it.
Once you have purchased the product key, the easiest method is to go to Settings > System > Activation and enter the Pro version key in the Change product key section.
Unfortunately, although I have used this method before on other computers, this time I received information that the product key provided cannot be used to upgrade the currently installed system.
I decided to check whether I would be able to upgrade Windows 11 from Home to Pro using the method of updating Windows 10 Home to Pro I described earlier.
I already had a downloaded Windows 11 ISO image loaded onto a pendrive using the Rufus program. If you do not have an ISO image of Windows 11, please refer to my post How to download a Windows 10 image (ISO).
Similar to the Windows 10 method, I started by changing the system registry.
To launch the system registry, simply click the ‘Windows Logo + R’ keyboard shortcut, then enter ‘regedit’ in the newly opened Run… window and confirm with the Enter button.
Alternatively, click on the ‘Start’ button and type the word ‘regedit’ and you should get the ‘Registry Editor’ suggestion.
Go to the basic folder HKEY_LOCAL_MACHINE > SOFTWARE.
- Then to
Microsoft\Windows NT\Current Version
Here, in the right part of the window, we change the values of EditionID to Professional and ProductName to Windows 10 Pro.
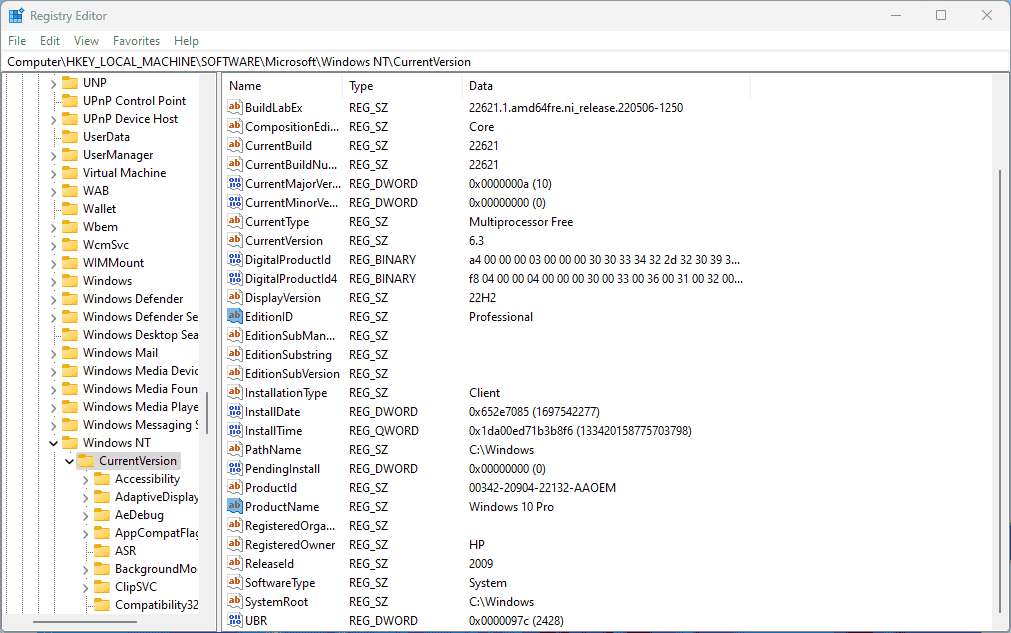
Yes, we enter Windows 10, even though we are updating Windows 11. As you can see, Windows 11 is just a souped-up Windows 10.
- Return to the basic folder and go to
WOW6432Node\Microsoft\Windows NT\Current Versionand make the same change as above.

- Run
setup.exefrom the Windows 11 installer.
If you downloaded the ISO image, you can unpack it using 7Zip.
 <script async delay="https://dariusz.wieckiewicz.org/g/serve.js?client=ca-pub-5380116874441486"
      crossorigin="anonymous"></script>
 <ins class="adsbygoogle"
      style="display:block; text-align:center;"
      data-ad-layout="in-article"
      data-ad-format="fluid"
      data-ad-client="ca-pub-5380116874441486"
      data-ad-slot="9220966978"></ins>
 <script>
      (adsbygoogle = window.adsbygoogle || []).push({});
 </script>
To speed up the entire process, I recommend disconnecting your computer from the Internet, as the installer may want to perform system updates first before starting the installation, which may significantly extend the entire process.
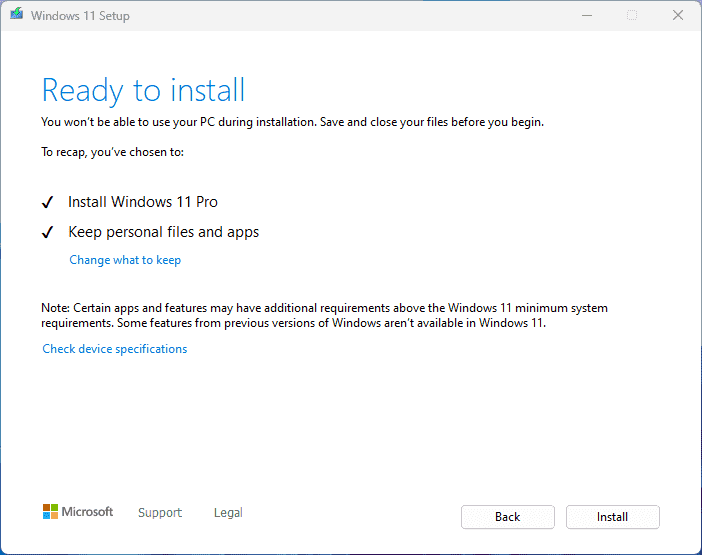
If you have done everything correctly, after a shorter (or longer) analysis, the installer will ask you whether you want to install Windows 11 Pro' with Keep Files and Applications`.
If the installer still informs us about
Windows 11 Home, then we close it and check our system registry again, in particularMicrosoft\Windows NT\Current Version.
Now just wait and enjoy the effect.
After restarting the computer, our system should be upgraded to Windows 11 Enterprise.
Yes, not Windows 11 Pro as we intended.
We can reconnect our computer to the Internet.
By going from the Start menu to Settings > System > Activation, we need to make a change, enter our Windows 11 Pro key and activate it.
The upgrade should go without any problem, and the system version will change from Windows 11 Enterprise to Windows 11 Pro.
The last step will be to go to Windows Updates and check if there are any new ones available to install. As a rule, this operation will include new ones that must be installed first before we start using our system.
And that would be it.
Regards.