Policy-Based Routing on an OpenWrt Router
For some time, I have been covering topics concerning OpenWrt on my website. One of the primary interests among my users has been the implementation of WireGuard and adding a Cloudflare WARP tunnel, as well as managing multiple internet connections on a single router.
What I have not yet covered is how to conditionally route traffic once we have established two internet connections, or when we have added a virtual connection (such as a VPN) to the router on a single physical connection.
While firewall rules can be used to route traffic, they are not always straightforward to implement; consequently, I looked for an alternative solution.
I was particularly interested in being able to quickly configure a router to direct traffic from a specific device over a VPN tunnel whenever necessary. To assist with this, I looked into the PBR (Policy-Based Routing) package.
Installation
The objective is to manage everything swiftly through the web interface. For this reason, I will not be installing the pbr package in isolation; instead, I will install the LuCI package directly, which will automatically pull in pbr as a dependency.
opkg update
opkg install luci-app-pbr
service rpcd restart
This procedure requires the installation of
luci-app-pbrand a restart of therpcdpackage before we proceed with any further configuration.
By default, during the initial installation, you will be presented with an error message. This is normal. The pbr service is disabled by default to ensure nothing breaks at this stage. You can ignore it for now.
ERROR: The pbr service is currently disabled!
Run the following commands before starting the service again:
uci set pbr.config.enabled='1'; uci commit pbr;
pbr 1.2.0-r6 FAILED TO START in fw4 nft file mode!!! Check the output of nft -c -f /var/run/pbr.nftERROR: The pbr service is currently disabled!
ERROR: Errors encountered, please check https://docs.openwrt.melmac.ca/pbr/1.2.0/#ErrorMessagesDetails!
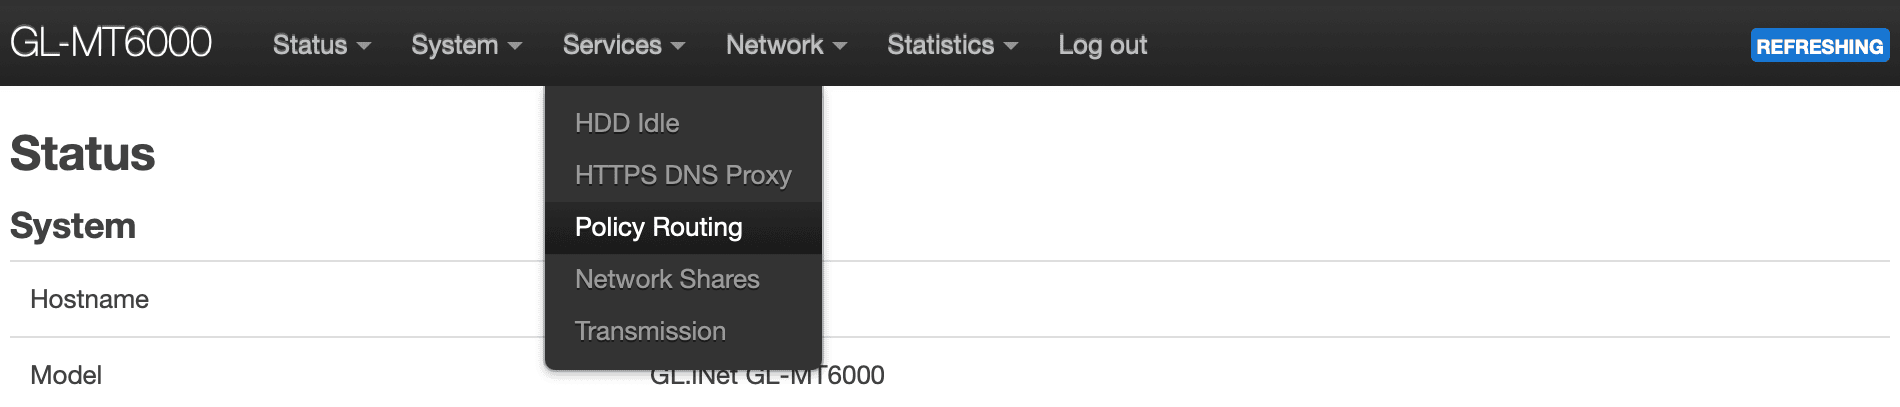
Before moving any further, we can log in to our router via a web browser. In the Services section, a new option called Policy Routing will now be visible.
Let’s review the default options and adjust them to our environment before enabling the service.
Configuration
Basic Configuration
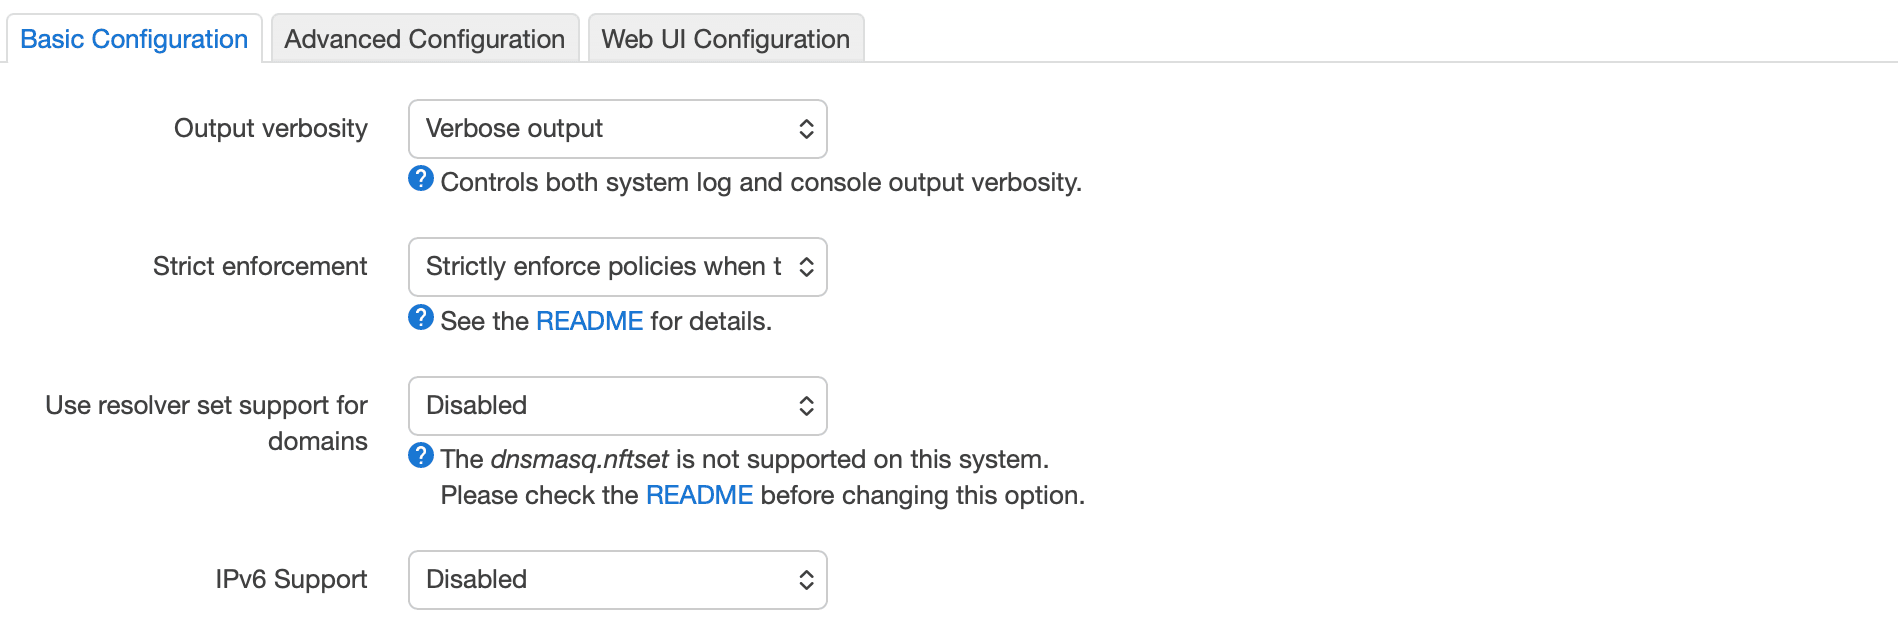
- Output verbosity
This determines the level of detail the
pbrservice writes to your system log (logread) and console during startup and rule changes.
- Recommendation: Keep this set to Verbose output (the default). Once everything is functioning correctly, you can switch to Condensed output.
- Strict Enforcement
This controls what happens to traffic if the specific gateway assigned to a policy (such as a VPN tunnel) goes down. This feature is also commonly known as a Kill switch.
- Recommendation: If you wish to prevent your real IP address from leaking when a destination connection (VPN) fails, select Strictly enforce policies (the default). If you prefer your internet connection to remain active via your ISP even if the “protected” route is broken, choose Do not enforce.
- Use resolver set support for domains
This allows
pbrto useipsetornftsetto route entire domains (e.g. netflix.com) by intercepting DNS queries, where supported.
- Recommendation: Set this to Enabled (specifically look for an
nftsetoption if available, such asDnsmasq nft set). As current versions of OpenWrt utilisefw4, using sets is the most efficient way to handle domain-based routing without manually searching for IP ranges.
On my router, the GL-MT6000 (Flint 2), only the Disabled option was available, accompanied by the message: The dnsmasq.nftset is not supported on this system..
I would definitely want this feature enabled if I plan on routing specific websites (such as BBC iPlayer) through specific interfaces.
OpenWrt 24.10 utilises a modern nftables environment. The warning regarding dnsmasq.nftset usually indicates that the specific older integration script for dnsmasq cannot be found, but do not let this discourage you.
Why is it “Disabled”?
For pbr to use domain sets, it requires dnsmasq (which is present on my system) to be compiled with nftset support. In newer OpenWrt releases, the standard dnsmasq package often needs to be replaced by dnsmasq-full.
How to fix it To unlock this option, we usually need to swap the DNS components. We can do this by running the following commands:
opkg update
opkg remove dnsmasq
opkg install dnsmasq-full
Before moving forward, let’s also run these commands:
rm /tmp/luci-indexcache*
service rpcd restart
When we head back to our web interface and refresh the page, the Dnsmasq nft set option will be available in the dropdown list.
- IPv6 Support
This toggles whether the policy engine creates routing tables and firewall rules for IPv6 traffic.
- Recommendation: Set this to Enabled if you have IPv6 provided by your ISP. Leaving this disabled will result in “leaks”—while your IPv4 traffic might follow your policies, IPv6 traffic will bypass them and exit via your default ISP gateway.
Advanced Configuration
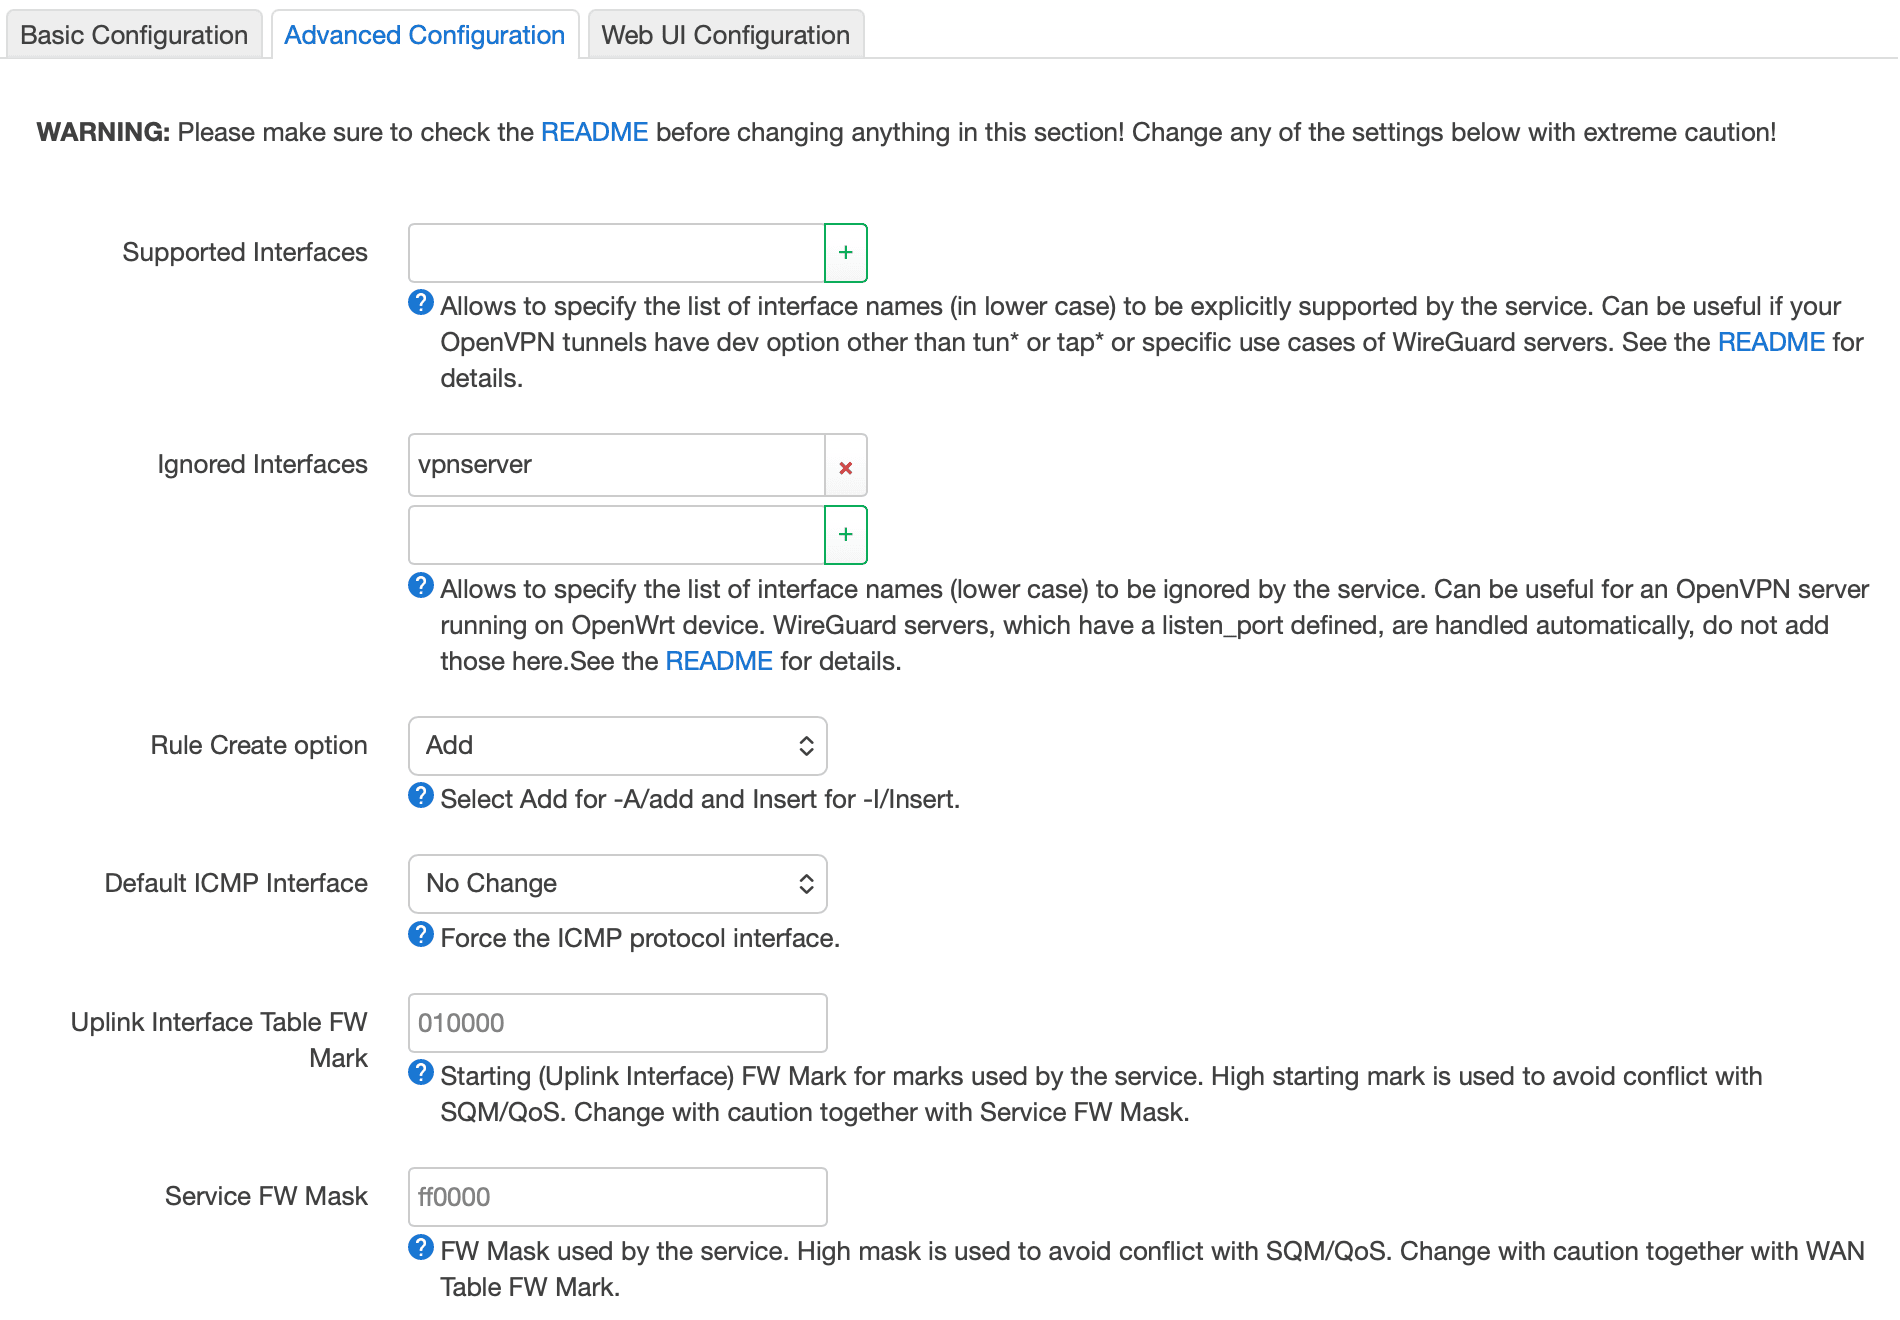
- Supported Interfaces
This tells
pbrexactly which network interfaces it is permitted to route traffic through. If left blank, it usually attempts to auto-detect tunnels (such astun*orwg*).
- Recommendation: Leave this blank for now. If you eventually find that a specific WireGuard or OpenVPN tunnel is not appearing in the “Interface” dropdown menu when creating policies, you can manually add its name here.
- Ignored Interfaces
This prevents
pbrfrom attempting to manage traffic for specific interfaces, such as a VPN server you might be hosting for remote access.
- Recommendation: Retain the default (
vpnserver). You do not wantpbrattempting to route traffic that is entering your router from an external source.
- Rule Create option
This determines whether
pbrrules are appended to the bottom of the firewall list (Add) or placed at the very top (Insert).
- Recommendation: Add (the default). Inserting rules at the top can sometimes interfere with core system firewall bypasses (such as traffic intended for the router itself). “Add” is safer and usually sufficient for most setups.
- Default ICMP Interface
This forces “pings” and “traceroutes” to go through a specific interface, regardless of other existing rules.
- Recommendation: No Change (the default). If you force this to “wan”, you will not be able to “ping” through your VPN to verify its connectivity. It is better to allow ICMP to follow the same policies as your data.
Uplink Interface Table FW Mark & Service FW Mask are technical “tags” (hexadecimal values) used to track packets in the system memory so the router knows which route they belong to. Do not change these. These high values (starting with 010000) are specifically set to avoid clashing with other services such as SQM (Smart Queue Management) or QoS. Unless you have a very specific manual firewall configuration, the defaults are perfect.
Web UI Configuration
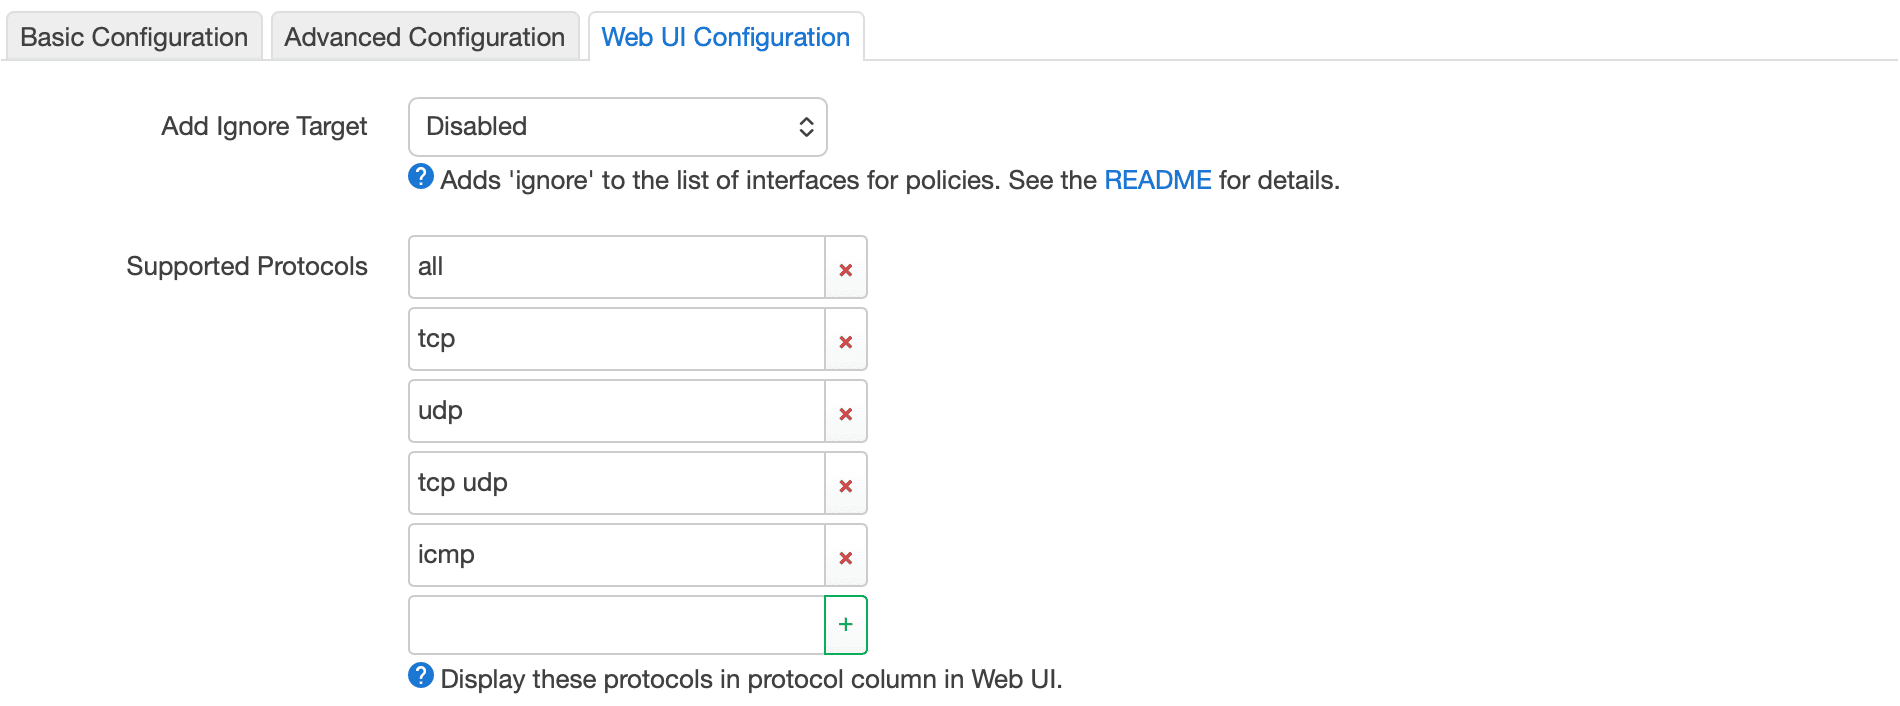
These final two options purely affect how you interact with the luci-app-pbr interface when you begin creating rules.
- Add Ignore Target
This adds an ‘Ignore’ option to the list of interfaces for policies. If you set this to Enabled, any traffic assigned the ‘Ignore’ flag will bypass
pbrentirely and follow the router’s default routing table.
- Recommendation: Enabled. This is incredibly useful for troubleshooting. If a specific device or website is malfunctioning, you can quickly set its policy to “Ignore” to determine if
pbris the cause without having to delete the entire rule.
- Supported Protocols
This defines which protocol options appear in the dropdown menu when creating a new policy.
- Recommendation: Leave as default. Generally, you will primarily use “tcp udp” for standard browsing or “all”. Whilst having “icmp” visible is helpful if you wish to route pings differently from data, “all” or “tcp udp” covers 99% of use cases for most users.
Now we can press the Save & Apply button.
Policies
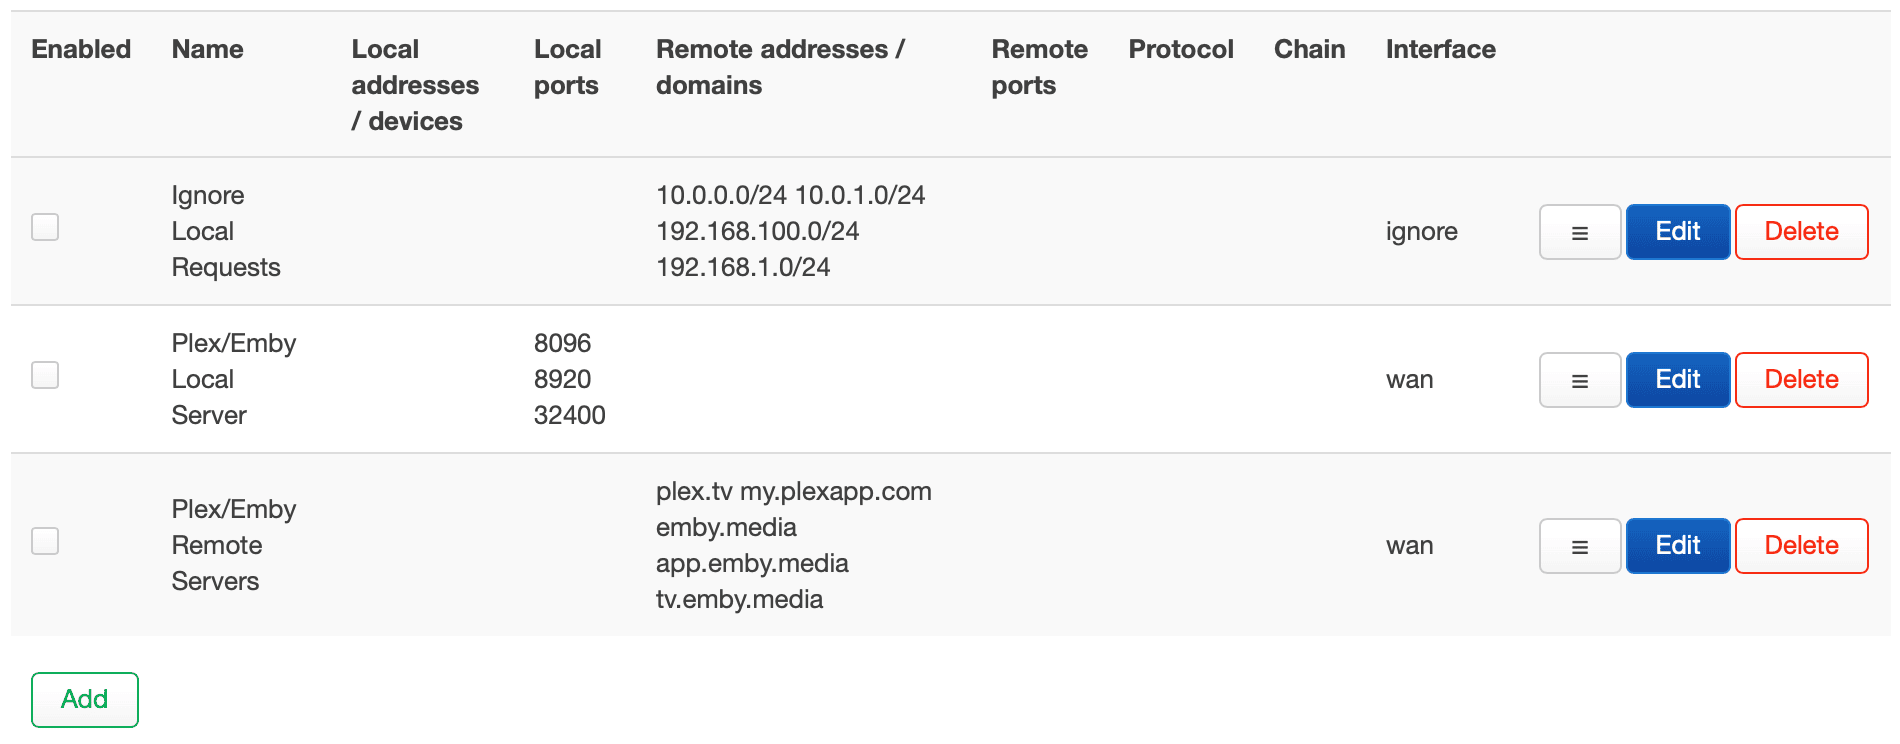
Now we will discuss the policies section which, by default, contains the rules shown above. These default rules are “boilerplate” templates included by the developer to prevent common headaches.
Ignore Local Requests
This is a safety net to ensure that traffic between your own devices (such as your phone communicating with your printer) does not get redirected into a VPN tunnel and dropped. You may need to adjust this slightly, especially if you change the default IP mask used by OpenWrt from the standard 192.168.1.x range.
Plex/Emby Rules These ensure that media server traffic remains on your primary ISP line (WAN) so that remote streaming functions correctly and is not throttled by a VPN.
All of these policies are initially set to Disabled (the ‘Enabled’ tick box is not selected). My recommendation is to tick Enabled for Ignore Local Requests after making any necessary adjustments to the IP range.
DNS Policies

This section is used to force specific devices to use a designated DNS server, bypassing your router’s global DNS settings.
- Recommendation: Keep this Disabled. As I have a global Cloudflare DoH (DNS over HTTPS) gateway running on port 5053, I want all my devices to benefit from that privacy. The default example (redirecting
192.168.1.5to Cloudflare’s1.1.1.1) is only useful if you have a “rebel” device—such as a Google Home or a Smart TV—that attempts to use hardcoded DNS settings, and you wish to intercept them. Unless you have a specific reason to override your DoH proxy for a particular device, leave this section empty.
DSCP Tagging

DSCP (Differentiated Services Code Point) is used for Quality of Service (QoS). It “marks” packets so that your ISP or another router knows which traffic is high priority (such as VoIP) and which is low priority (such as a background download).
- Recommendation: Leave blank. Most residential ISPs ignore DSCP tags entirely. Unless you have a highly complex multi-router setup where you have configured specific hardware to prioritise certain “marked” packets, completing this section will not provide any noticeable benefit and might even cause issues with some external networks.
Custom User File Includes
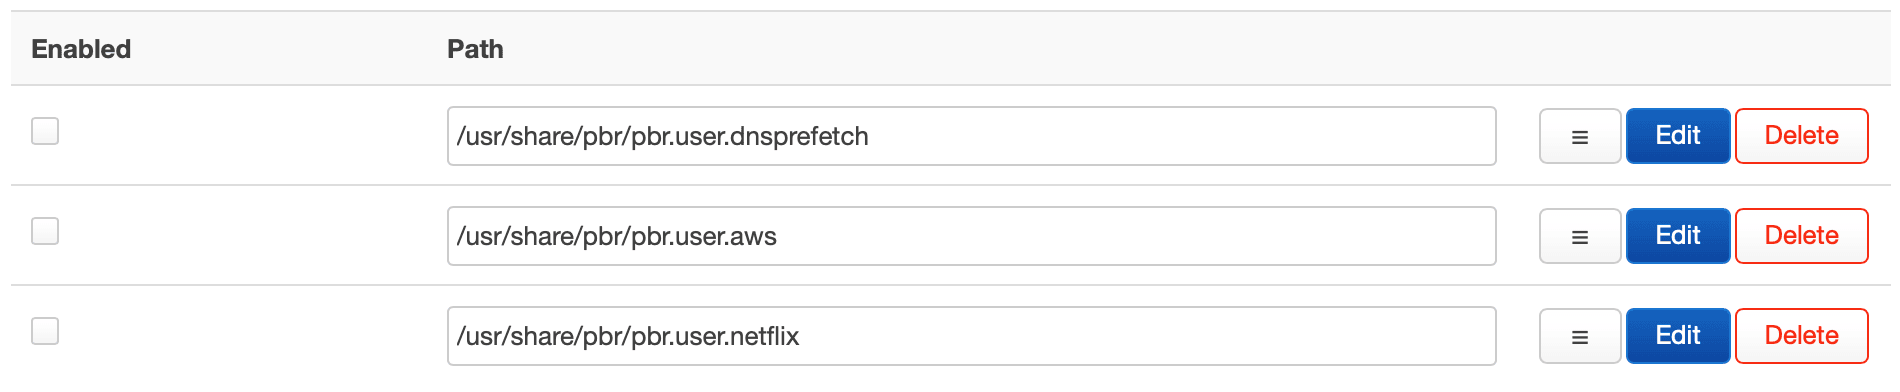
These are pre-made scripts that assist
pbrin managing services that utilise thousands of frequently changing IP addresses.
- pbr.user.dnsprefetch: Highly recommended to Enable. This helps resolve domains in your policy list before you even visit them, ensuring the “initial load” of a routed website feels significantly faster.
- pbr.user.aws: Keep Disabled unless you specifically wish to route all Amazon Web Services traffic through a particular interface (which is generally inadvisable as it encompasses a vast portion of the internet).
- pbr.user.netflix: Enable if you plan on routing Netflix. Netflix is notoriously difficult to route because they utilise hundreds of different IP ranges; this script handles the complex management for you.
Status

Now we are ready to Enable our service under Service Control. Follow this by pressing the Start button.
Use Case
My objective is to use pbr to direct the entirety of the traffic from one of the devices on my network through a Cloudflare WARP tunnel.
Referencing my previous post, Cloudflare WARP and a router with OpenWrt, I utilised wgcf to set up a virtual interface for Cloudflare WARP routing.
Important
Because traffic will be routed via pbr, when setting up the WireGuard interface for the Cloudflare WARP tunnel, you must remember NOT to tick Route Allowed IPs. Otherwise, all of your traffic will be routed through this new interface by default.
For the Cloudflare WARP interface in the aforementioned article, I recommended attaching it to the wan zone within the Firewall Settings. However, if your provider supplies native IPv6 support, you should not enable IPv6 Masquerading, as your devices will lose their individual IPv6 addresses and all traffic will be routed through the router’s single IPv6 address.
In that instance, I recommend creating an additional Firewall zone where you can set Masquerading for IPv4 and (in Advanced Settings) IPv6. This zone will be used explicitly for the Cloudflare WARP interface. All other options should remain exactly like the default wan zone.
Once our additional interface is up and running, let’s perform a quick check to ensure everything is functioning correctly.
Navigate to Services > Policy Routing and, by clicking the Add button in the policy section, create a rule to route the traffic of your computer through the new interface.
In Local addresses/devices, you need to target your device on the local network using both IPv4 and IPv6. This may prove problematic if these addresses change; therefore, the simplest method is to target the device by its name. You can find this name on the main status page when you log into your router, under Active DHCP Leases.
Remember, if your device name appears as “iPhone-Darek (iPhone-Darek.lan)”, you should only type “iPhone-Darek”.
PBR will automatically resolve the name to both its current IPv4 and IPv6 addresses. If the addresses change, the rule remains valid.
Type your device name, select the interface through which it should be routed, and add the rule by pressing Save, followed by the Save & Apply button.
To verify quickly if all traffic is passing through the new interface, simply head to speedtest.net and check the connection source on the left. If you are using Cloudflare WARP, it will state Cloudflare Warp (instead of toob, which is my current ISP).

The decision regarding what you wish to route, and how, now rests entirely with you.
Enjoy!


Comments & Reactions