Installing a VPN server on a router with OpenWrt (WireGuard)

If you have a router with OpenWrt, you have probably thought more than once about how to set up a VPN server on it so that you can connect to the network from outside your home or office and have access to local data, such as a network drive or printer.
In the case of OpenWrt, if you start looking for information about VPNs, you will immediately come across details about OpenVPN.
Initially, I thought about creating a post about installing OpenVPN on a router with OpenWrt; however, the further into the forest, the more trees.
The configuration can start simple. You can even add an interface from the browser; however, everything is far from simple and clear. Being halfway through my post, I realised that further creation of it would introduce more complications than I initially assumed. At this point, I remembered WireGuard.
Both OpenVPN and WireGuard are not available by default on operating systems (Windows, macOS, as well as Android or iOS). In both cases, you must use a dedicated application to connect.
WireGuard won over OpenVPN for me because it is much easier to set up and manage. It is also much faster, offers a higher level of security, and, in the case of mobile devices, does not drain our battery like OpenVPN does.
While in the case of OpenVPN, you had to execute a series of commands related to setting up the server from the SSH terminal, in the case of WireGuard, we can set up our server with minimal use of the terminal (or even without it) and do the rest via a web browser. All in a user-friendly way.
So let’s get started…
Optimised for OpenWrt 25.12 using
apkinsteadopkg
Installing WireGuard on OpenWrt (Server)
First, we need to install a few packages for WireGuard itself and those that add the ability to manage it from a web browser.
From Web Browser
Go to System > Software and, in the Actions: section, click on the green button Update lists….
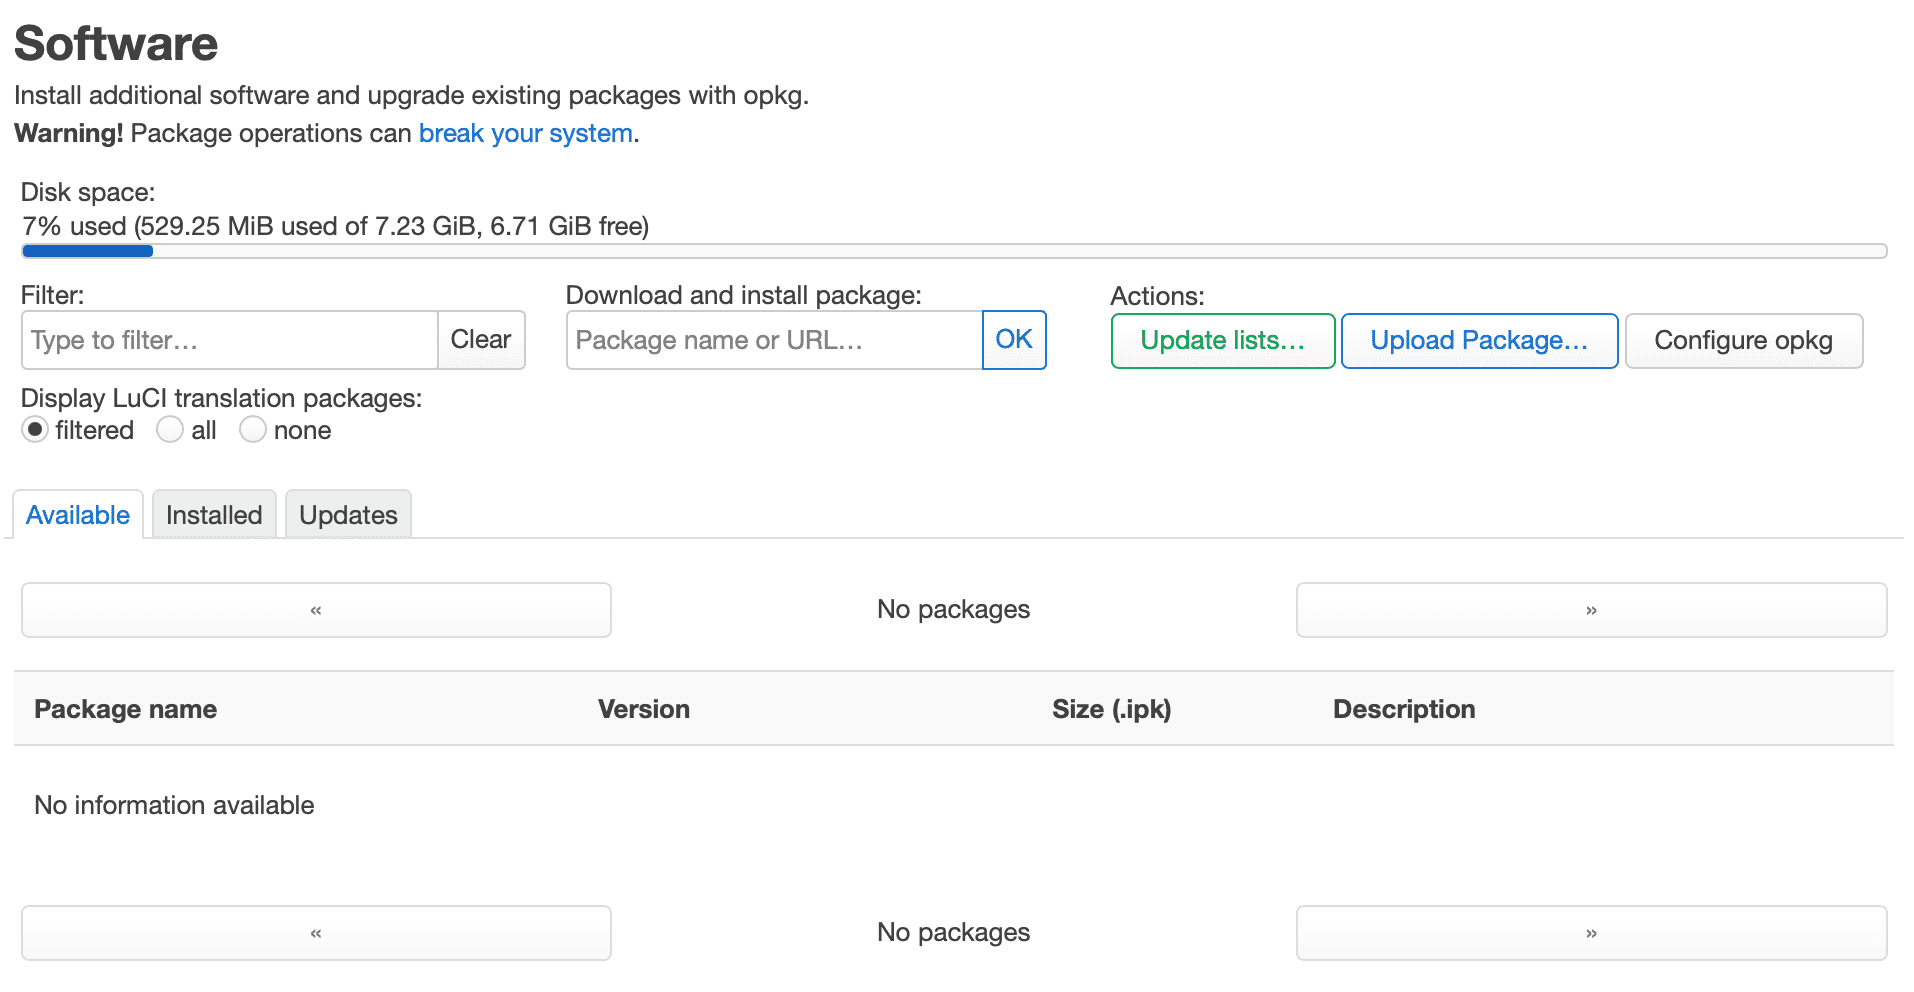
Search for the following packages and click the install button next to them.
luci-proto-wireguard
kmod-wireguard
wireguard-tools
From Terminal
Run the following commands:
apk update
apk add luci-proto-wireguard kmod-wireguard wireguard-tools
Since WireGuard uses kernel-level elements for its functionality, we need to restart our router at this stage to ensure everything loads correctly.
Restart your router.
Restarting router
From Web Browser
Go to System > Reboot and click the Perform reboot button.
From Terminal
Type command:
rebootDo not proceed if you have not restarted your router after installing the above packages.
Setting up WireGuard Server Interface on OpenWrt
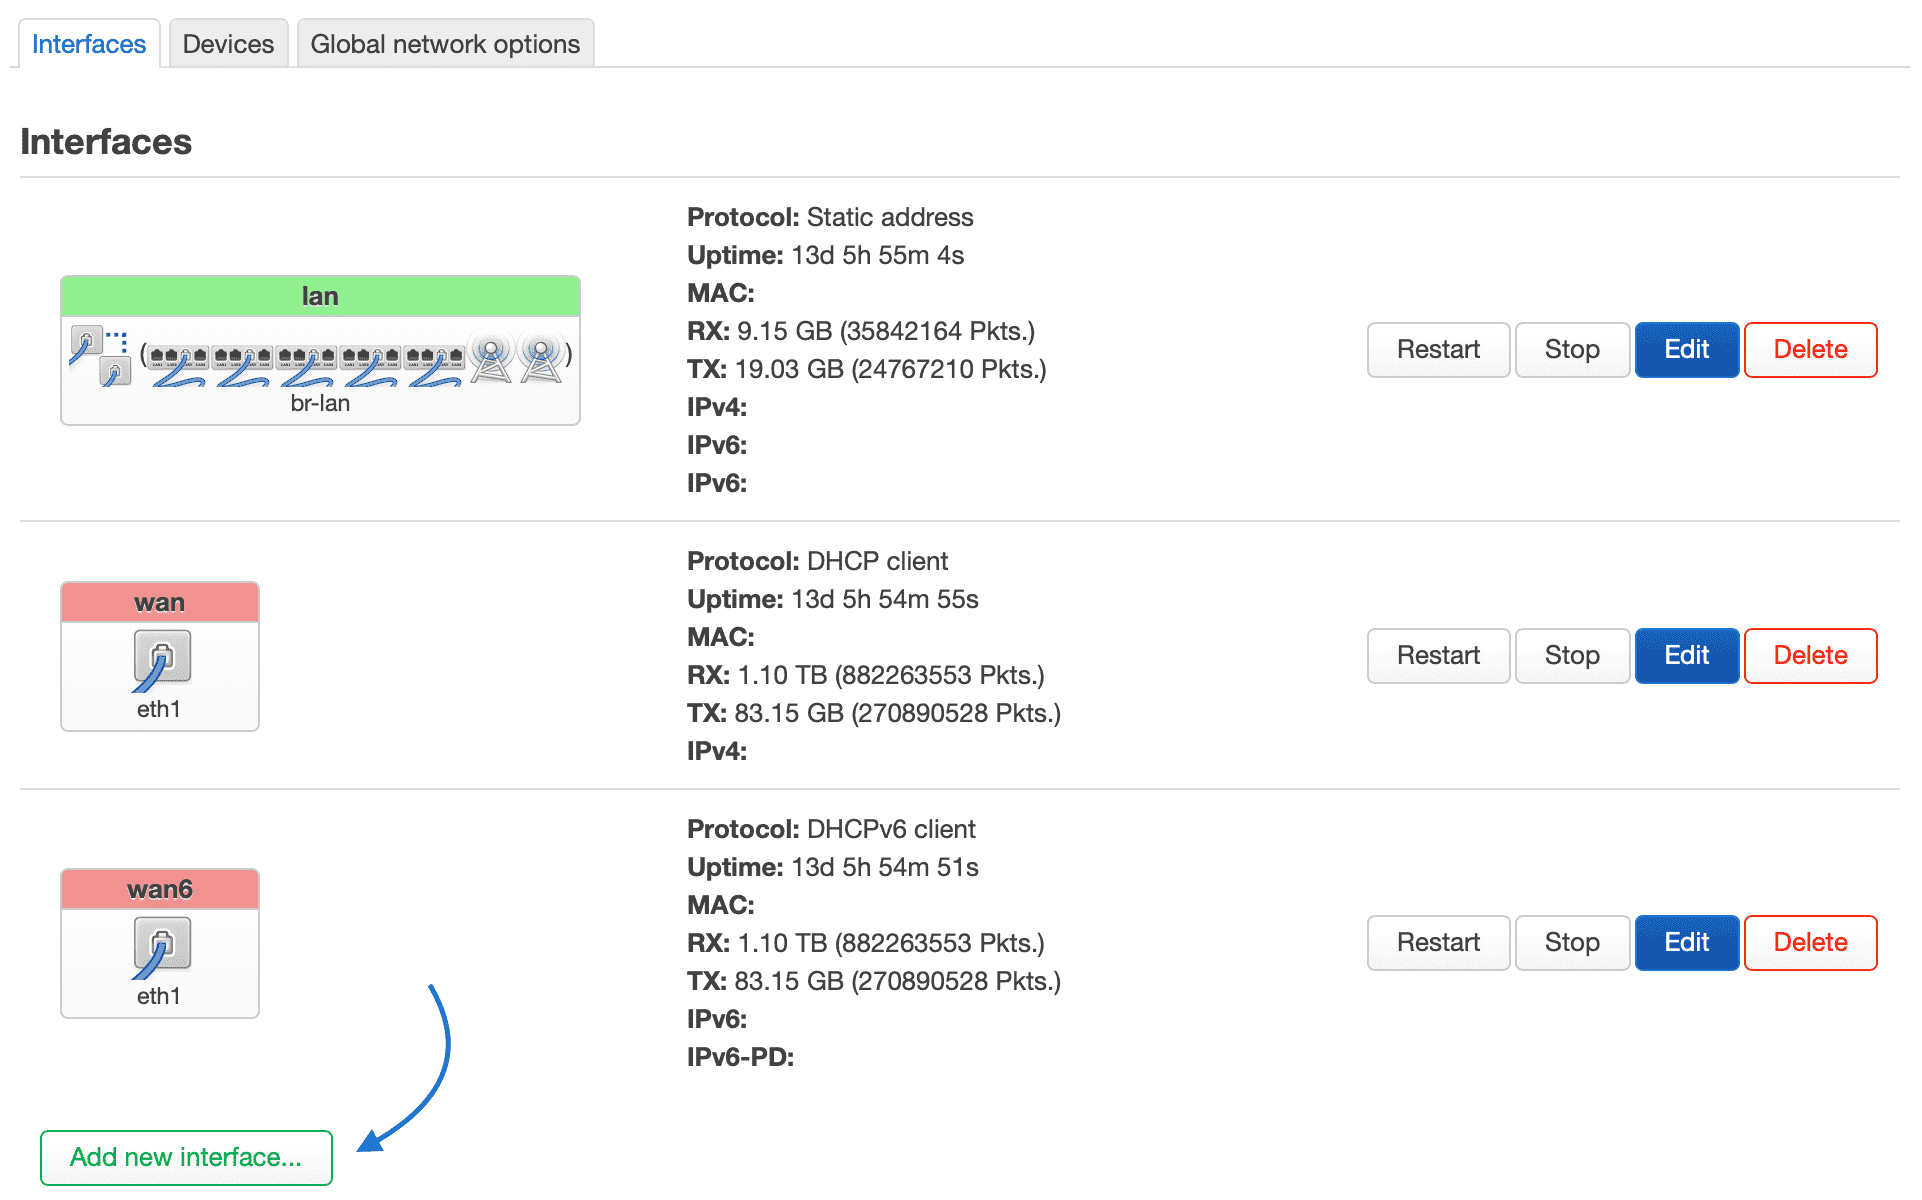
Let’s set up our Network > Interfaces by clicking the Add new interface button.
Specify a name for your interface (like wg0) and select the protocol WireGuard VPN.

Confirm by clicking the green Create interface button.
In the next step, you’ll see the Private key and Public key for our server highlighted in red, indicating they’re missing. These keys are necessary to establish a connection with clients.
You can add them in two ways.
From Web Browser
Simply click the Generate new key pair button.

Or use the terminal.
From Terminal
First, create a folder to store your settings.
mkdir -p /etc/wireguardTo generate the Private key and Public key, run the following command.
wg genkey | tee /etc/wireguard/server-privatekey | wg pubkey > /etc/wireguard/server-publickeyRead your generated keys and paste them into the corresponding fields in the web interface.
To read the Private key, use the command:
tail /etc/wireguard/server-privatekeyTo read the Public key, use the command:
tail /etc/wireguard/server-publickeyNext, set the Listen Port, which WireGuard will use to listen for incoming client connections.
- Listen Port: 1234
Next, enter the local IP address of your server. You don’t need to worry about this address conflicting with your local network. Later, we’ll configure it to connect to local addresses, which, by default (in an OpenWrt environment), will be in the range of 192.168.1.x.
- IP Addresses:
- 10.0.0.1/24
- fd42:42:42:1::1/64
Here, I set the local IPv4 and local IPv6 addresses for our server.
Next, navigate to the Firewall Settings tab.
From the Create / Assign firewall-zone item, select your LAN network. This allows you to see and connect to devices on the local network.
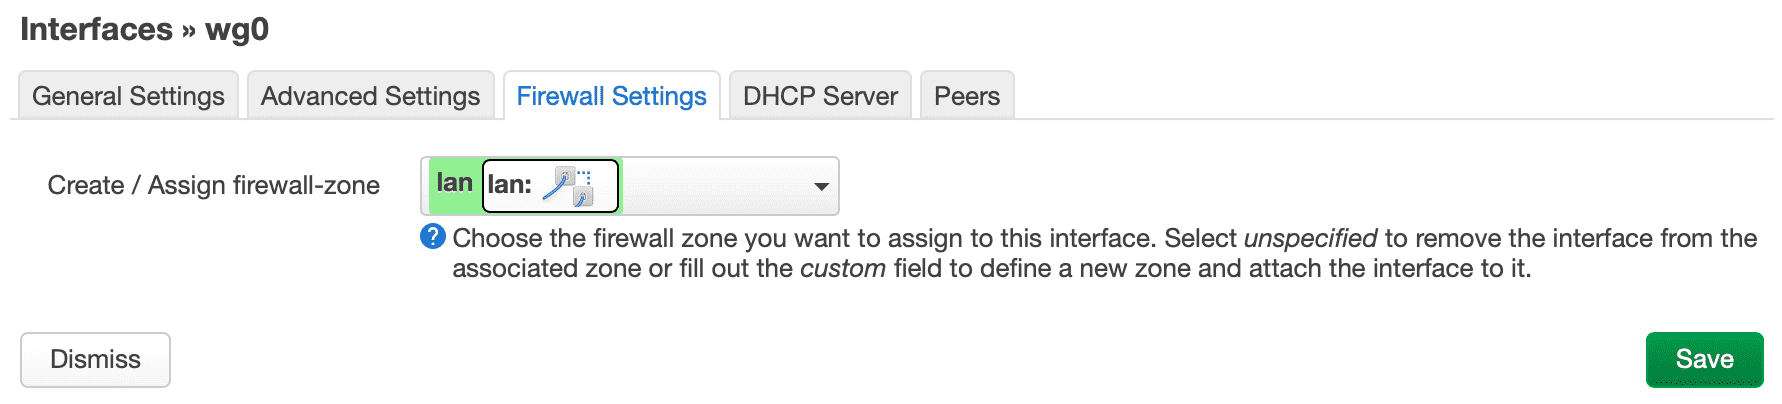
At this stage, click the Save button, then Save & Apply.
Your server interface is ready and running.
Before anyone can connect to it, we need to add specific firewall rules.
Adding Firewall Rules for WireGuard Server
To connect to our router via port 1234/udp, we need to permit it at the firewall level.
There are two ways to accomplish this.
From Web Browser
Go to Network > Firewall and select the Traffic Rules tab.
Scroll to the bottom of the rules and press the green Add button. Add the rule as shown in the image below.
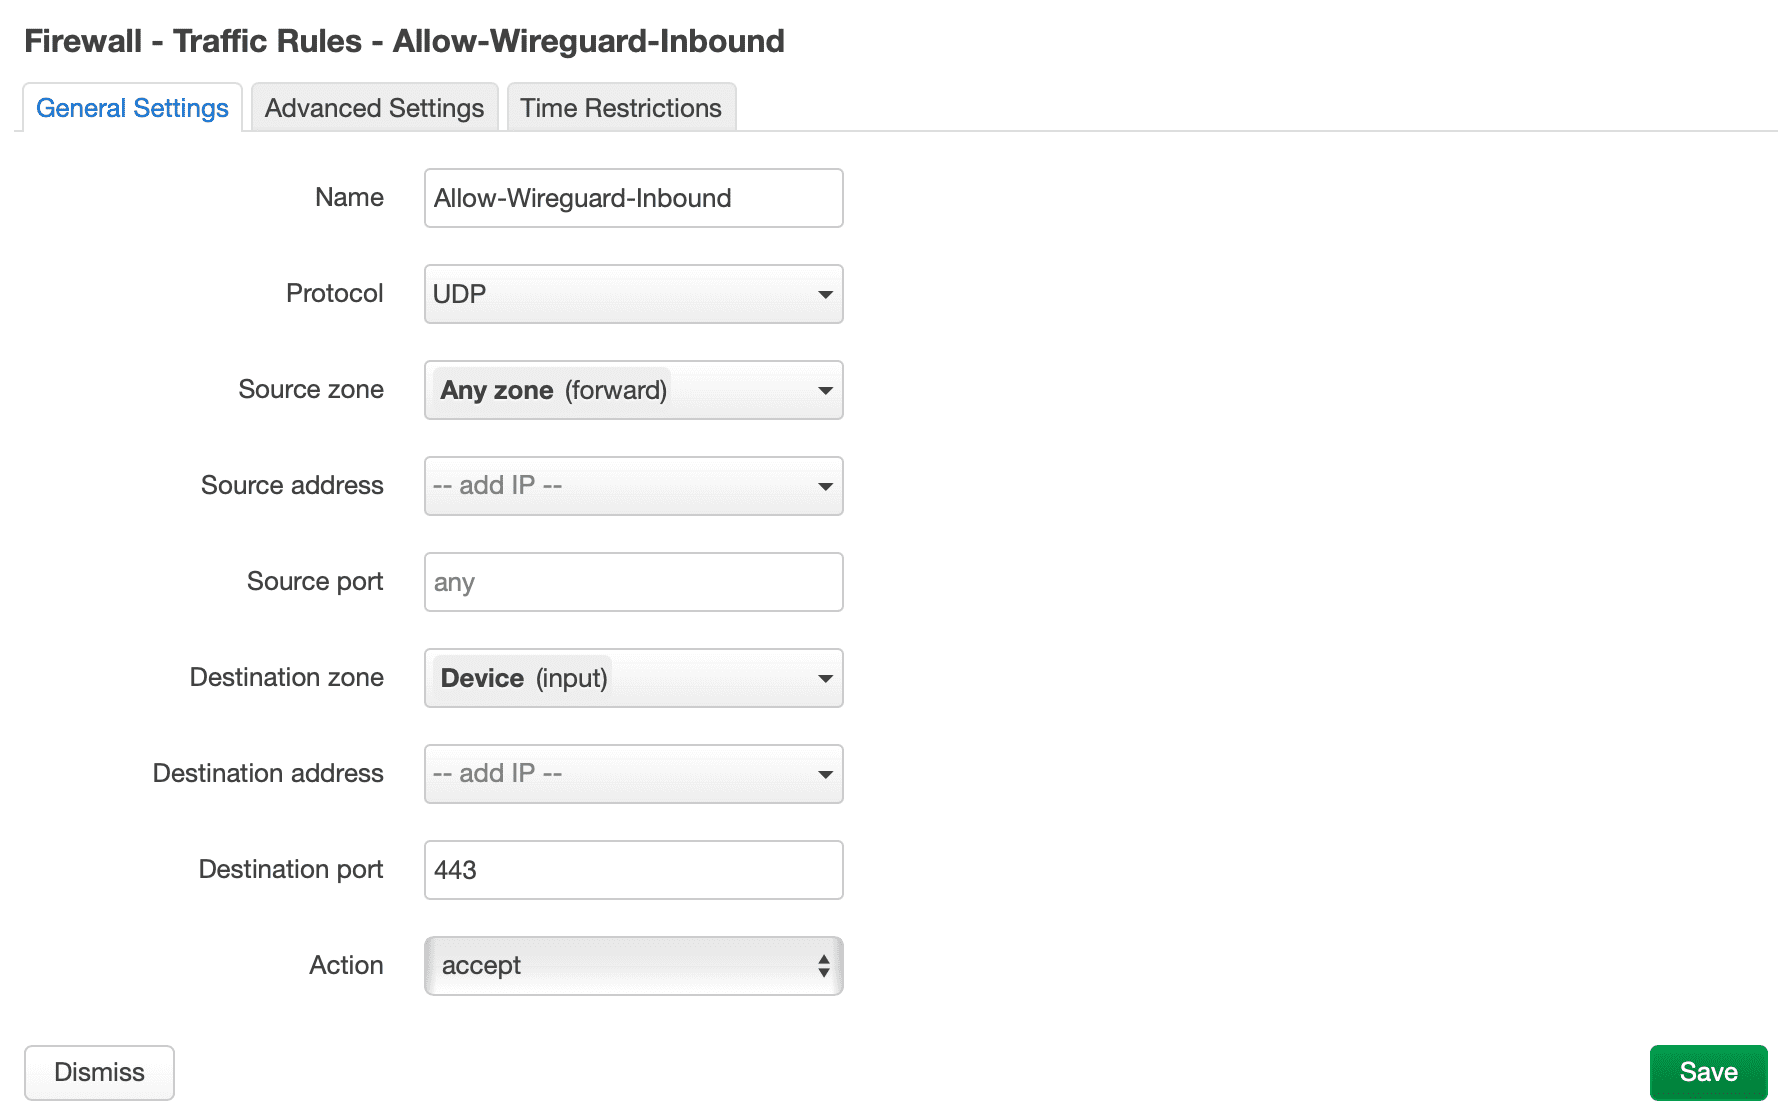
Once done, press the Save button, then Save & Apply.
From Terminal
Execute the following command in the terminal to add a firewall rule.
uci add firewall rule
uci set firewall.@rule[-1].src="*"
uci set firewall.@rule[-1].target="ACCEPT"
uci set firewall.@rule[-1].proto="udp"
uci set firewall.@rule[-1].dest_port="1234"
uci set firewall.@rule[-1].name="Allow-Wireguard-Inbound"
uci commit firewall
Follow by restarting the firewall using the command below:
/etc/init.d/firewall restartSetting WireGuard Users - Peers
Now we are ready to add users who will be using the service.
Head to Network > Interfaces and click the Edit button.

From there, go to the Peers tab.
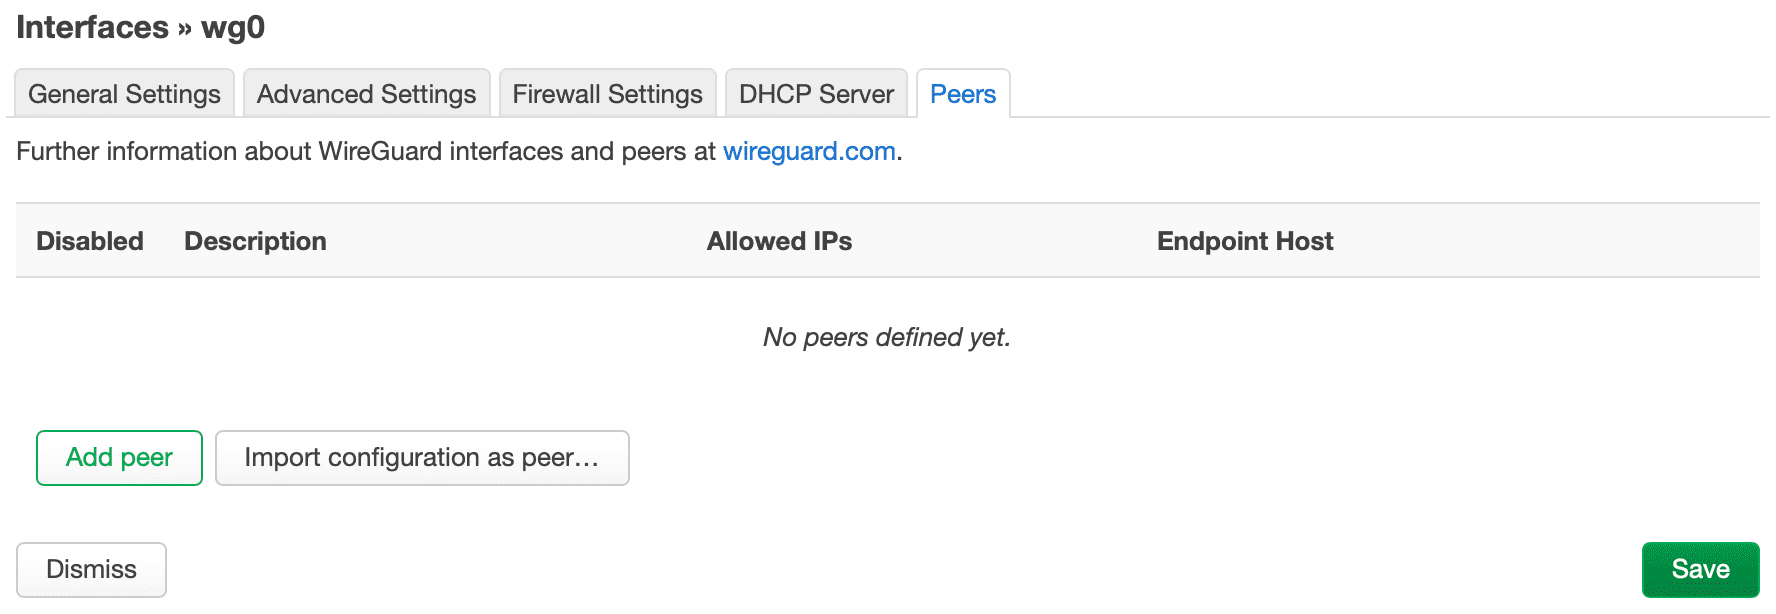
Click the green Add peer button.
Before filling in the fields for the first user, ensure you have their Public key and Private key.
There are two ways to add them.
From Web Browser
Simply click the Generate new key pair button.
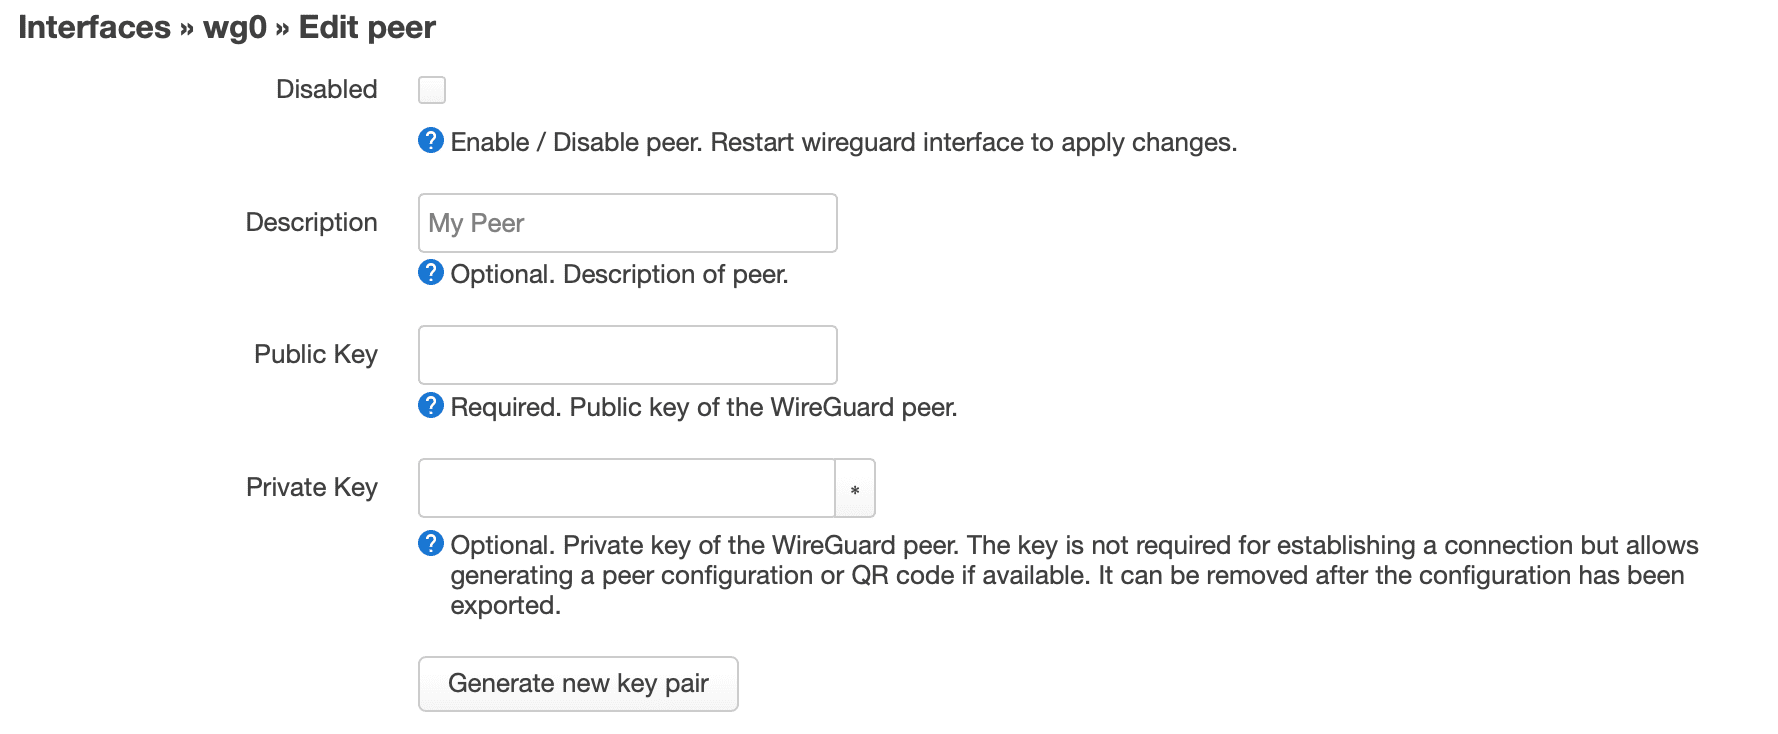
Or use the terminal.
From Terminal
To create the Private key and Public key for the first user, run the following command.
wg genkey | tee /etc/wireguard/user1-privatekey | wg pubkey > /etc/wireguard/user1-publickeyNow, read your keys and paste them into your web interface.
tail /etc/wireguard/user1-publickey
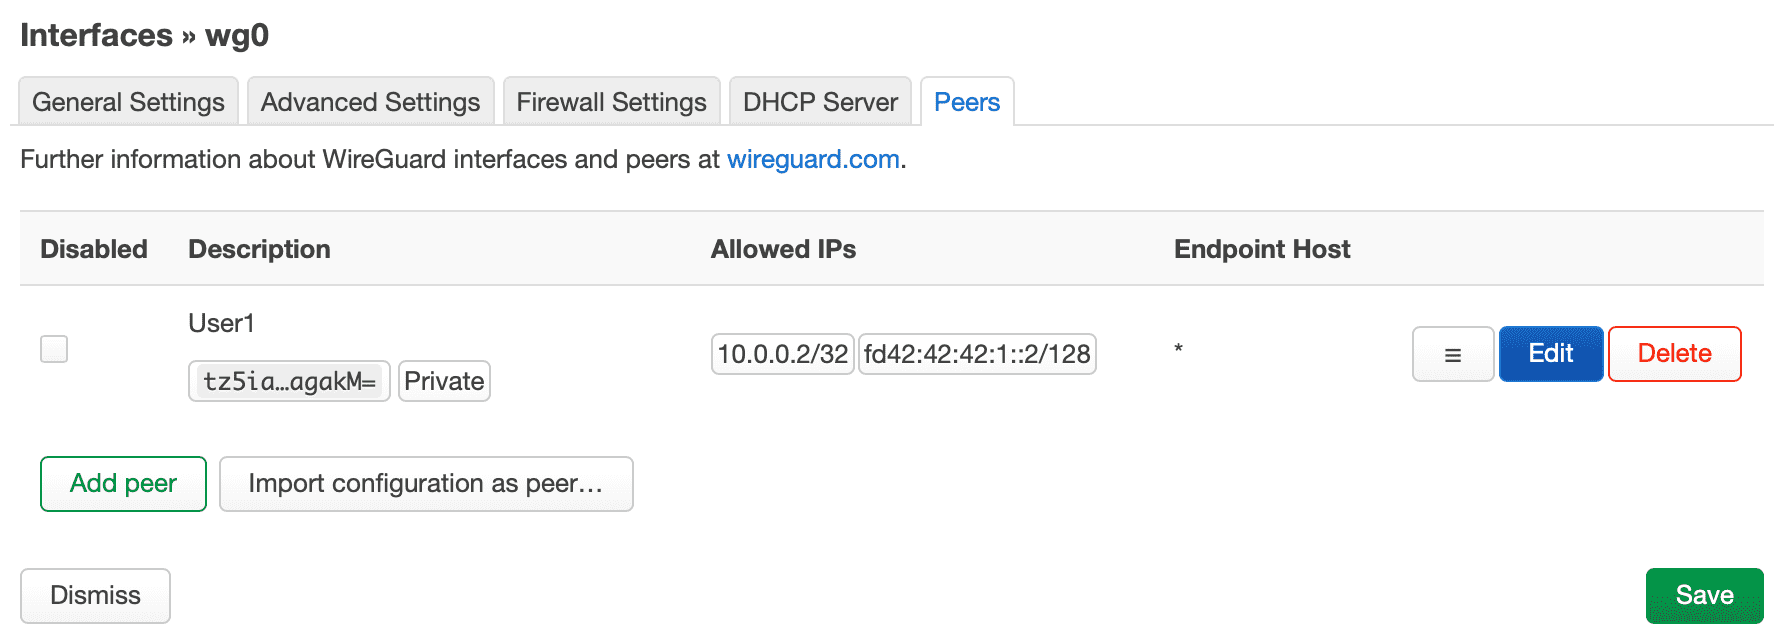
tail /etc/wireguard/user1-privatekeyIn the Description field, specify your username.
Go to the Allowed IPs section and enter a static address that will be used by the client, similar to the server’s IP address (10.0.0.1/24, fd42:42:42:1::1/64).
- 10.0.0.2/32
- fd42:42:42:1::2/128
Notice that the user’s IP mark ends with /32 (for IPv4) and /128 (for IPv6). Each user is assigned a single IP address, meaning a single credential can only be used to connect one device at a time.
Let’s check Route Allowed IPs.
If you have more than one internet connection set up using mwan3 (as described in the post: Adding a second internet connection to a router with OpenWrt), leave Route Allowed IPs unchecked.
In Persistent Keep Alive, enter the value 25, which is the recommended value if this device is behind a NAT.
Press the Save button to add the peer configuration.
In the same way, you can add another user (peer) to your configuration.
The next user will have new keys generated and allowed IPs in the next order, i.e.,
10.0.0.3/32andfd42:42:42:1::3/128.
Once all peers have been added, confirm everything with the Save button. In the interfaces section, click Save & Apply.
At this stage, you must also restart the WireGuard interface to refresh the configurations and peers that have just been added.

In this way, we have a WireGuard-based VPN server running.
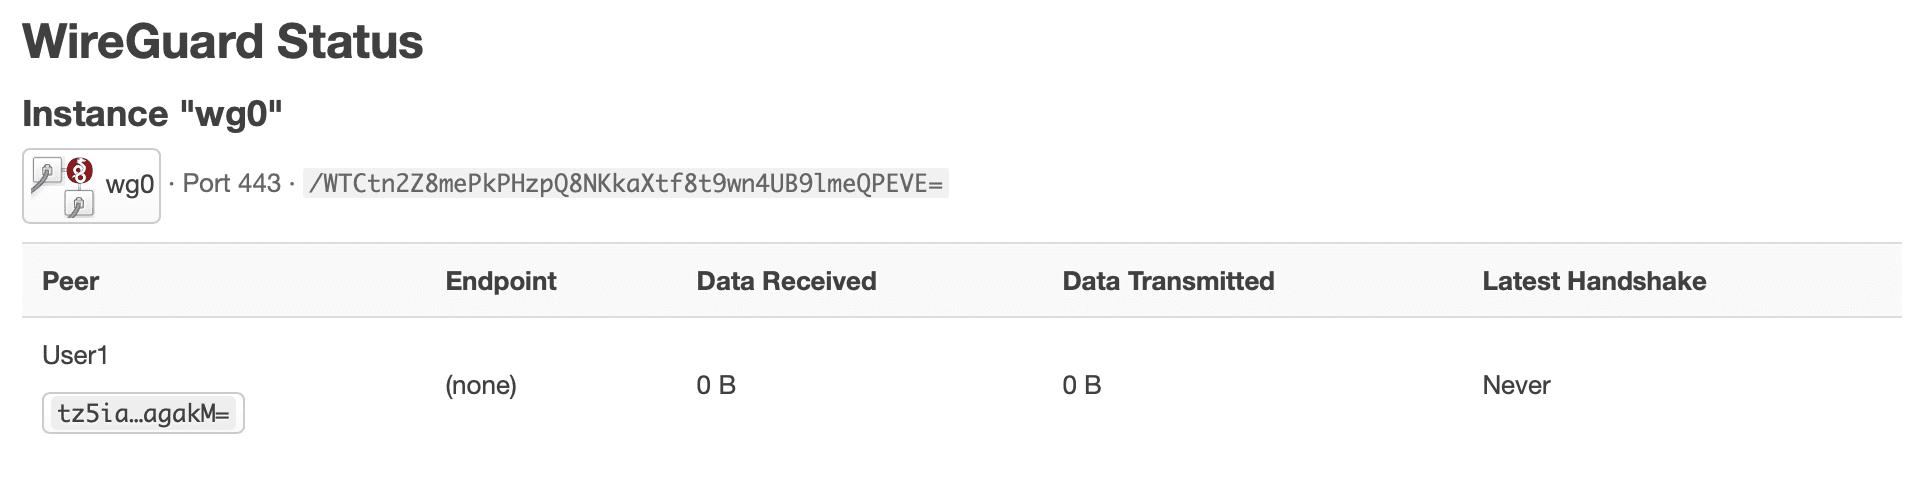
WireGuard Status
When your WireGuard server is running, you can check its status and manage users and their connection status by going to Status > WireGuard in the web interface.
On this page, you will see the server’s public key and the port (Listen Port) on which the service is running.
Now we are ready to set up our client devices and verify that everything is working.
Setting up WireGuard User Devices
It’s time to set up user (peer) devices that will connect to our server.
I’ll use the iPhone (iOS) app as an example. The setup is analogous on other operating systems.
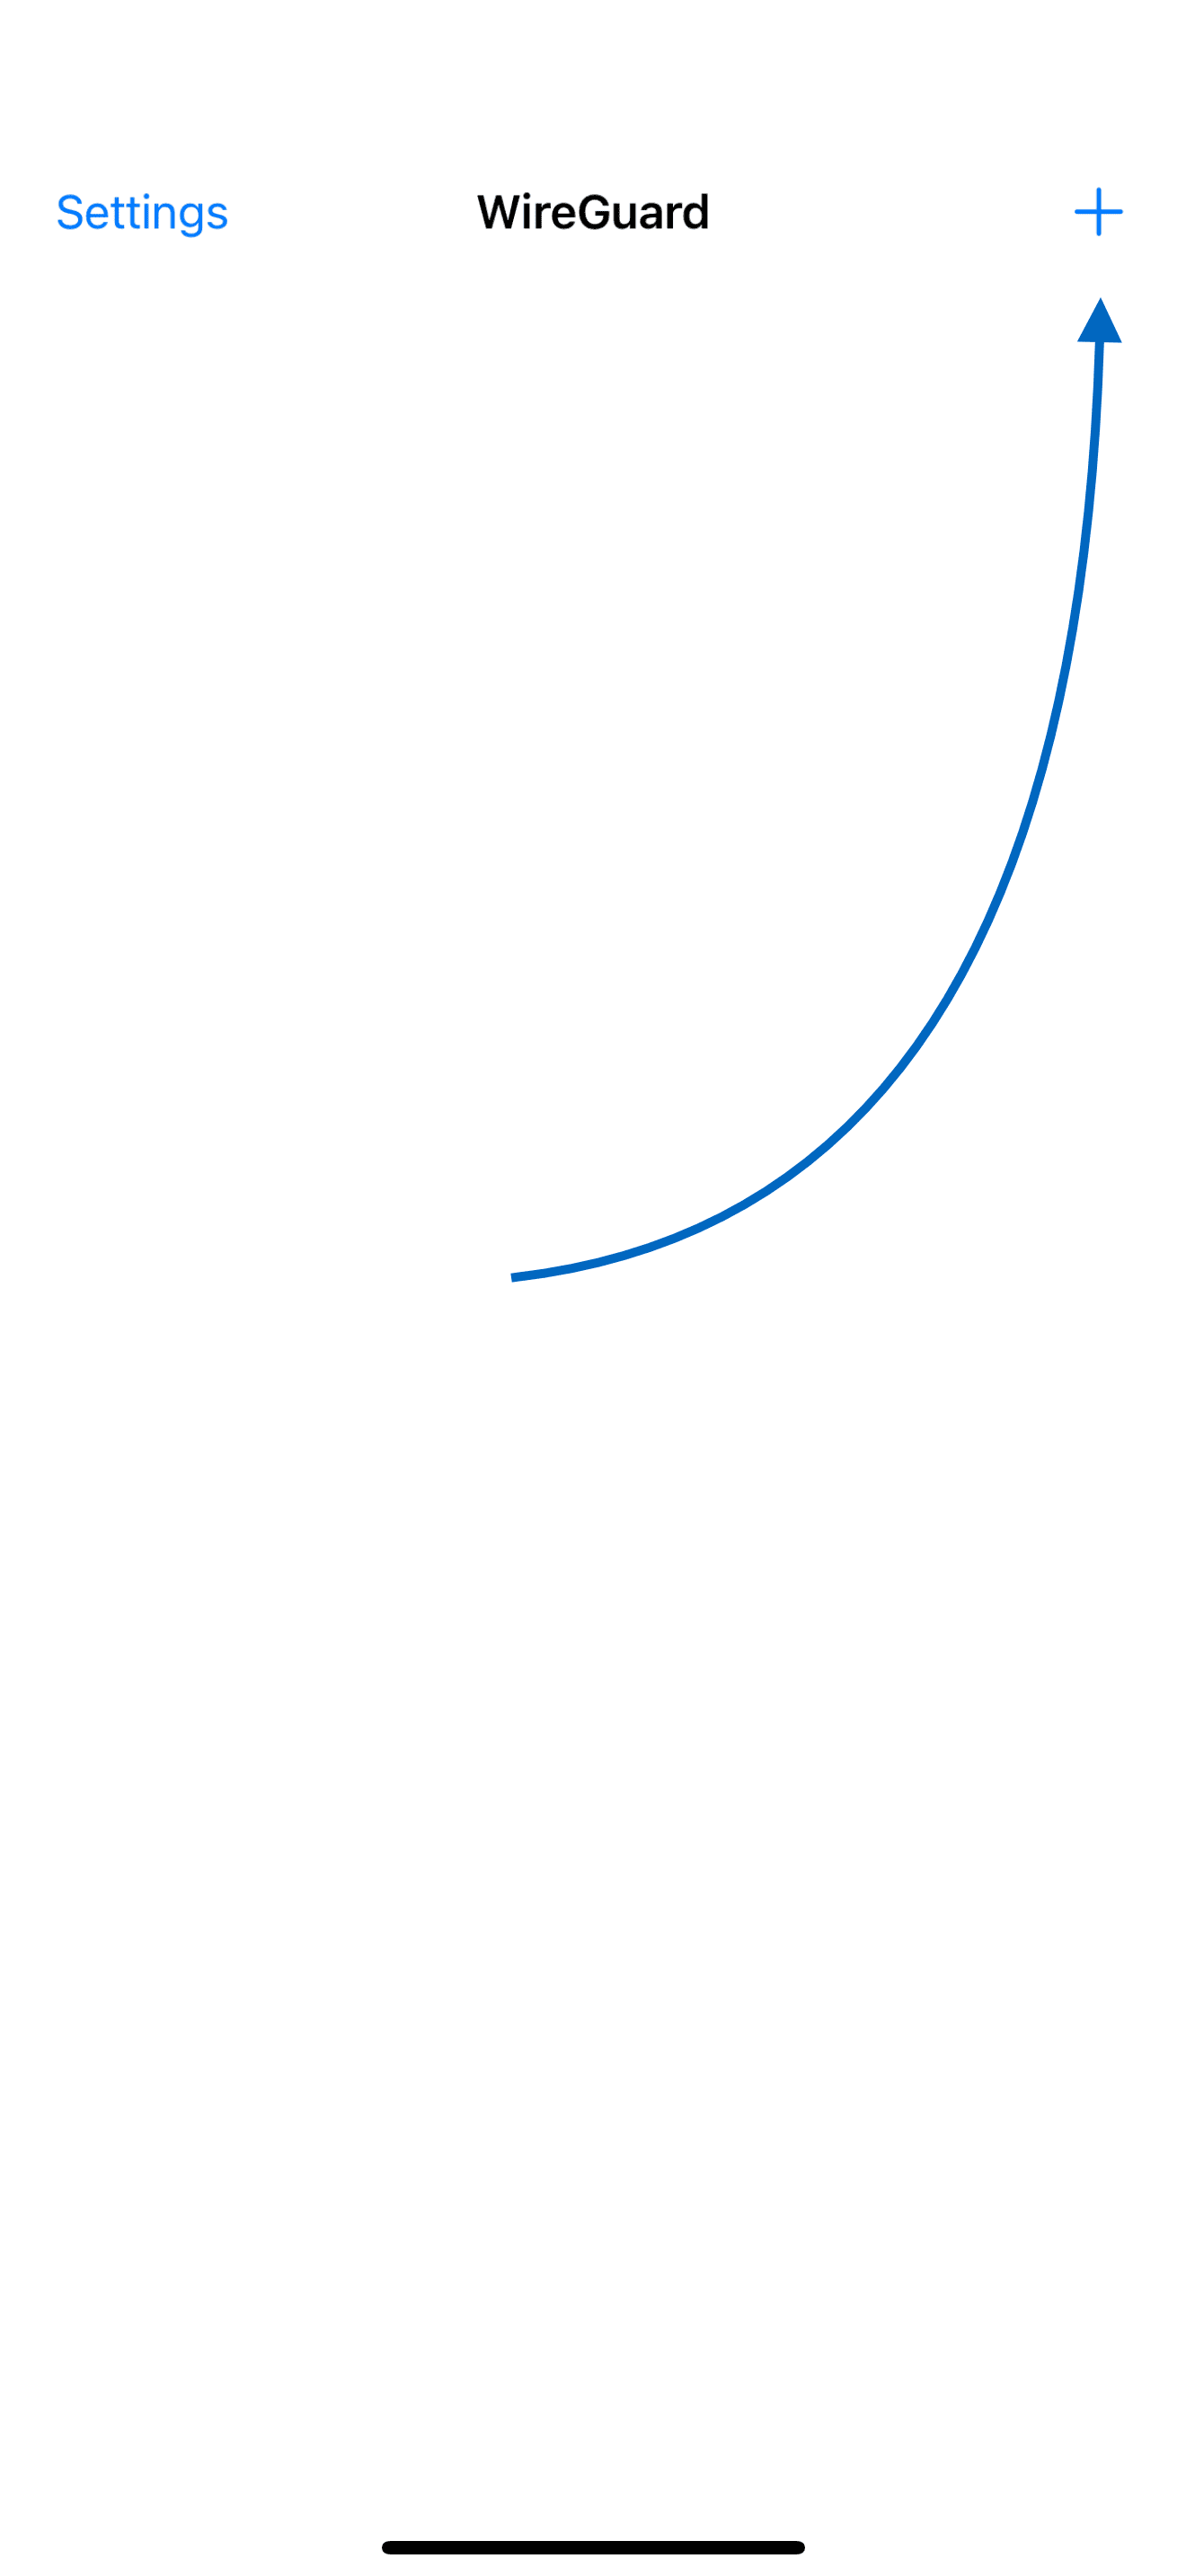
Download the WireGuard application from the App Store.
For Android devices, download it from the Play Store.
After starting the application, click on the Add a tunnel button.
[
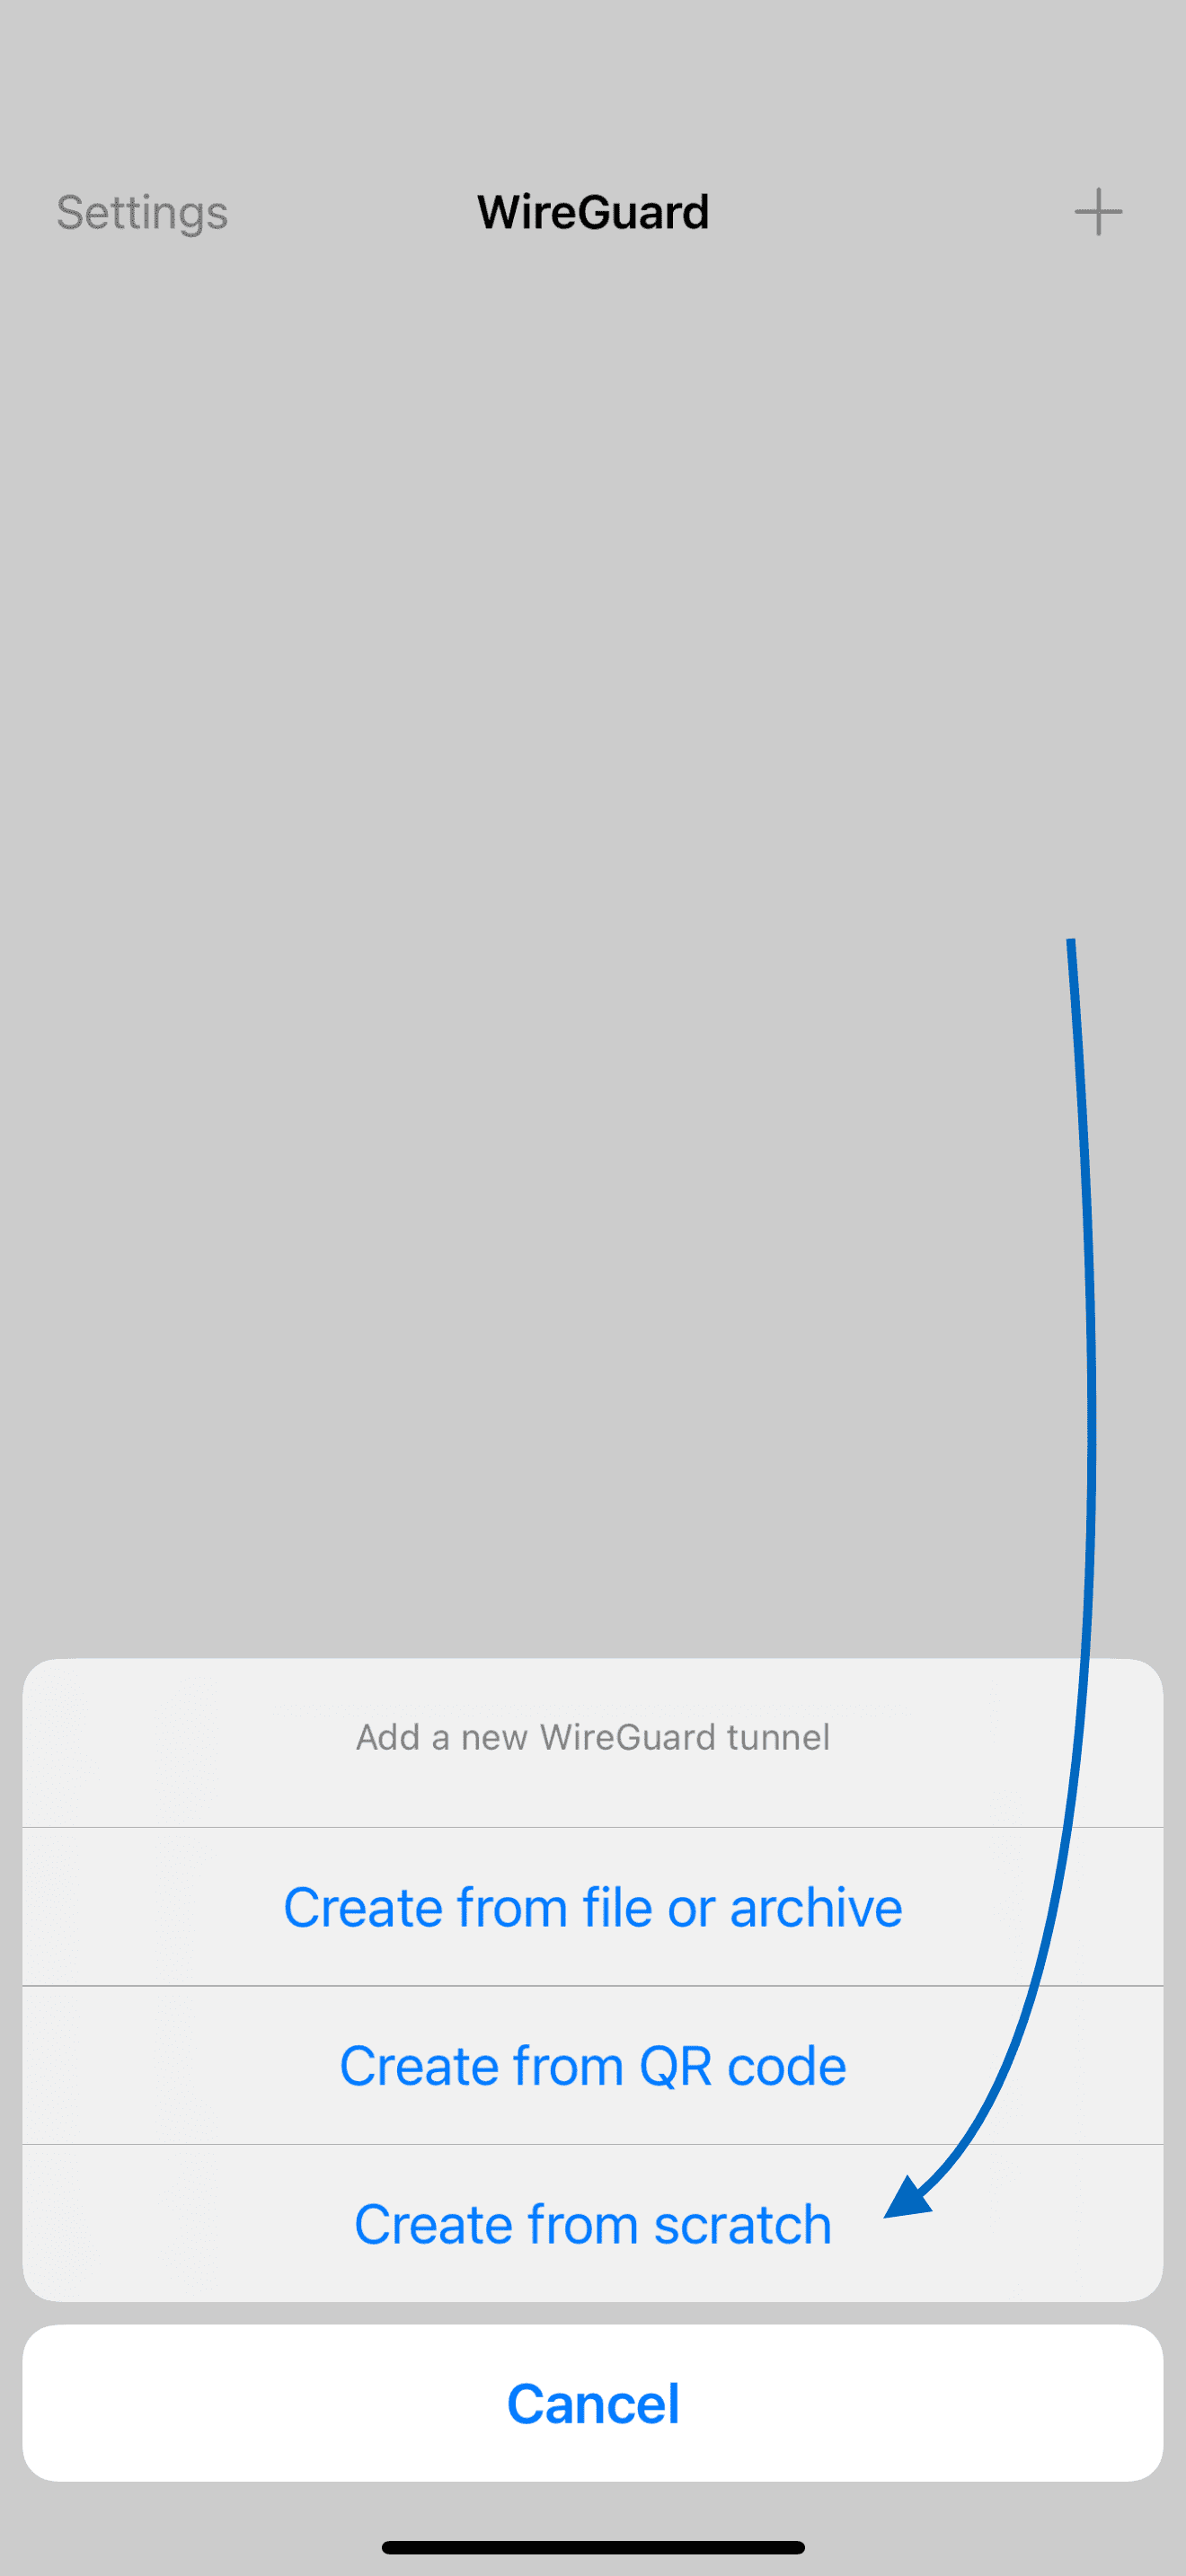
Starting from Scratch
Since we are starting from scratch, select Create from scratch.
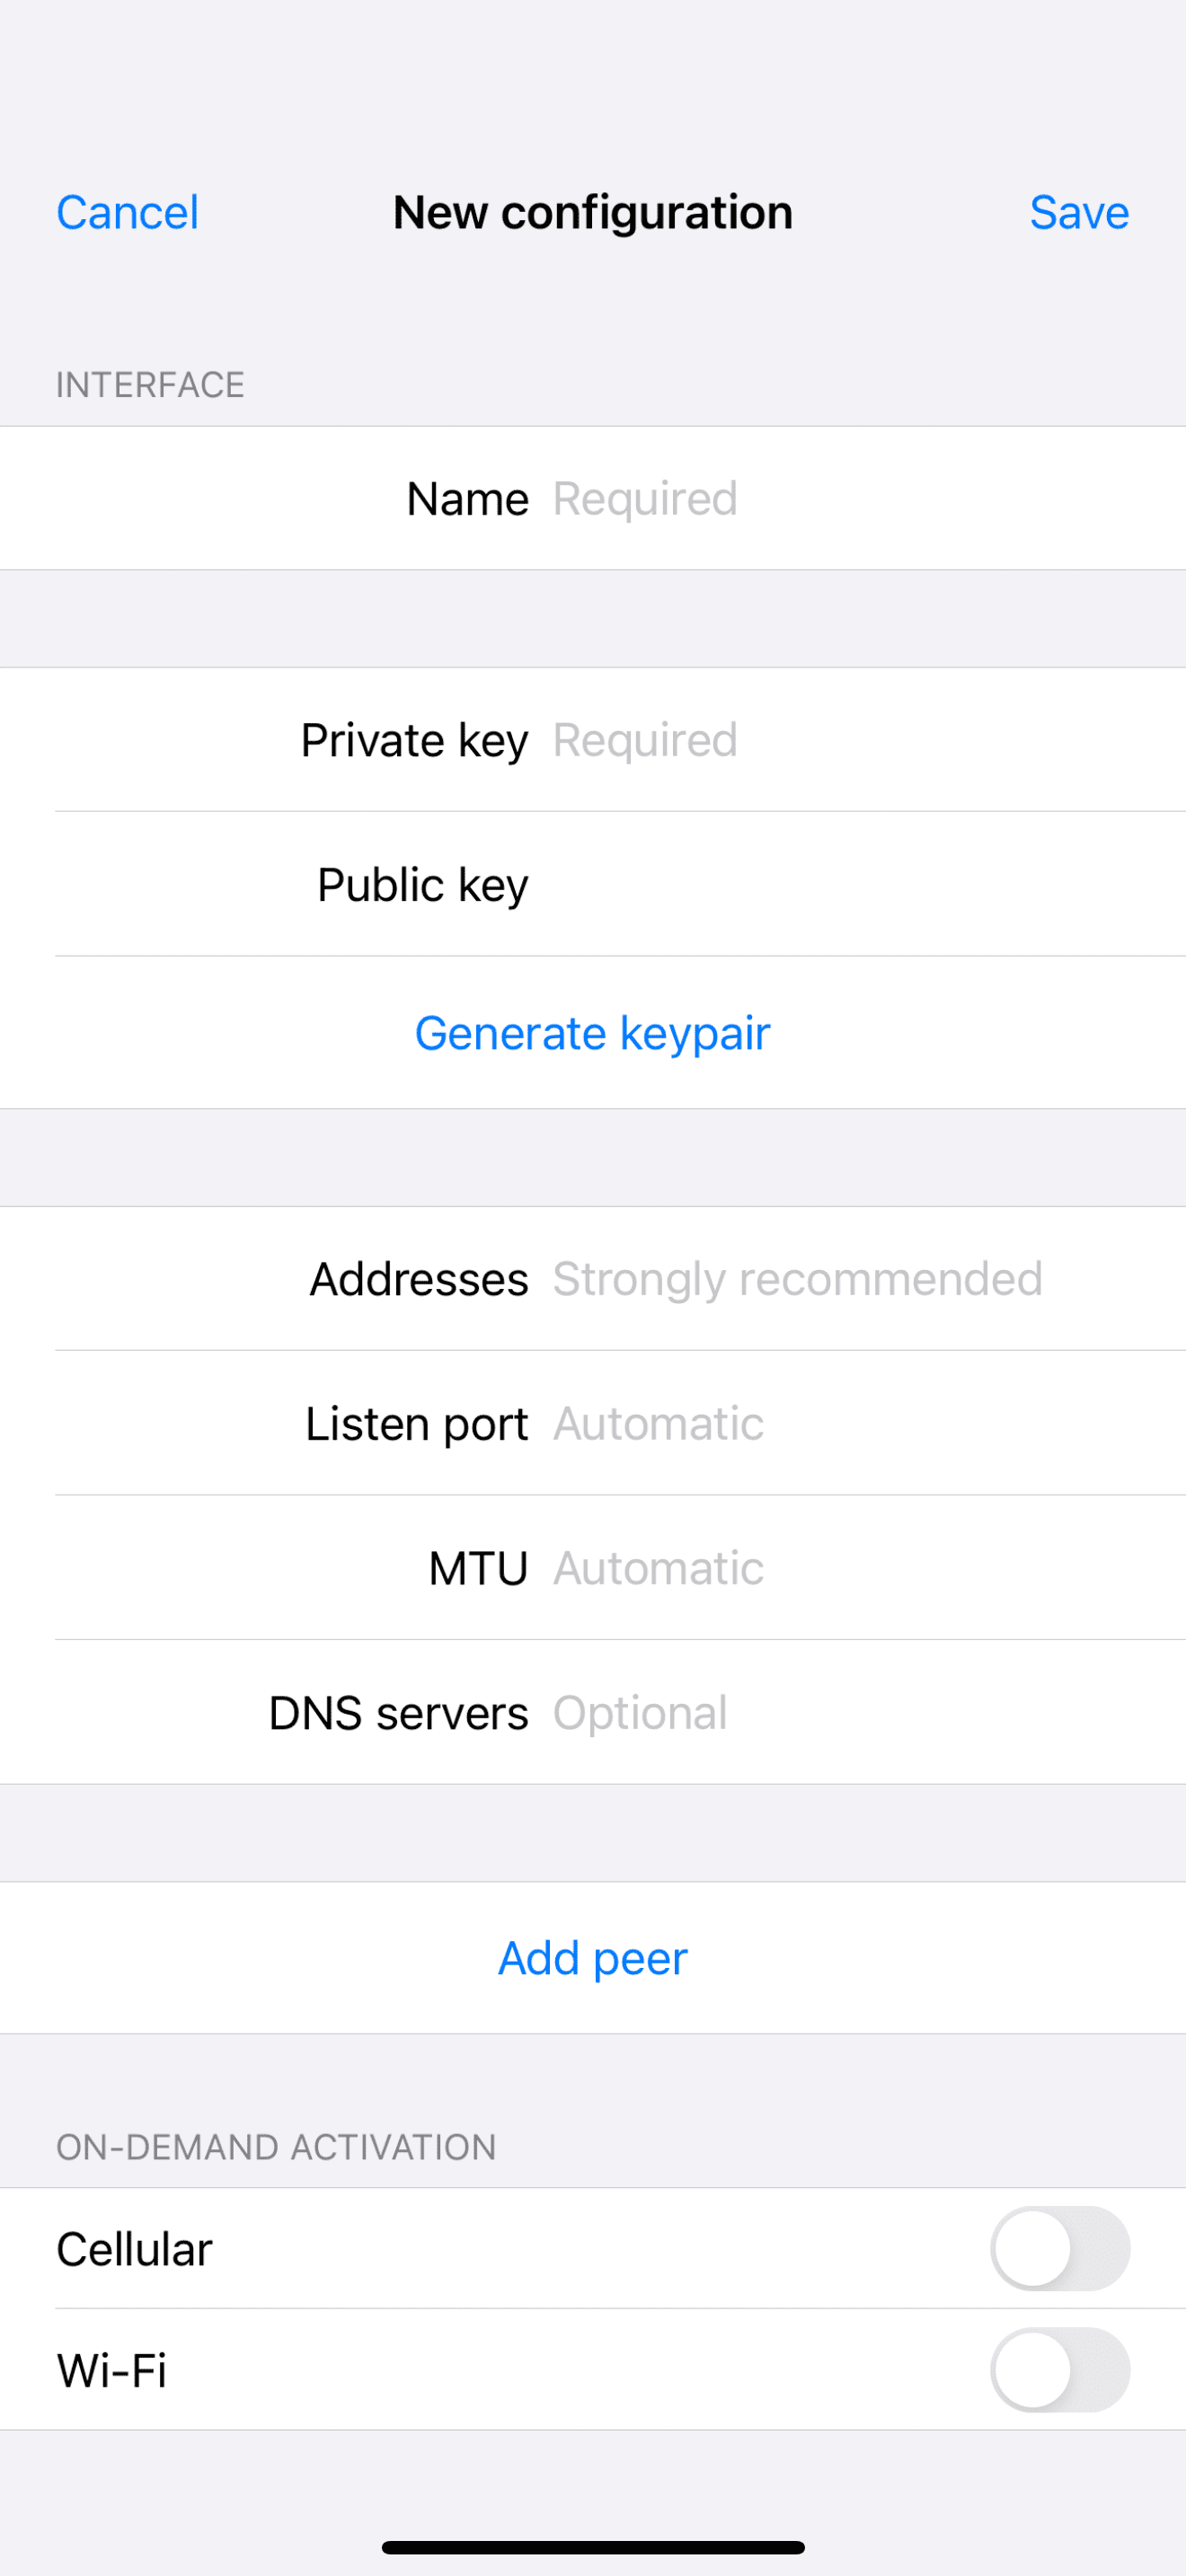
Now, we begin entering our configuration, starting with:
Name: User1
Private key: {paste}
This is our user1-privatekey generated at the beginning, either through the web browser or terminal.
To read the key generated through the web browser, navigate to Network > Interfaces, click edit next to your WireGuard interface (wg0), go to the Peers tab, click edit next to User1, and copy the public key from there.
To read the key generated through the terminal, use the following command on your router:
tail /etc/wireguard/user1-publickey.
You’ll notice that the Public key field is automatically pre-filled.
Addresses: 10.0.0.2/32, fd42:42:42:1::2/128
Enter the client IP address here, as configured on the server side.
DNS servers: 192.168.1.1
Where 192.168.1.1 is the local IP address of our OpenWrt router, unless it has been changed.
If you prefer your device to send DNS requests via your internet connection instead of through your router, you can skip this option.
Now, we need to add information about the server we’ll be connecting to.
Click Add peer to input the server details.
In the Public key field, enter the server’s key.
To read the key generated through the web browser, navigate to Network > Interfaces, click edit next to your WireGuard interface (wg0), go to General Settings, and copy the public key from there.
To read the key generated through the terminal, use the following command on your router:
cat /etc/wireguard/server-publickey.
Endpoint: [externalIP]:[port]
If our router has a permanent, external IP address, we enter it here along with the previously set port for the connection. For example: 123.34.45.56:1234, where 123.34.45.56 is the IP address and 1234 is the port.
In the Allowed IPs field, set: 0.0.0.0/0, ::/0.
This configuration allows visibility of devices on the local network.
Set Persistent keepalive to 25.
Afterward, save the configuration.
At this point, your phone will prompt you to add the VPN configuration to the settings, which you should allow.
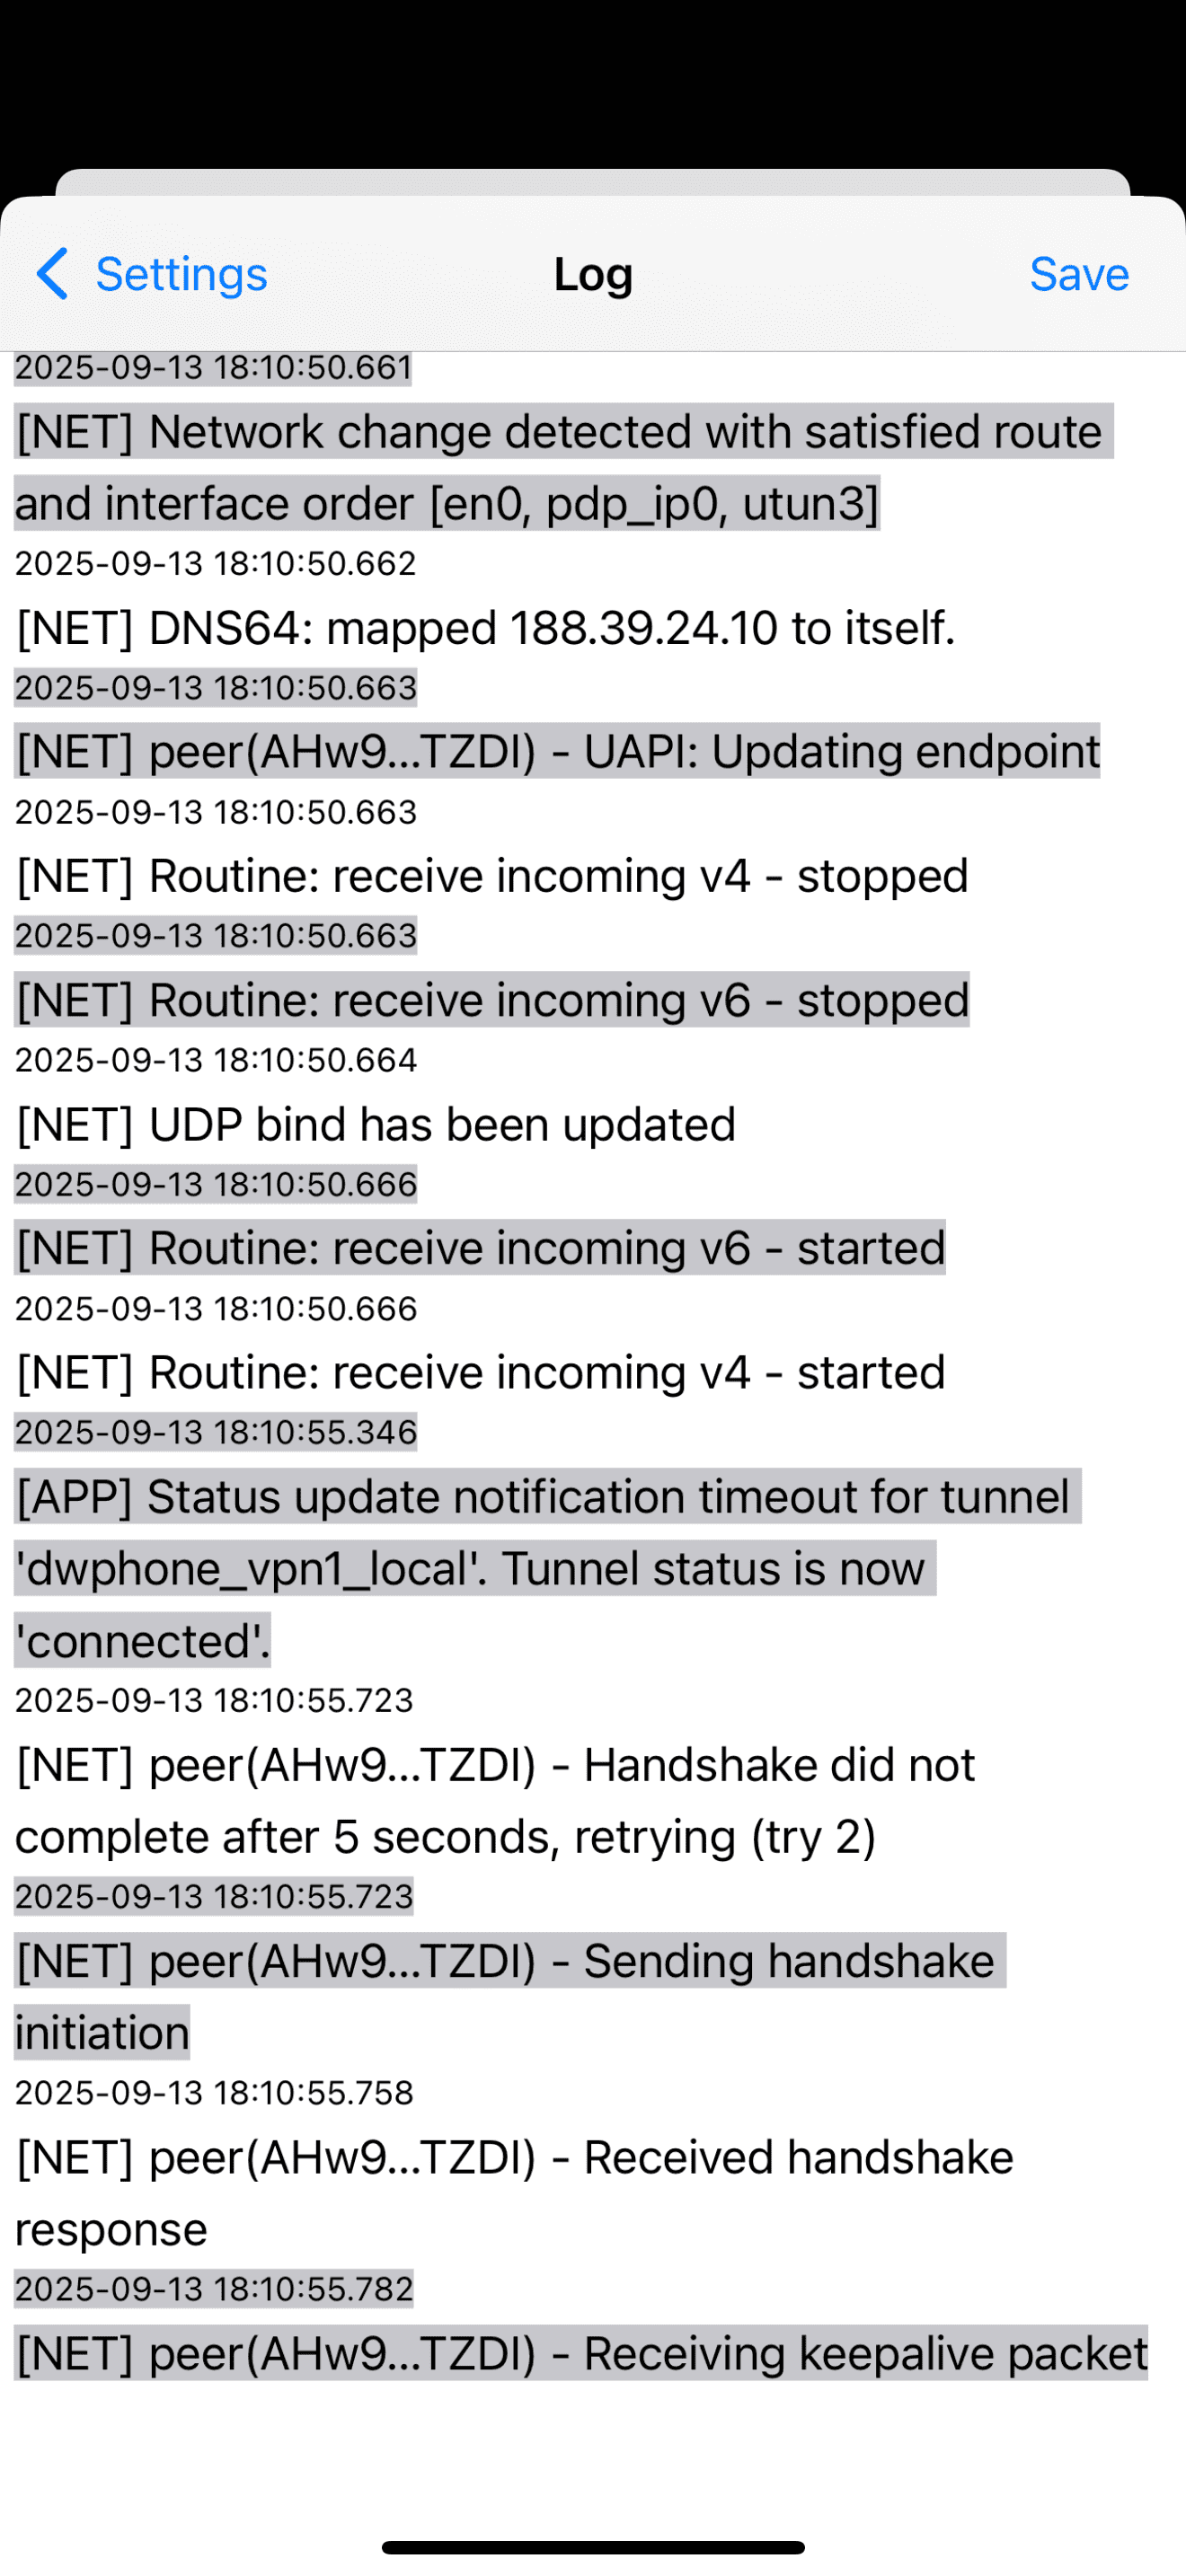
If everything is configured correctly, you only need to establish the connection, and it should work. To verify, go to the Settings of the WireGuard app on your device and click View log to check if everything operates smoothly.
Additionally, open your browser, search for myip on Google, and verify if it matches your local network’s IP address.
On our router side, from the browser, we can also see in WireGuard Status that our connection is working and data is traveling between devices.

If something is not working, check whether the Firewall on the router is configured correctly (see earlier) and verify that the correct keys have been entered everywhere.
To avoid re-entering everything from scratch each time we set up our device to connect to WireGuard, save the configuration to a file from the Settings level. When reconfiguring, you can import these settings.
However, not every app allows setting everything up from scratch. For WireGuard on macOS, the options are limited to importing settings or adding an empty tunnel via Add empty tunnel.
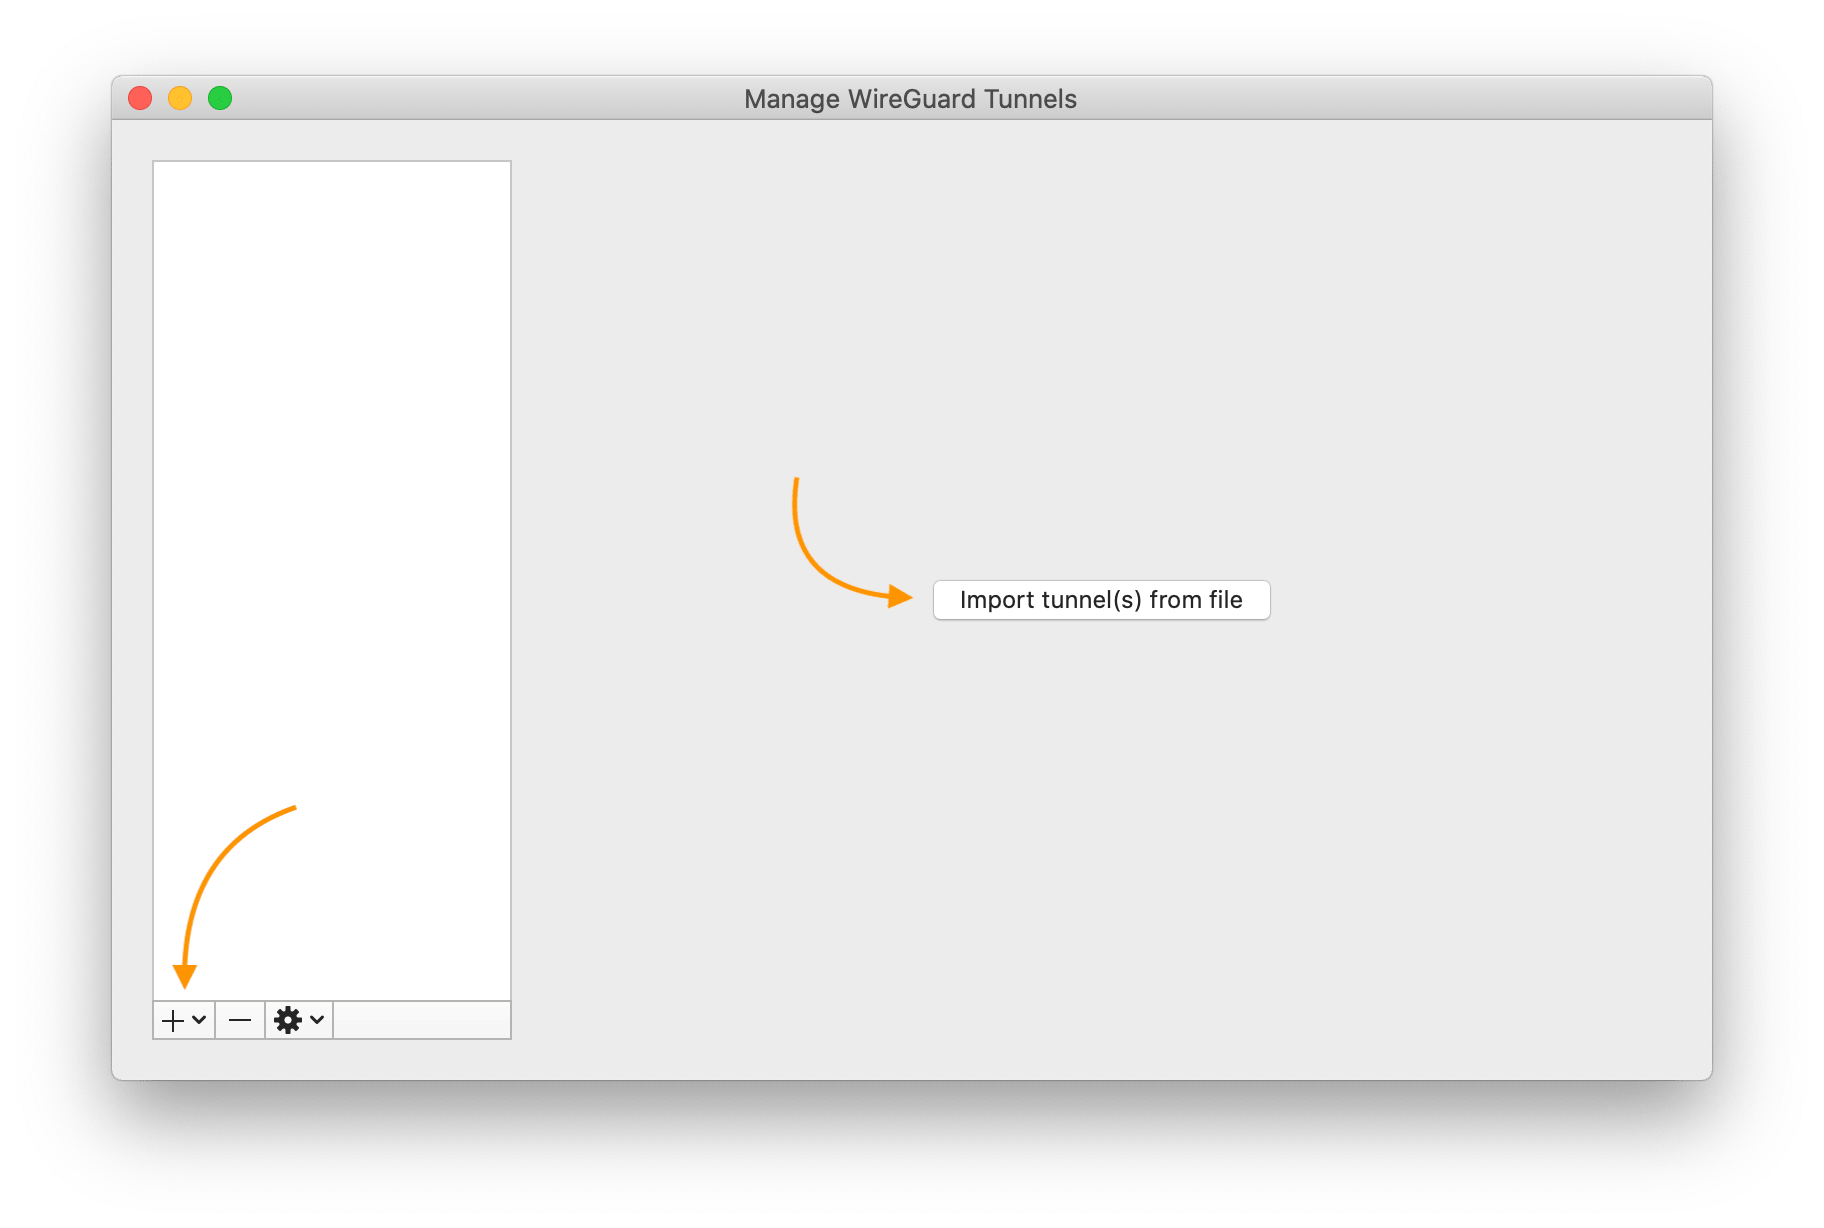
After clicking Add empty tunnel, a configuration file will appear containing the generated public key and private key.
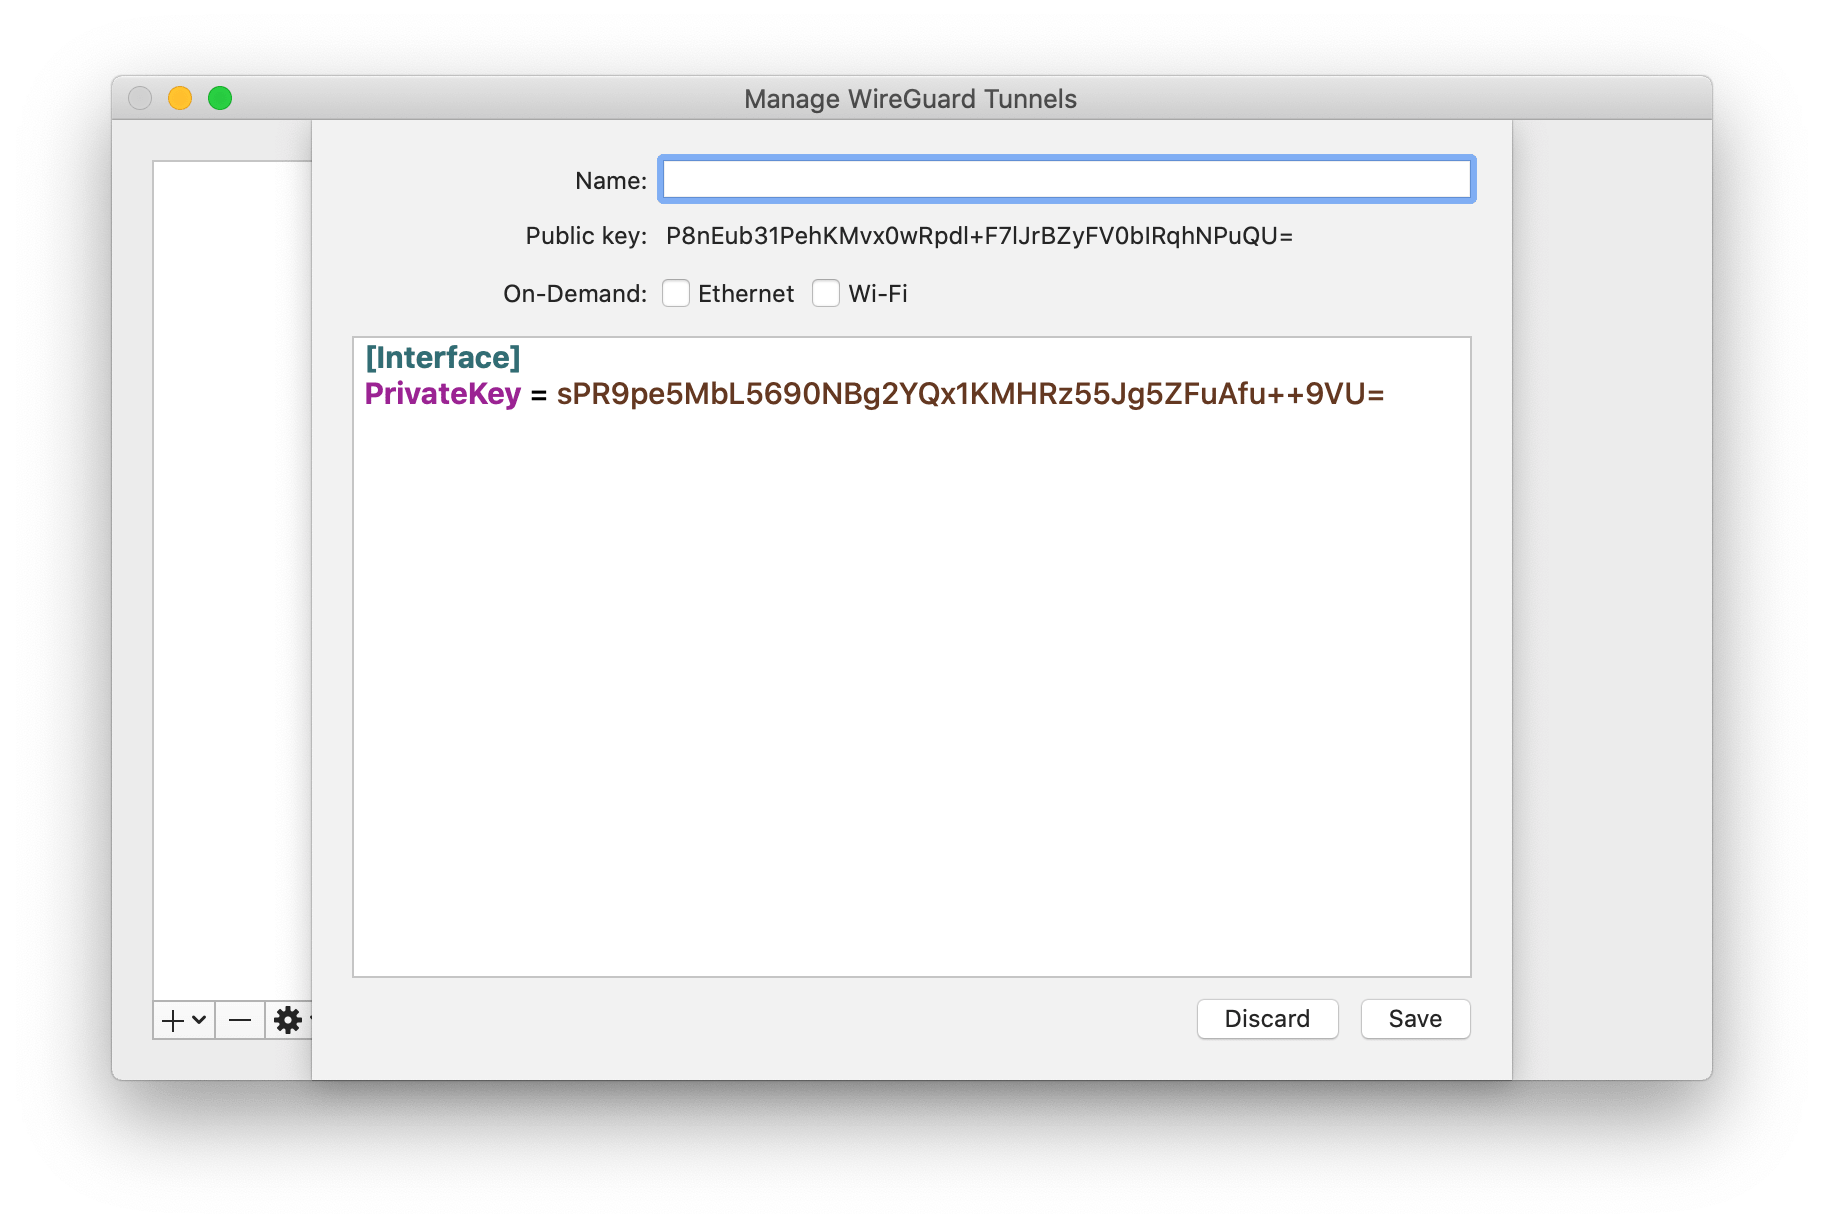
None of these settings are useful, as we need to retrieve everything from our server’s configuration.
For the iOS app, we introduced the server’s Public key, client IP address (Addresses), name server (DNS servers), Endpoint, Allowed IPs, and Persistent keepalive, all of which are missing here.
We need to configure it more manually.
Our configuration will look like this:
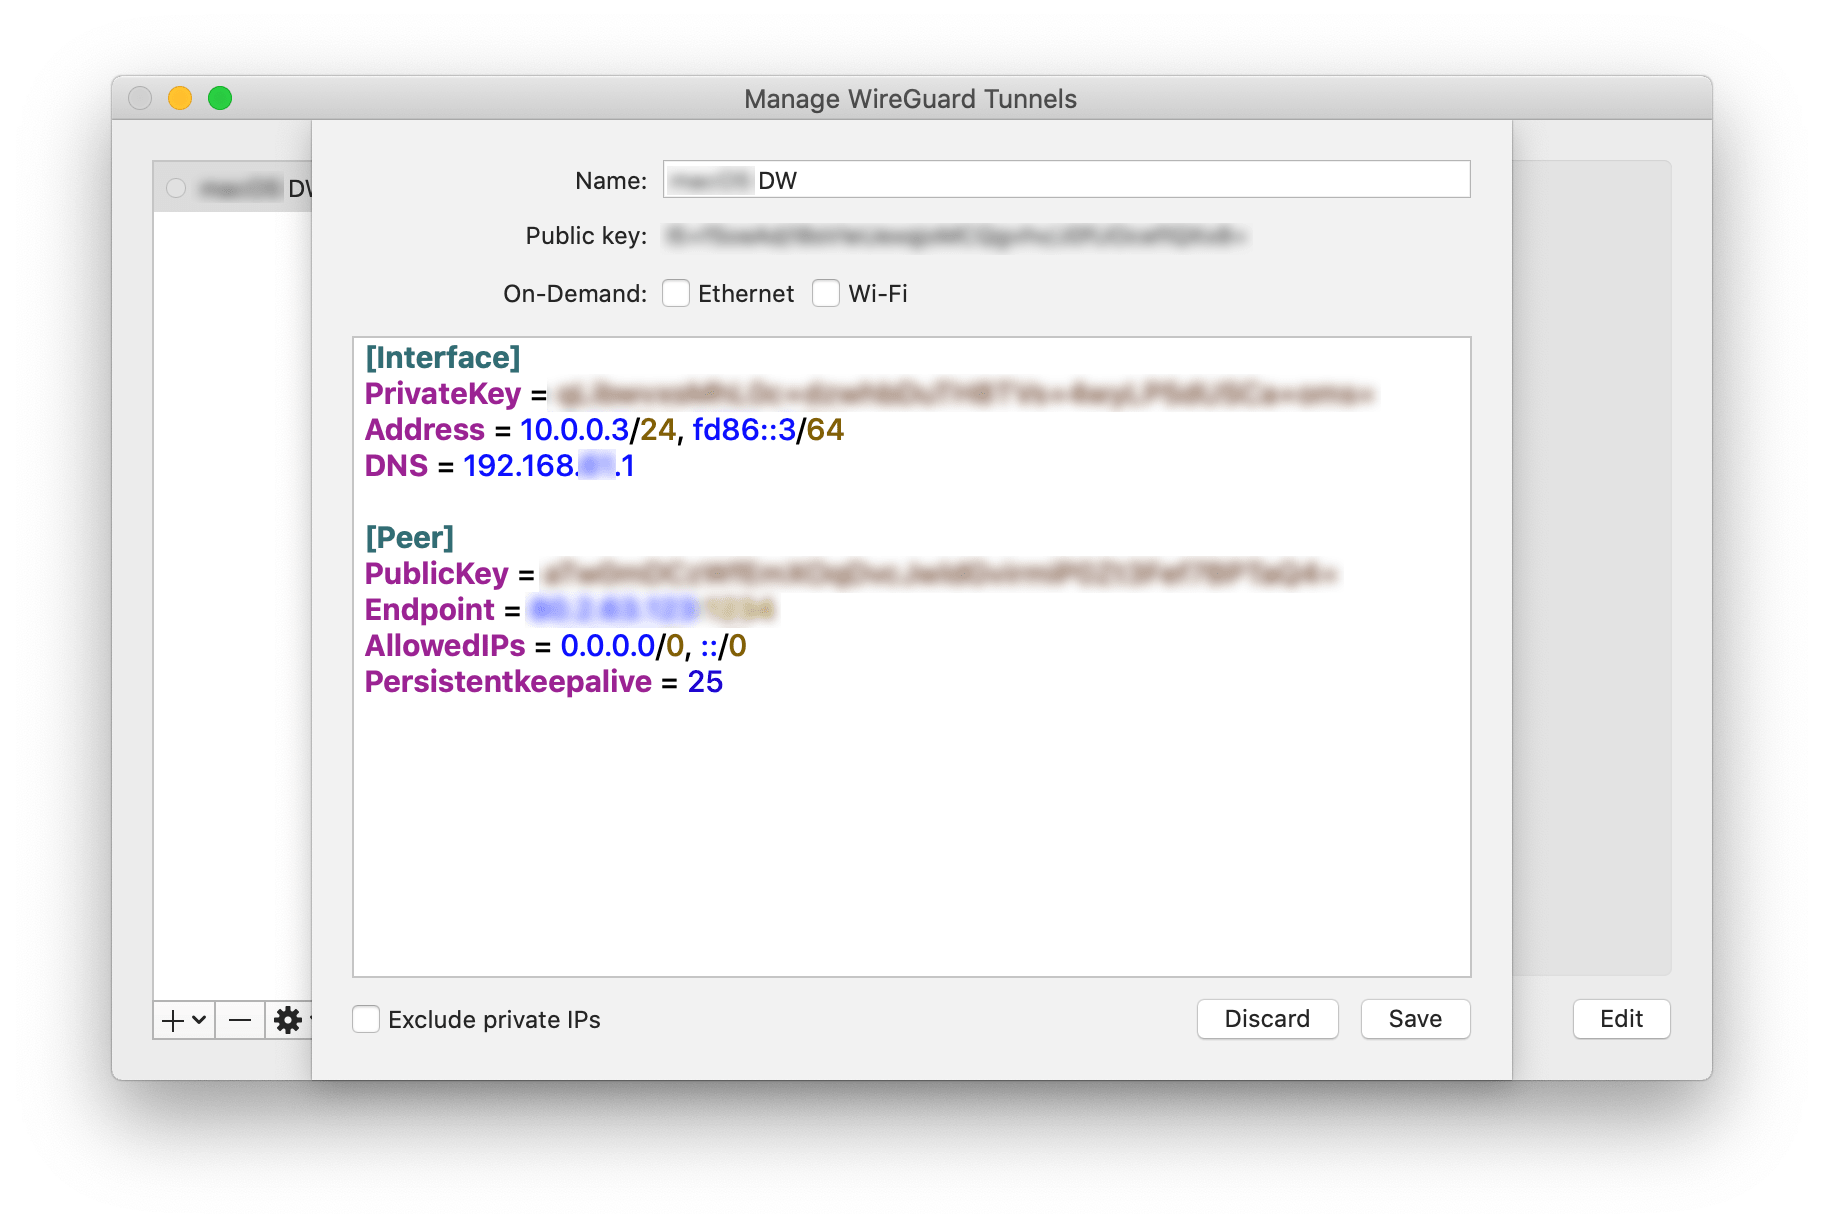
After pressing the Save button, macOS will prompt you to add the appropriate VPN profile to the configuration.
Finally, test whether everything works by clicking the Activate button.
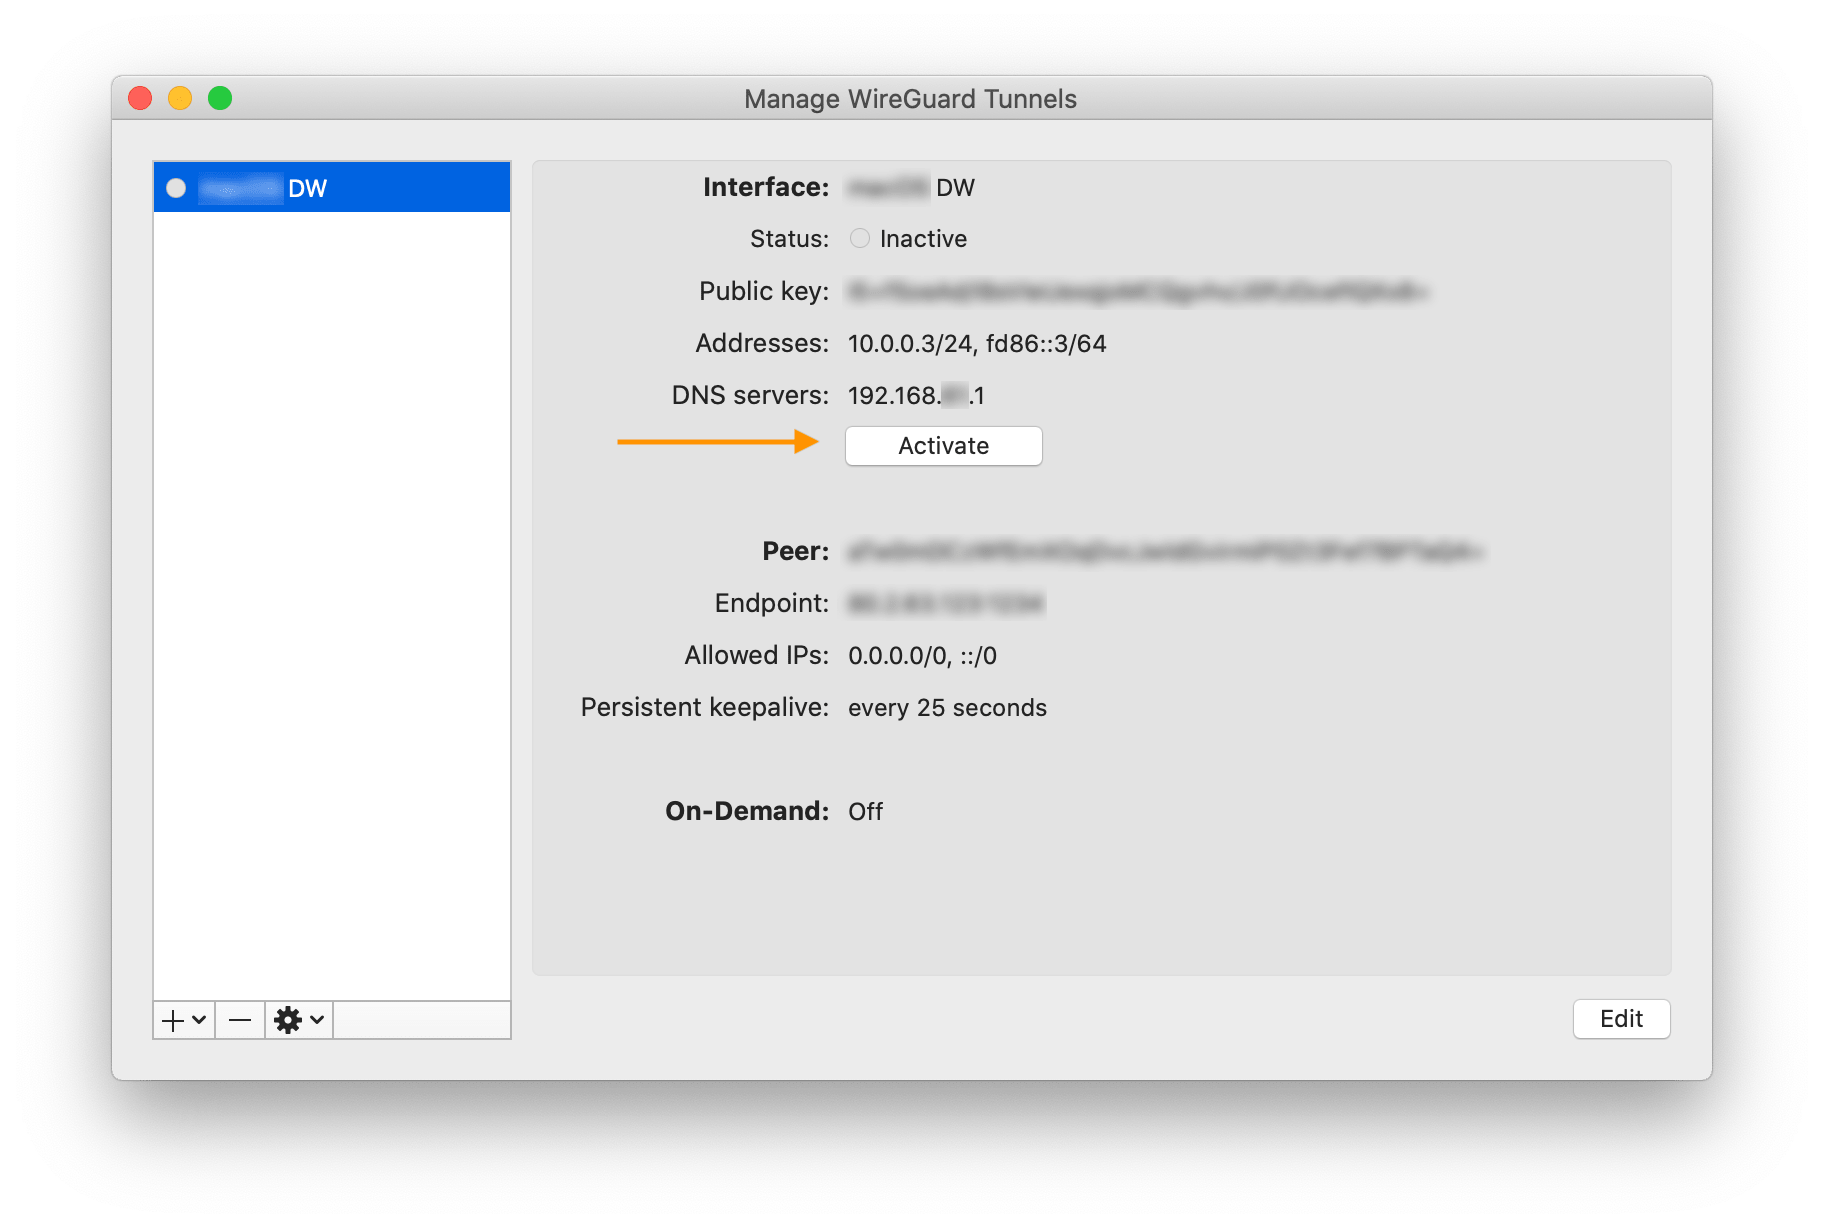
If everything is configured correctly, you should connect without any issues, and everything should work.
Starting from QR Code
As you may have noticed, during the earlier configuration, there are options to use a generated QR code to add configurations on our client (peers) devices.
To enable this, you might need to add the qrencode package to your router if it wasn’t added when you installed WireGuard in the first steps.
apk add qrencodeGo to your router, Network > Interfaces, and click edit next to your WireGuard (wg0) interface. Head to the Peers tab.
Click the Edit button next to the freshly created peer. At the bottom of the page, you will see Configuration Export with a button to Generate configuration that you can use to add your client configuration to the WireGuard app on the device you will be using to connect.

This will generate the content of the config file (as seen above in the macOS configuration) that you can use in the client app.
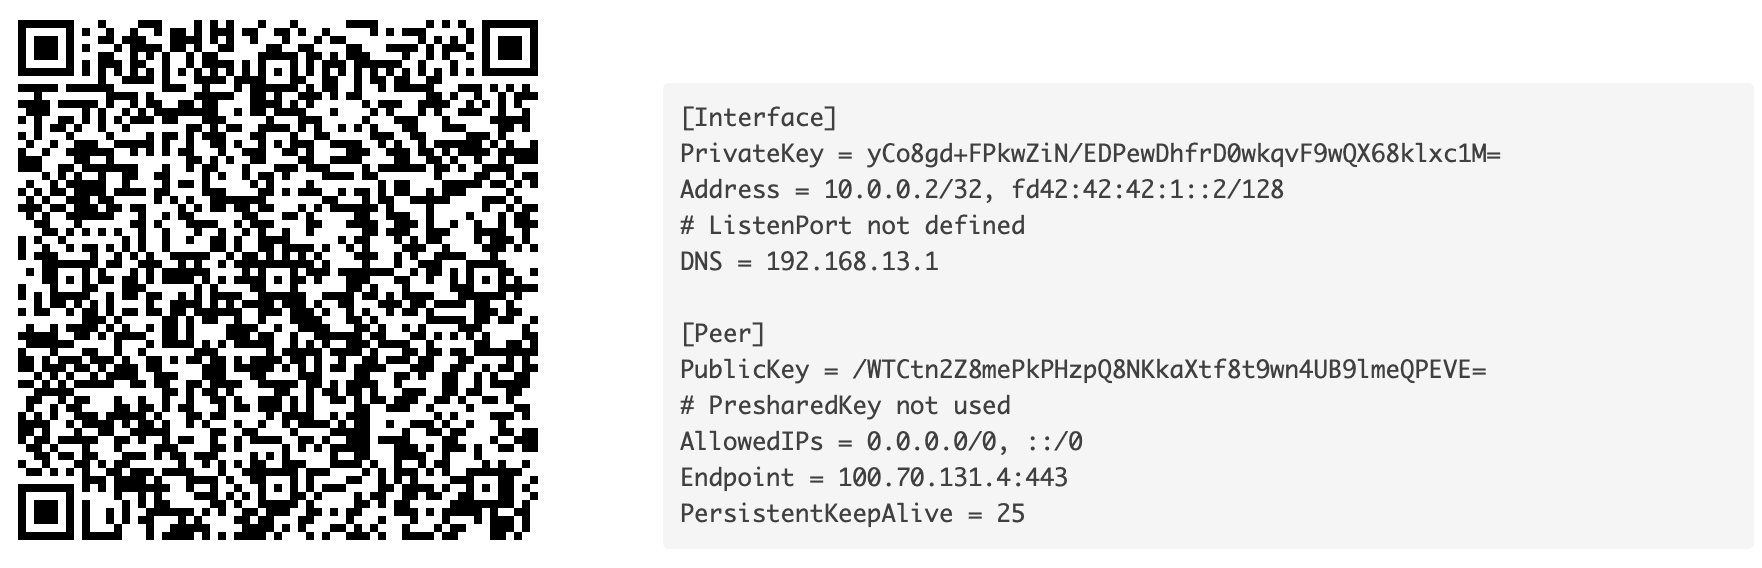
It will also create a handy QR code, which you can use to import the config file quickly to your client device.
However, there is one issue with it.
By default, the configuration will include this part:
...

[Peer]
...
AllowedIPs = 0.0.0.0/0, ::/0
Endpoint = 100.70.131.4:1234
PersistentKeepAlive = 25
This refers to the WireGuard Server, not the user connecting to it. The term [Peer] can be a bit confusing. For the server, a peer is a client connecting to it. For the user, the peer is the server to which they are connecting.
I am behind CG-NAT, and the IP
100.70.151.3refers to a local IP address, which is incorrect. On your end, it may display the correct IP if you have an external IP provided directly.
Rather than providing an IP address, it’s better to set a connection domain. Even if the IP changes, the IP can be dynamically updated without needing to update each user (peer) configuration.
The problem is that in the web configuration, there is no option to specify a domain.
Because of this, using the QR code is partly pointless.
We can use it to import all configs, keys, etc., but we need to make sure to change our Endpoint IP to a domain name like:
Endpoint = vpn.wieckiewicz.org:1234
WireGuard and IPv6 Tunnel
If you’ve added an IPv6 connection to your Internet connection (which doesn’t natively support it) via a tunnel using Hurricane Electric Free IPv6 Tunnel Broker, as I did in the post Adding an IPv6 tunnel to a router with OpenWrt, you’re probably wondering how to configure the WireGuard server to support this solution.
The above description adds support for local IPv6, which works within the router, but does not support outgoing traffic (to the Internet), even when IPv6 is available. All traffic is therefore carried out exclusively using IPv4.
You can check this by visiting https://test-ipv6.com/ from your local network after connecting to WireGuard.
Yes, there is a possibility of adding IPv6 support! Which of course we will do!
The advantage of this solution is that not only will we be seen on the Internet using the router’s external IP address (IPv4), but we can also assign an external, individual IPv6 address directly to our device connected to the VPN!
Although each WireGuard client on the Internet will be seen under one IP in version 4 (IPv4), in version 6 (IPv6) each device will have an individual address! All the magic of IPv6 (no need for port forwarding, etc.).
First we need to change the IPv6 settings we have entered, so where we have fd42:: we need to replace it so that it matches our WAN6 interface prefix. We need to do this both on the router side, in the WireGuard server configuration and in the Peer settings, as well as on the client side (configuration file).
In the case of the server (including client settings - Peers - on the server side), we make changes via a web browser and then restart our wg0 interface.
In the case of clients (Peers), we make changes in the configuration file and then import it to the application, or we edit each profile separately on each device.
To maintain consistency with the current IP address configuration, i.e. 10.0.0.1 for the server and subsequent numbers for clients, we will build the IPv6 address on the same principle.
Using IPv4 to IPv6 calculator for 10.0.0.1 we get for example:
0:0:0:0:0:ffff:a00:1We will change the first 4 zeros (0:0:0:0:) to the network prefix we received for our tunnel.
For example, if we received in Routed IPv6 Prefixes something like this:
2001:470:____:5cb::/64Start - The prefix 2001:470:____:5cb: will be constant, and each local address will get 0:ffff:a00:1, with the last digit changing. 1 for the server, 2 for the first client, and so on.
And so, we change the server settings fd42:42:42::1/64 to 2001:470:____:5cb:0:ffff:a00:1/64
For the first Peer fd42:42:42::2/128 to 2001:470:____:5cb:0:ffff:a00:2/128
On the client side, in the WireGuard application, for the first client where we have: 10.0.0.2/24, fd42:42:42::2/64 change to 10.0.0.2/24, 2001:470:____:5cb:0:ffff:a00:2/64
Item :____: has been censored of its full (current) prefix.
0:ffff:a00:1 is an example address and I recommend not using it, but choosing your own unique one. If you are not sure whether the address you have chosen is correct, validate it along with the prefix using, for example, this tool.
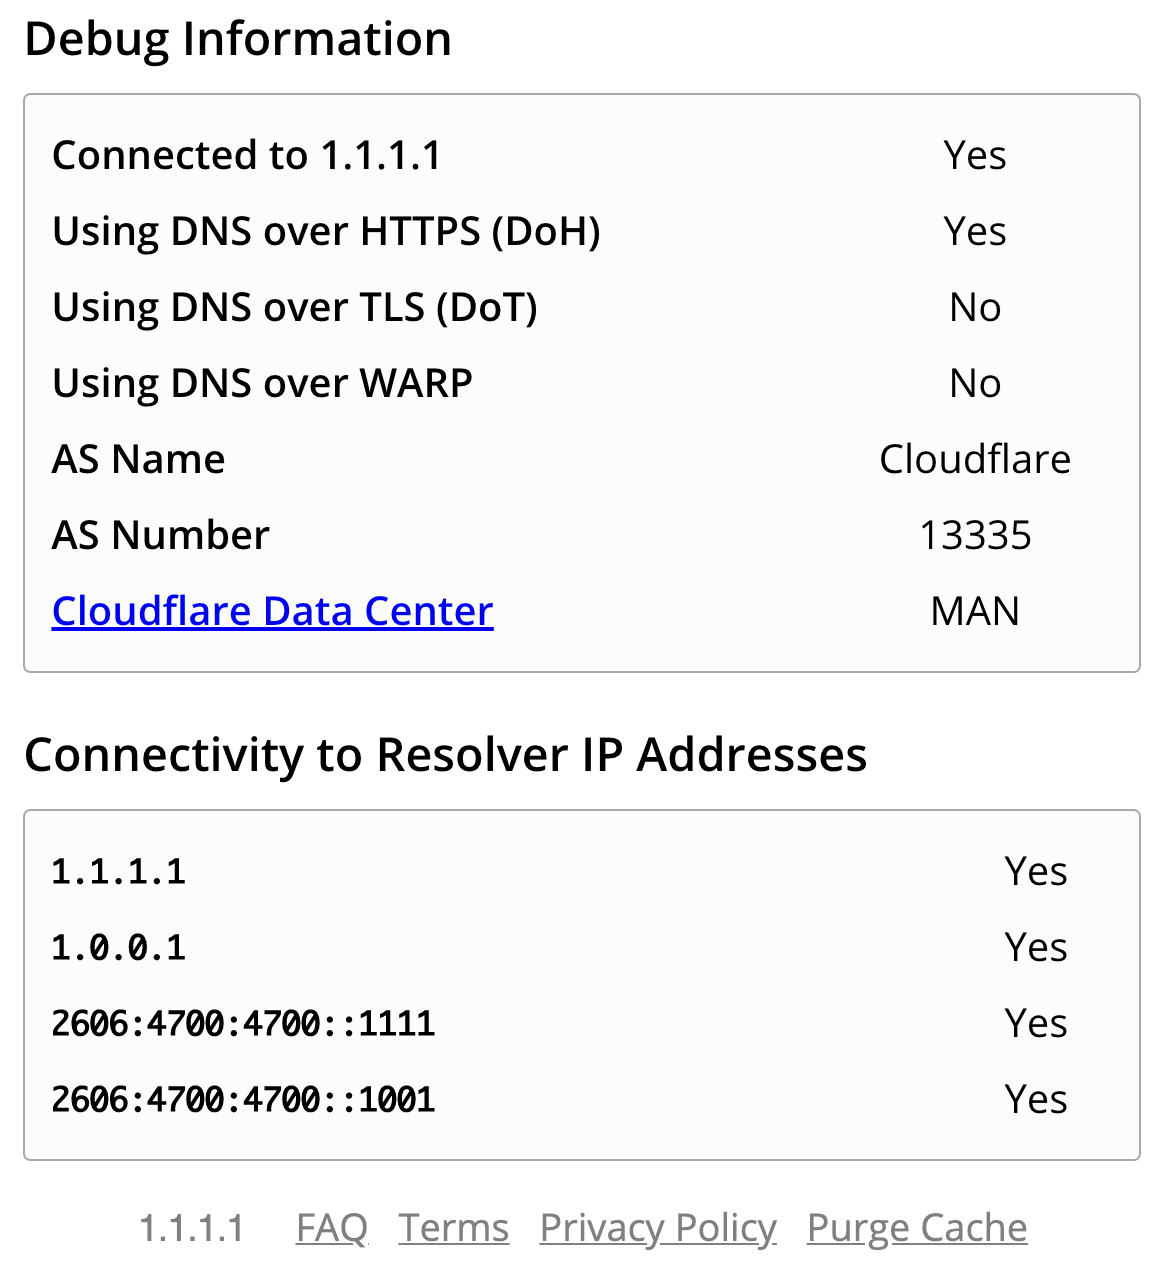
If we did everything correctly, then after connecting to the VPN and going to the website https://test-ipv6.com we will get a result of 10/10.
Additionally, if we have Secure DNS set, the https://one.one.one.one/help page will also return in Connectivity to Resolver IP Addresses the availability of DNS addresses from the IPv6 level.
If you wish to backup your Wireguard interface configuration, please consider adding the ‘/etc/config/network’ file to your backup configuration (System > Backup / Flash Firmware > Configuration tab).
Regards.
Credits: Birkhoff Lee


Comments & Reactions