

Adding a USB drive to a router with OpenWrt

Today’s solution is a bit unusual - my network drive (NAS) recently stopped working, and to sort it out I need to do some digging in it. In the meantime, I would like to use the USB 3.0 port built into my WRT3200ACM router with OpenWrt software to share a USB drive on the network.
For this purpose, I use a 2TB WD My Book Essential (3.5” with external power) with a USB 3.0 port. I formatted the drive in exFat (from the computer I started with) for compatibility with both Windows and Mac. When I want to disconnect it from the network, I will always have access to the data by connecting the USB cable directly to the computer.
So here we go…
Optimised for OpenWrt 25.12 using
apkinsteadopkg
Most steps are performed from the terminal.
In this post I will focus on how to add a drive to a router. In a separate post (link at the end) I will describe how to share this drive on a local network.
Installing USB Drive Support
First, we update the packages.
apk updateNext we add support for USB devices.
apk add kmod-usb-storage kmod-usb-storage-uasIn my case I need to add exFat support as well. Depending on which file system you choose, you need to install it according to this guide.
apk add kmod-fs-exfat libblkid1In addition, we will need tools to check if our USB device is working properly. We install them using the following command:
apk add usbutilsNow we can connect our drive.
If we did everything correctly, by executing the command below, we will see our disk in the list of devices connected to USB.
lsusb -tWe should see something like this:
root@OpenWrt:~# lsusb -t
/:  Bus 03.Port 1: Dev 1, Class=root_hub, Driver=xhci-hcd/1p, 5000M
    |__ Port 1: Dev 4, If 0, Class=Mass Storage, Driver=usb-storage, 5000M
or in case of supported protocol UASP:
root@OpenWrt:~# lsusb -t
/:  Bus 03.Port 1: Dev 1, Class=root_hub, Driver=xhci-hcd/1p, 5000M
    |__ Port 1: Dev 4, If 0, Class=Mass Storage, Driver=uas, 5000M
Checking disk visibility
We check whether our disk and partitions are visible in the system.
ls -l /dev/sd*We should see something like this:
root@OpenWrt:~# ls -l /dev/sd*
brw-------    1 root     root        8,   0 May  1 21:20 /dev/sda
brw-------    1 root     root        8,   1 May  1 21:20 /dev/sda1
In the next step, we will install an additional tool that we will use to mount the partition.
apk add block-mountWe execute the command:
block info | grep "/dev/sd"We should see something like this:
root@OpenWrt:~# block info | grep "/dev/sd"
/dev/sda1: UUID="5EAC-6F27" LABEL="2TB" TYPE="exfat"
Mounting the disk
We prepare the configuration file:
block detect | uci import fstabEnabling automatic mounting based on the generated configuration file:
uci set fstab.@mount[-1].enabled='1'
uci commit fstab
We mount our disk:
block mount(Optional) If we want to make sure that automatic disk mounting works at system startup, we execute:
rebootWe check if our disk is visible using:
dfWe should see something like this:
root@OpenWrt:/mnt# df
Filesystem           1K-blocks      Used Available Use% Mounted on
/dev/sda1            195341.     10368 1953408896   0% /mnt/sda1
And:
uci show fstabWe should see something like this:
root@OpenWrt:~# uci show fstab
fstab.@mount[0]=mount
fstab.@mount[0].target='/mnt/sda1'
fstab.@mount[0].uuid='5EAC-6F27'
fstab.@mount[0].enabled='1'
If you have any problems, make sure that the @mount[0].enabled field is set to 1.
If we have any data on the disk, we can see it:
ls -l /mnt/sda1We make sure that everything works properly by executing the command:
block infoWe should see something like this:
root@OpenWrt:~# block info
/dev/sda1: UUID="5EAC-6F27" LABEL="2TB" MOUNT="/mnt/sda1" TYPE="exfat"
We finish it all with the command:
service fstab bootDisk Sleep - SpinDown (Optional)
My WD caddy has built-in software that suspends/puts the drive motor to sleep after a period of time. The drive is still accessible, but when not in use, it won’t spin up unnecessarily. When the drive is needed, it will spin up again.
If we do not have the software option, then we can use an additional solution that will allow us to program the disk directly to do the same thing.
To do this, we install hdparm:
apk update
apk add hdparm
Assuming (from the above steps) that our disk is available as /dev/sda1, the following command sets the time after which the disk will go into suspend mode. We set this time as a multiple of 5 seconds. A minute is the value of 12, if we want to set 15 minutes, we need the value of 180.
hdparm -S 180 /dev/sda1The above option is a hardware option. It introduces changes to the disk settings, so that they are preserved even when we connect our disk to another device / computer. Unfortunately, it does not always work. Some enclosures refuse to accept the above command, returning an error. In this case, there is an additional software solution called hd-idle, which can be integrated with our router administration panel from a web browser.
The hd-idle package, after a specified period of time (defined in the administration panel), sends the spindown-now command to turn off disk spin-up and enter standby mode.
We install it using the command:
apk add luci-app-hd-idleThen we go to our web control panel, Services > HDD idle, where we set whether this software option should be enabled, for which disk and the time.
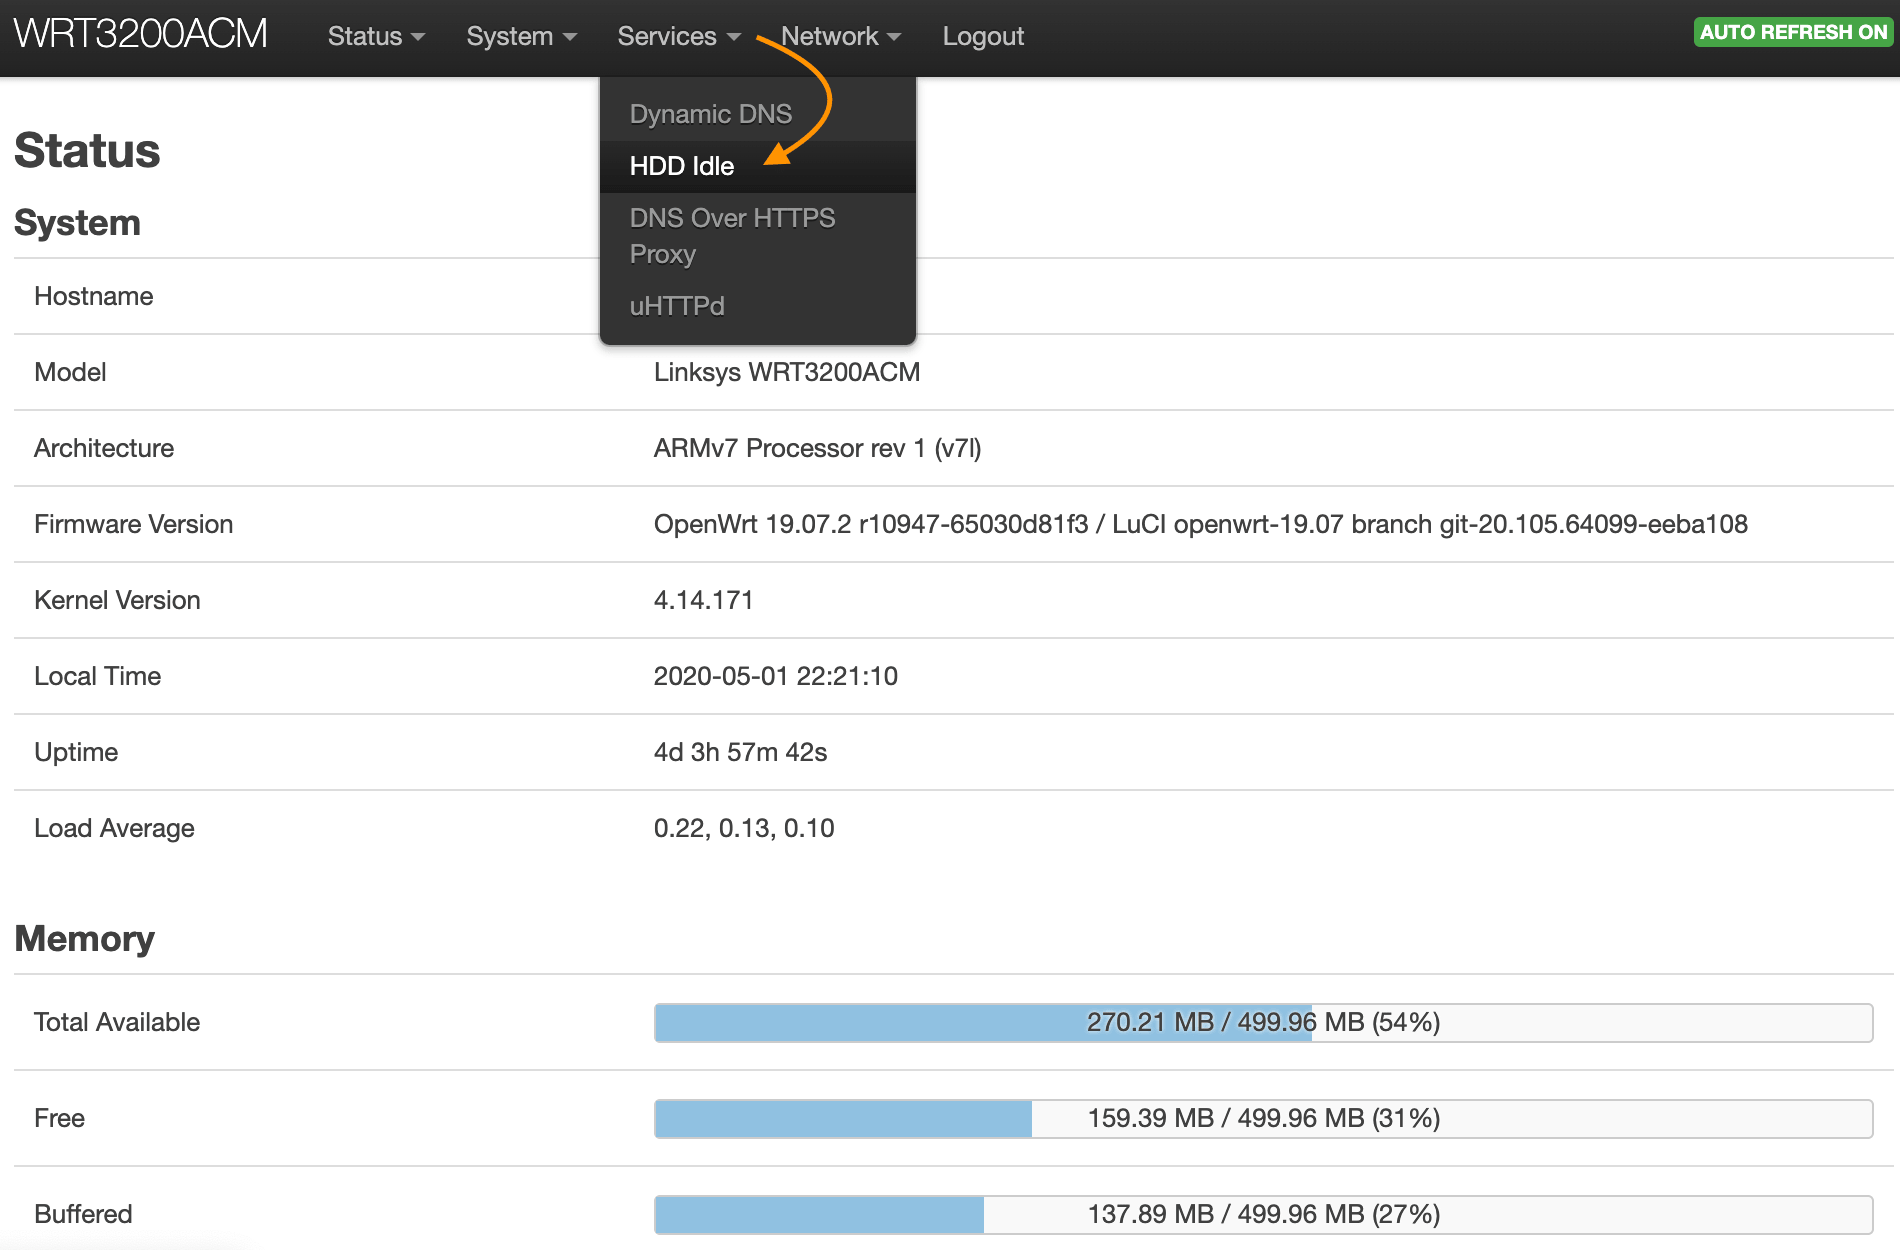
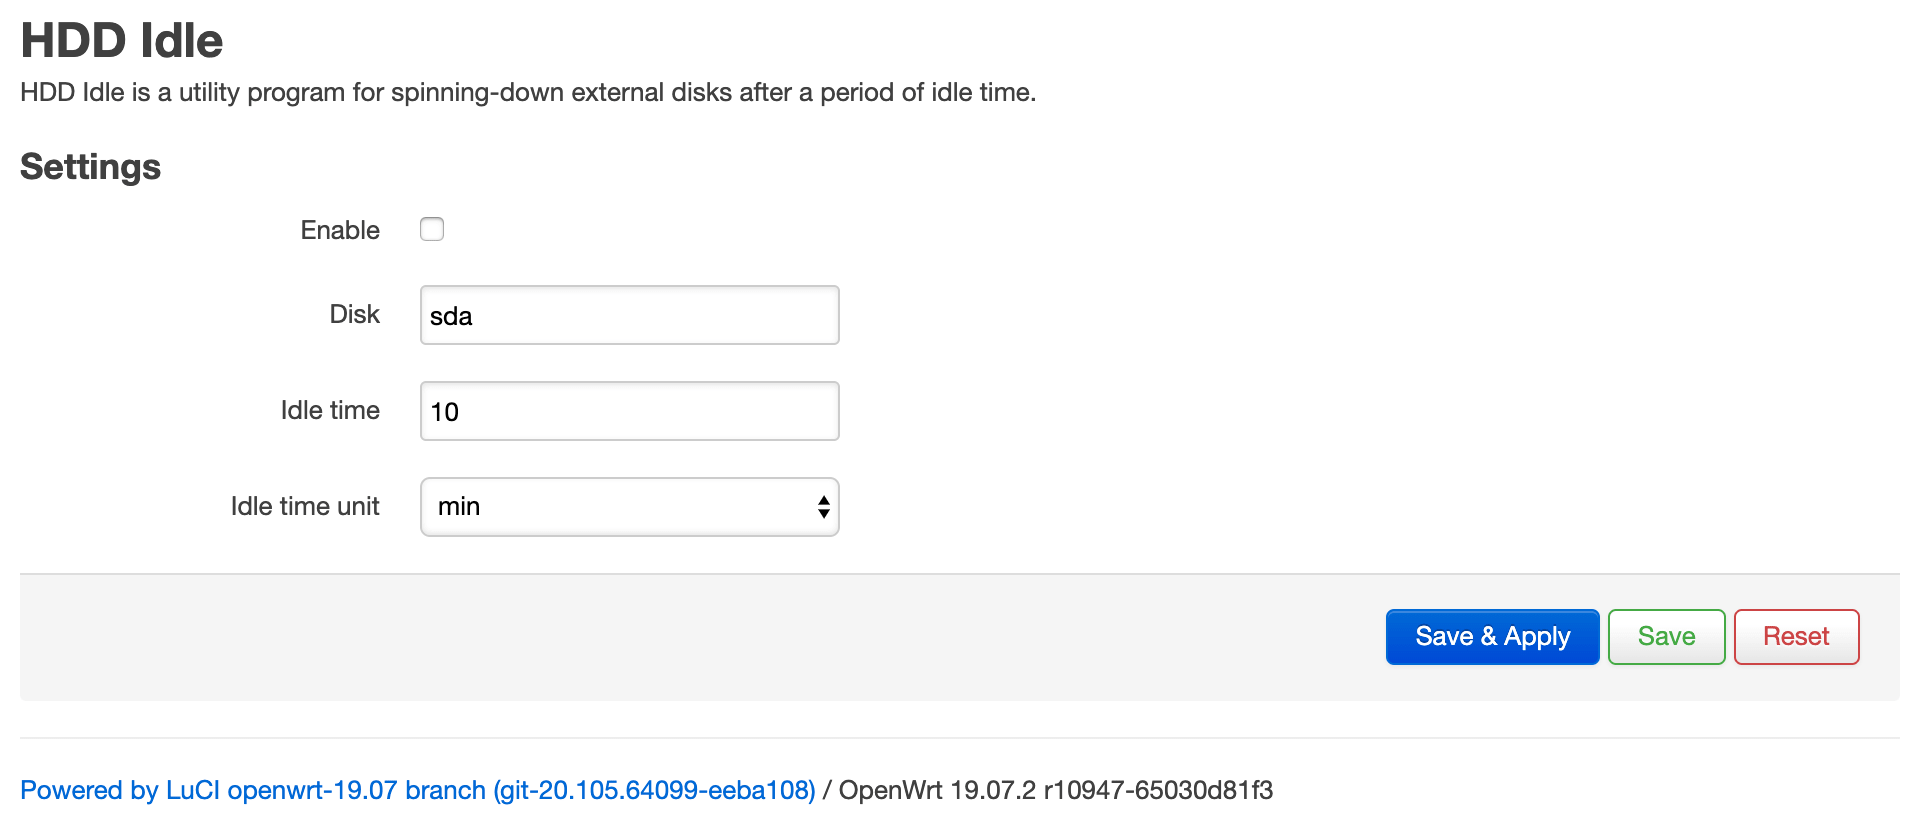
I recommend first checking whether the hardware option works (whether built-in or programmed), as it does not require any additional packages that must be enabled on our router, and only then choose a software solution.
And that would be it, when it comes to adding a disk, we can move on to sharing our disk on the local network. However, I described this step in a separate entry: Sharing a USB drive over the network from an OpenWrt router
Credits1


Comments & Reactions